- Selectively delete photos/videos/songs in batch with a single click.
- Add songs to iPhone without iTunes syncing on Mac or PC.
- Transfer any song to any iPhone on any computer wihtout iTunes.
- Import playlists in iTunes Library to iPhone without iTunes syncing.
- Copy songs in multiple formats to iPhone without incompatibility issues.
- Make any photos or video from Apple devices or PC to GIF images.
- De-duplicate the repeated contacts.
- Selectively transfer exclusive files.
- Fix & optimize ID3 tags,covers,song information
- Directly transfer music, videos, contacts and photos between Apple devices.
- Perfectly backup/restore iTunes library.
- Transfer and manage Apps on your iDevice in batch.
- Turn your iDevice into flash drive.
- Be compatible with all iOS devices, including iPhone 7, iPhone 6s, iPhone 6, iPad Air, iPad mini etc.
The Most Comprehensive Guide to Share iPhone Data Using AirDrop to Mac
If you own an iPhone, you might want to share your files with your Mac device so that the files become available for use on both of the devices or for any other use. But you should be aware of the proper and specific steps and services that help you to perform this activity. This article will comprehensively guide you to transfer files from iPhone to Mac with the use of AirDrop. AirDrop is an efficient file sharing service from Apple. But you must have an iPhone that runs on iOS 7 or later and Mac OS X Yosemite in order to use this amazing feature from Apple. Then you just have to perform the following steps to AirDrop iPhone to Mac.
- Part 1. How to Share iPhone Data Using AirDrop to Mac
- Part 2. Fix AirDrop Problems
- Part 3. Best iOS Manager to Share Data from iPhone to Mac
Part 1. How to Share iPhone Data using AirDrop to Mac
At first, make sure that you have turned on Wi-Fi and Bluetooth on your iPhone and Mac computer. Then your can follow the guide to share iPhone data to Mac using AirDrop.
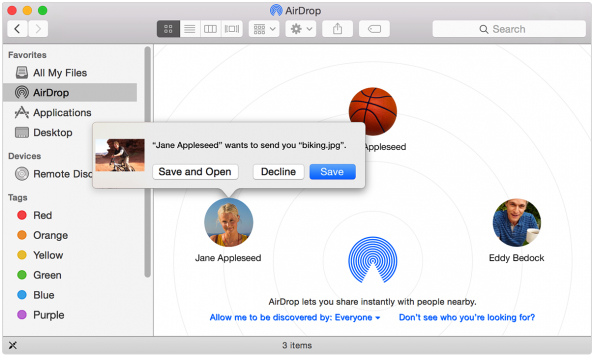
Step 1. You'll have to set up your Mac device to receive files via AirDrop. Go to the Finder menu on your Mac device. Click on the AirDrop option on the navigation pane located at the left side.
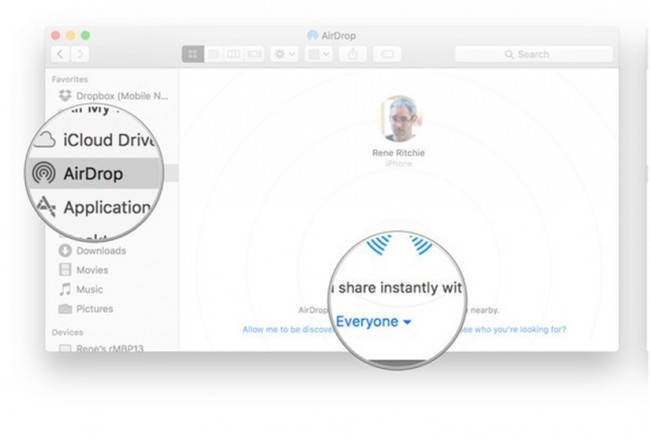
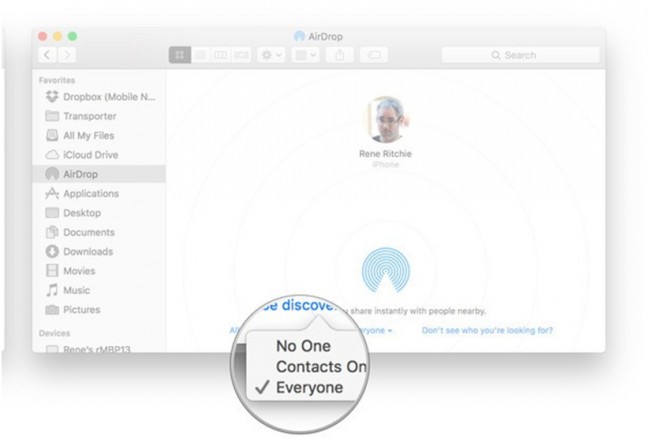
Step 2. Now you have to select Contacts Only or Everyone from the option located at the bottom of the screen.
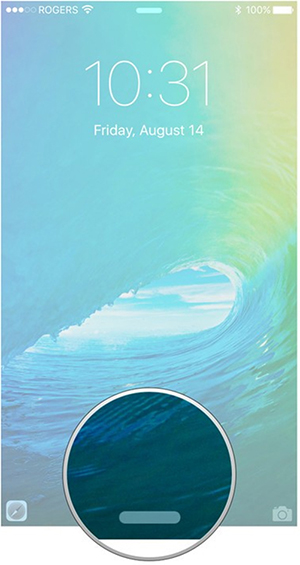
Step 3. Now, you have to set up your iPhone for using AirDrop. You need to swipe from bottom to call up the control center.
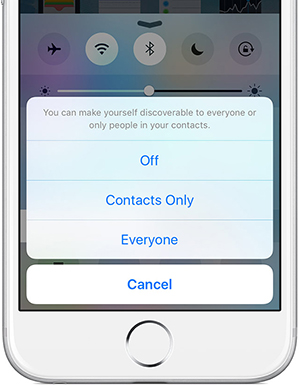
Step 4. Tap AirDrop in Control Center.
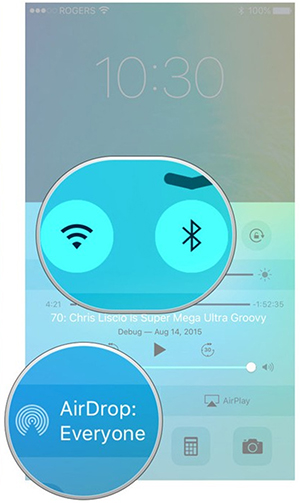
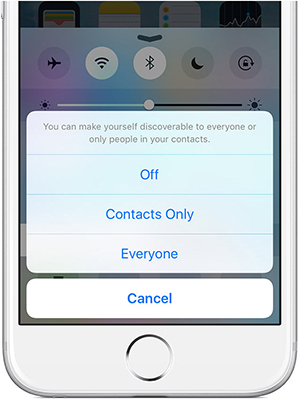
Step 5. Now you should choose either Contacts Only or Everyone. The first option will allow only your contacts to view your device. The second option allows all the nearby iOS devices (with active AirDrop) to discover your iPhone.
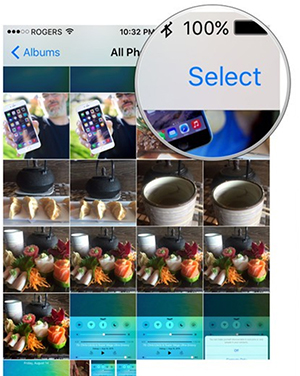
Step 6. If you want to share a single photo, go to the Camera Roll and select a photo. If you want to share multiple photos then select all of them.
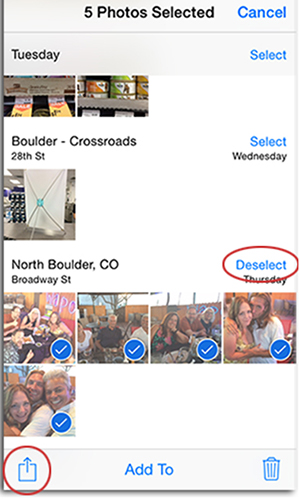
Step 7. Tap on the Share button located at the bottom-left corner of your screen. You can deselect all the selected photos by tapping on the Deselect option.
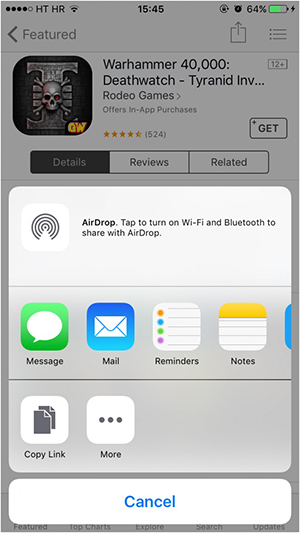
Step 8. You'll find that the sharing option through AirDrop will appear at the top of the screen. The option will be titled Tap to share with AirDrop. Tap on that option.
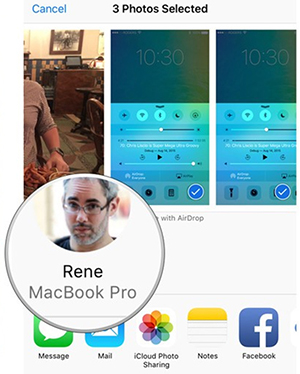
Step 9. In the AirDrop window of the Mac device, a pop-up menu will open up and ask you to Save or Decline the file shared by the iPhone. Tap on the Save button and the file(s) will land on the Downloads folder of your Mac device. With these steps, you can share your AirDrop iPhone to Mac with no problems.
Part 2. Fix AirDrop Problems
Many iOS and Mac users often complain that AirDrop sometimes doesn't work properly. If you have encountered the problems when you are using AirDrop, you may want to find several solutions. This part will provide you several solutions for you to fix AirDrop problems when using AirDrop between iPhone and Mac.
Solution 1
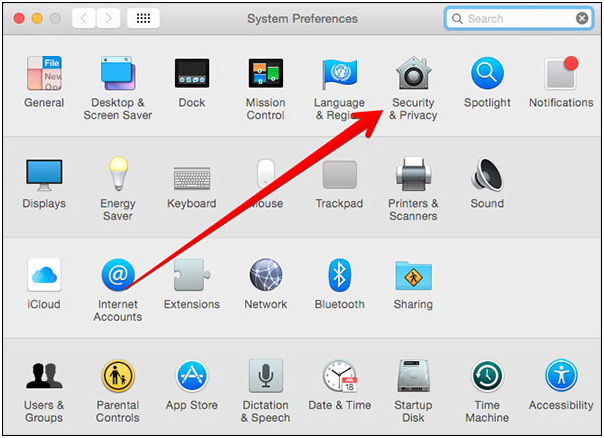
Step 1. Go to System Preferences on your Mac device and select Security & Privacy. It will open up a number of options for you.
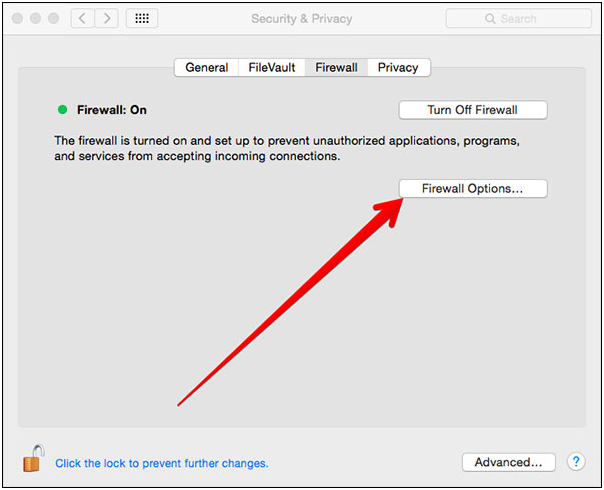
Step 2. Select Firewall and check if it is On. If it is active, click Firewall Options.
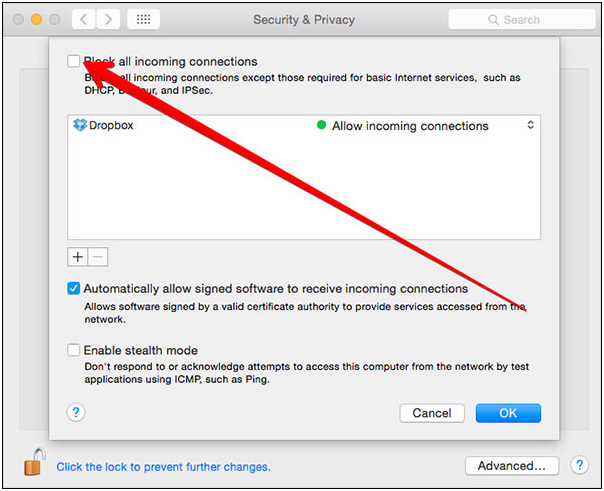
Step 3. Uncheck the box located at the left side of Block all incoming connections.
Solution 2
Make sure that you have selected the Everyone option from the primary sharing option of the AirDrop menu.

Solution 3
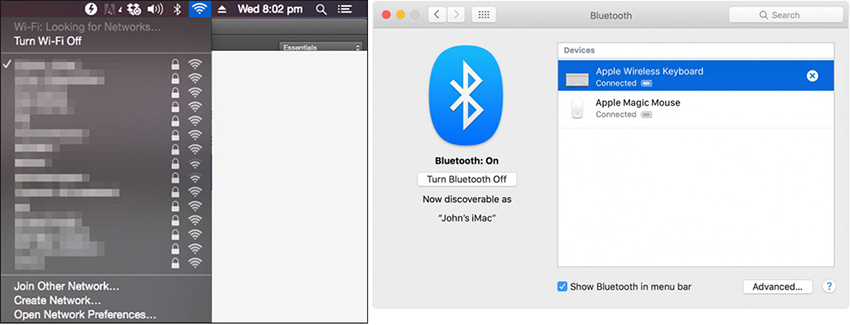
Make sure that both Bluetooth and WiFi are active on your Mac device.
Solution 4
Make sure that you have also activated the Everyone option in the AirDrop sharing option on your iPhone.
Solution 5
Make sure that WiFi and Bluetooth are active on your iPhone.
Solution 6
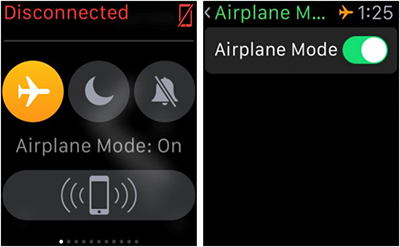
Disable the Airplane mode if you have actived it by mistake.
Solution 7
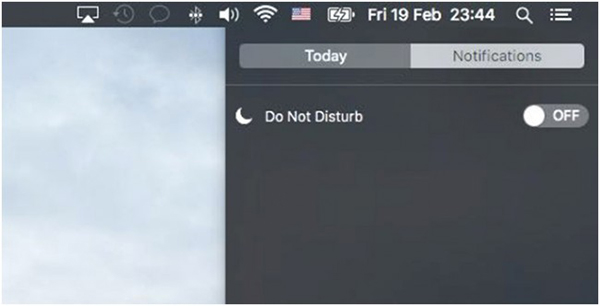
Disable Not to Disturb mode in Control Center on your iPhone.
Solution 8
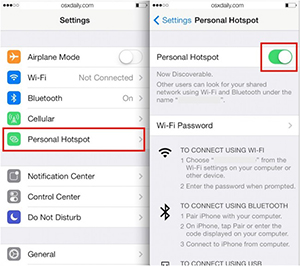
You should ensure that you are not using a Personal Hotspot. Go to Settings on your iPhone and then toggle off Personal Hotspot.
Solution 9
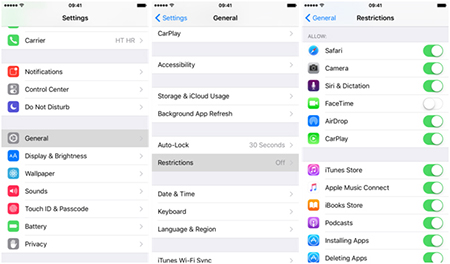
Make sure that AirDrop is not restricted for use on your iPhone. Go to Settings and then open up the General option. Now, make sure that AirDrop is allowed on your iPhone.
Solution 10
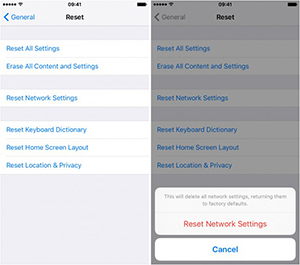
You might need to reset your network settings to solve this problem. Go to Settings > General > Reset > Reset Network Settings.
Part 3. Best iOS Manager to Share Data from iPhone to Mac
If you face problem in using AirDrop iPhone to Mac or you are rather reluctant to use it, you should use a better and more efficient software that allows you to effortlessly share data from your iPhone to your Mac device. There are several programs available on the Intnernet, and Wondershare TunesGo can be regarded as the best among them all.
Wondershare TunesGo is an efficient program that can help you to manage your iPhone,iPad and Android devices easily. It is available for both Windows and Mac computers, and it is also compatible with all the latest versions of the iOS device. It helps you to transfer music, photo, video, contacts, messages, documents, and other data from iPhone to Mac, and it also allows you to transfer the files between any two iOS devices directly. This part will introduce how to transfer files from iPhone to Mac with Wondershare TunesGo in detail.
Powerful Phone Manager for iOS and Android Devices - Wondershare TunesGo
Key Features of Wondershare TunesGo
- Transfer music, photos, videos, contacts, messages and more among iTunes, iDevice, and PC platforms.
- Does not only transfer the music file but it also transfers all related elements like album artworks, ID3 tags, ratings and much more.
- Manage the data in your apple devices without iTunes.
- Automatically fix and populate album art, song information, album information and more.
- Allows multiple transfers, playlist transfer as well as selective transfers.
- Smartly merge all duplicate contacts.
- Identifies duplicate files during a transfer and transfers the missing files only.
How to Transfer Files from iPhone to Mac with TunesGo
Step 1. Download and install Wondershare TunesGo on your computer, then start it. Now connect your iPhone to computer with the USB cable, and the program will automatically detect it.
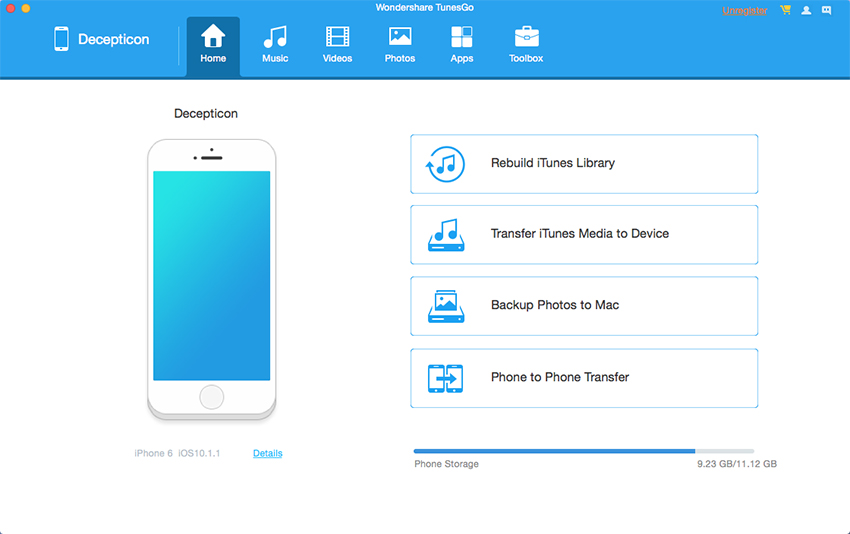
Step 2. Let's set transferring music as an example. Choose Music category at the top middle of the main interface, and TunesGo will display your iPhone music files in the main interface.
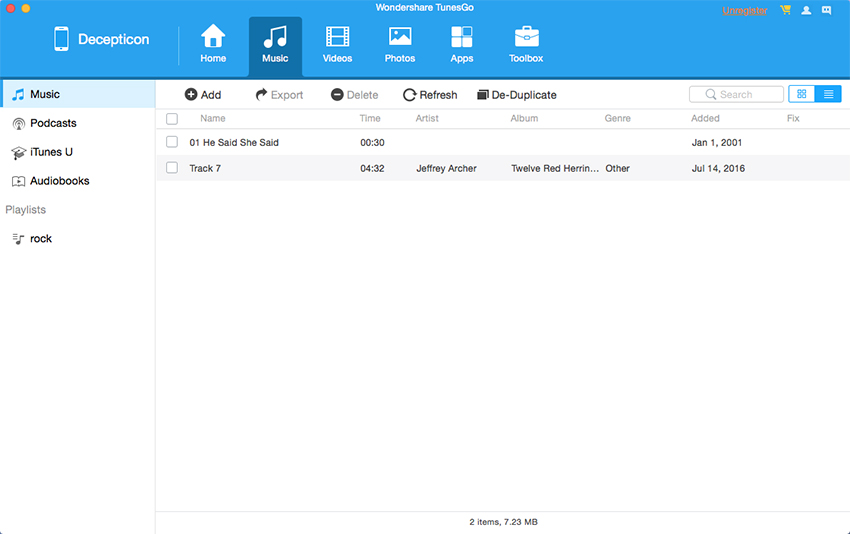
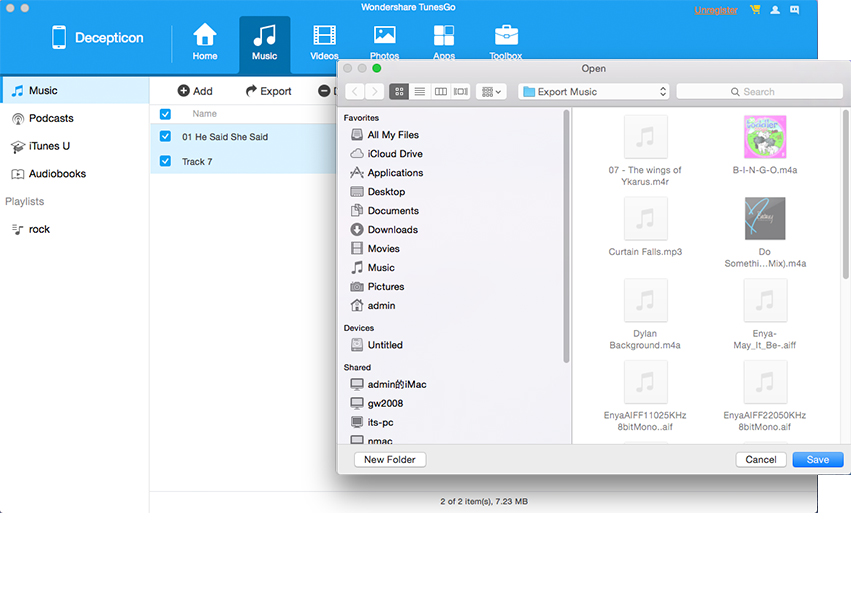
Step 3. Check the music files you want to transfer to Mac computer, and then click the Export button, and choose Export to Mac. After that, choose a target folder on your Mac and click Save to start transferring files from iPhone to Mac.
Conclusion: Now you are able to transfer files from iPhone to Mac via AirDrop easily, and you can also take advantage of Wondershare TunesGo to get the work done. Both of the two solutions will bring much convenience to your daily digital life.

