How to transfer music from iphone to computer
For many of us, our music collection is one of the most valuable things we have on our digital devices. So, we want to have several options to access it when we need it. However, most of the time iTunes, as you may know, is a one-way street when it comes transferring music. It allows you to easily transfer music to your iPhone but the reverse process can be a nightmare without third party tools.
So, you may be wondering what to do if your computer suddenly crashed and your iTunes library is all lost. If you still have all your music on your iPhone, there is no need to worry. I will describe 3 ways for you to transfer music from iphone to computer.
Also it is important to note that although we are not going to be using iTunes, you will need to have it installed on your PC or Mac because it contains the driver that helps to read your iPhone. So, let’s get rolling.
- Method 1: transfer music from iphone to computer using Wondershare TunesGo
- Method 2:transfer music from iphone to computer using iExplorer
- Method 3: transfer music from iphone to computer using iTools
Method 1: transfer music from iphone to computer using Wondershare TunesGo
If you want the quickest and most intelligent way to transfer music from iphone to computer, look no further. Whether you want to safely backup your music collection in a specific directory or you simply want to make copies of your digital music files for cloud storage, Wondershare TunesGo has you covered.It is highly compatible with a wide range of devices and has a built in library management feature specifically designed to your convenience. Follow these steps to export songs with the touch of a button.
1. First connect your iPhone to your computer using a USB cable and open Wondershare TunesGo. On the home screen, click Transfer and select From device
Powerful Phone Manager and Transfer Program - Wondershare TunesGo

- Manage contacts/photos/music and other files on iPhone.
- Directly transfer media files to iOS devices with a click.
- Transfer audio and video from iDevice to iTunes and PC.
- Transfer contacts, music, photos without iTunes restrictions.
- De-duplicate the repeated contacts.
- Import and convert music and video to iDevice friendly formats.
- Delete contacts/photos/videos in batch with a single click.
- Fix & optimize ID3 tags,covers,song information
- Perfectly backup/restore iTunes library.
2. Now select your iPhone and the software will automatically scan its contents.
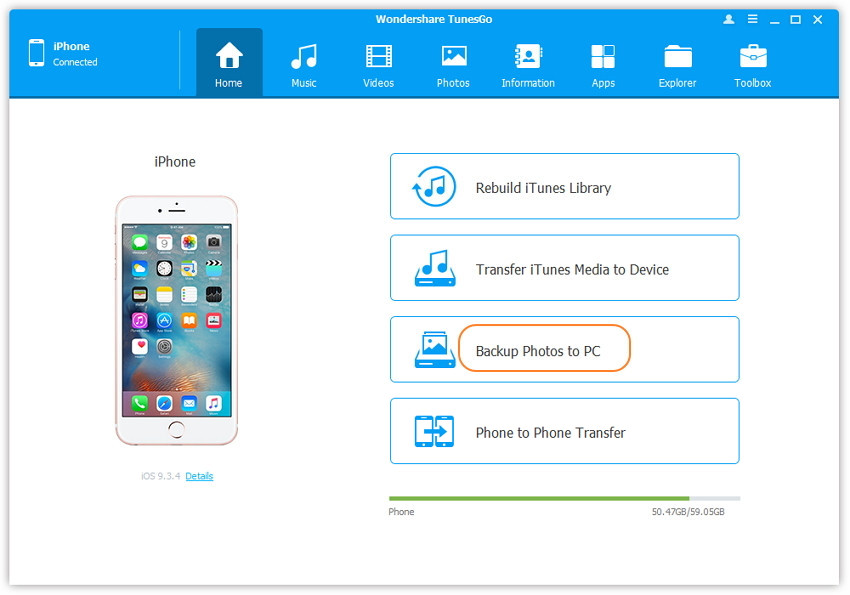
3. Then select the music files that you wish to transfer to your computer, click "Backup to PC" or "Backup to Mac" and it will be done in a few seconds.
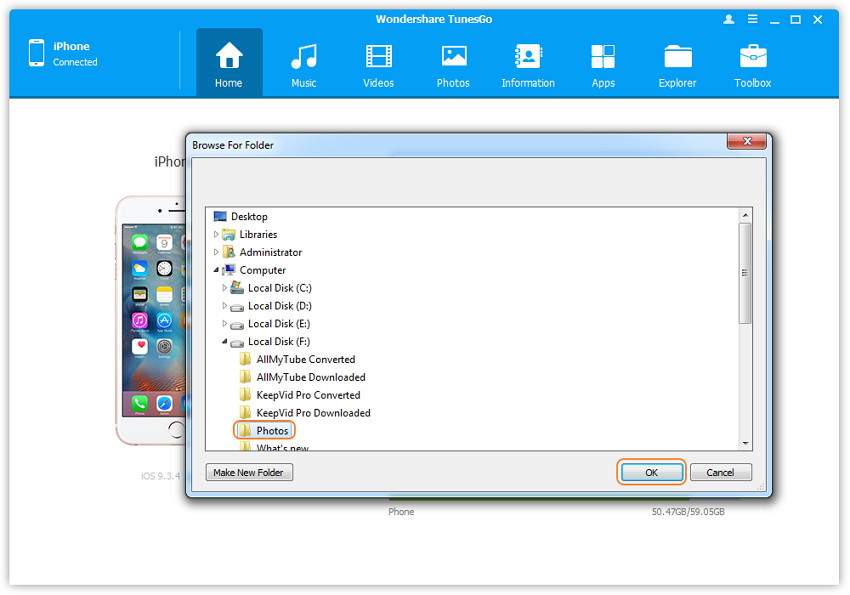
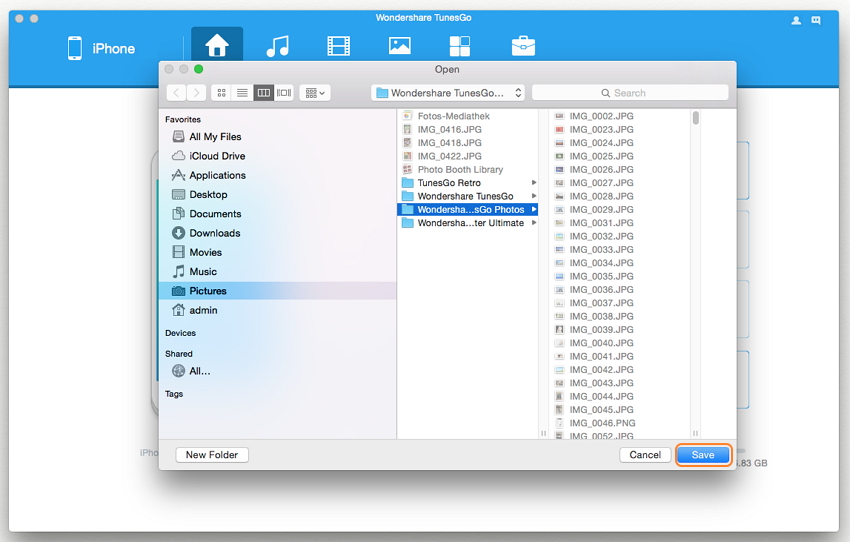
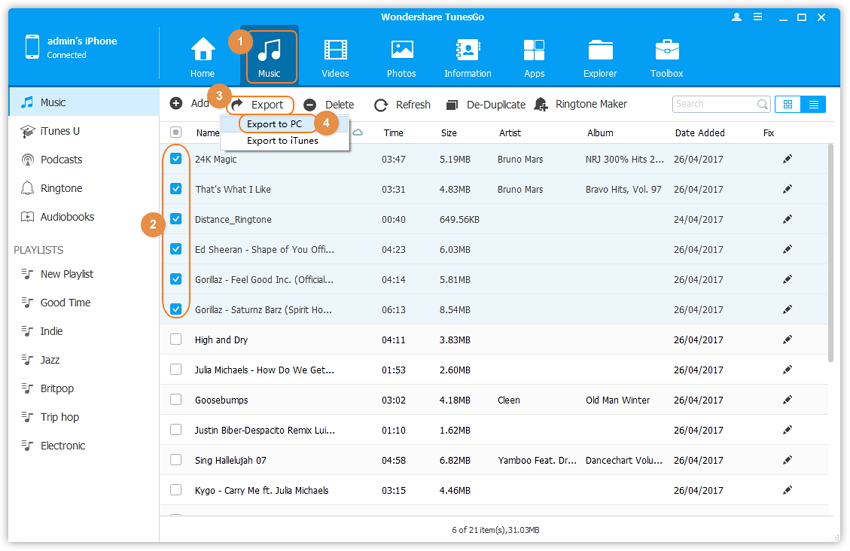
Wondershare TunesGo also allows you to transfer individual files to your computer using the “Export to” function.
Method 2:transfer music from iphone to computer using iExplorer
Using iExplorer is also an easy way to transfer music from iphone to computer. It works both on PC and Mac and itis free to try, although the free option limits some of its features. It incorporates a drag-and-drop interface that will really simplify our task. First, download and install iExplorer on your computer and follow the steps below.
1. To get started, open the installed software on your Mac or PC.
2. Afterwards, connect your iPhoneto your computer using the appropriate USB cord. As soon as your device is connected, iTunes may ask you if you want to sync your device. Many people have been victims of permanent loss of their data from their iPhones after syncing it to iTunes. So, it is safer and highly recommended for you to just click “No” or “Cancel”.
3. When your device has been successfully recognized, the Device Overview screen will be displayed in iExplorer. Note that you can get back to this screen sidebar on the left of the window.
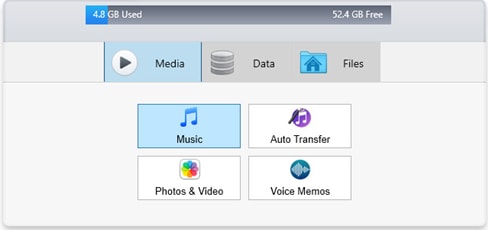
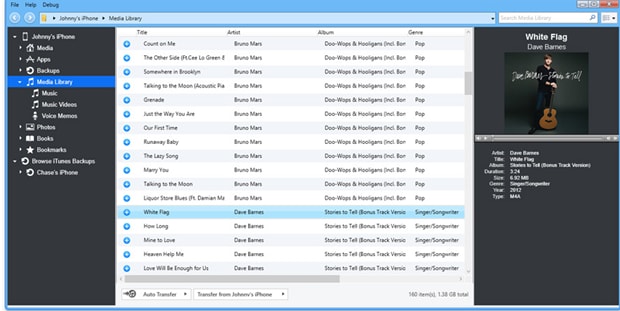
4. From here you should be able to see your media library. So, navigate through your collection and choose the tracks and playlists that you want to transfer to your computer. You can select multiple music files by holding the Command or Control key (for Mac or Windows respectively) before clicking on the files.
5. Next, click the Transfer from button and a new menu will pop up. If your goal is to export the entire playlist to a particular folder, choose Transfer Entire Playlist to Folder. If however you want to transfer only specific music files, click the Transfer Selected to Folder option.

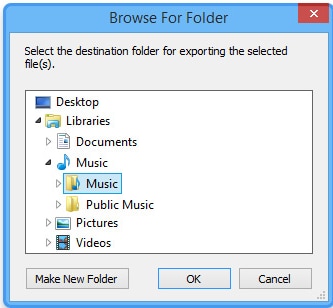
6. A dialog box will then appear, prompting you to select a folder. So, choose the appropriate folder on your computer, Click OK and the program will start to transfer music from iphone to computer.
iExplorer is very popular among iPhone users but lately, people have been complaining about bugs and compatibility issues. If you are among the lucky ones and it works with your device, you may think about giving it a try.
Method 3: transfer music from iphone to computer using iTools
Another alternative third party tool to transfer your music collection to your computer is iTools. Though it does not operate as fast as the previously described programs, it is free and still gets the job done. To transfer music from iphone to computer (PC or Mac), use the following instructions.
1. First you’ll need to install the program. So, open up your favorite browser and go to iTools.hk. Select English and click on Download. Click Download again and save the program to your desktop or another folder.
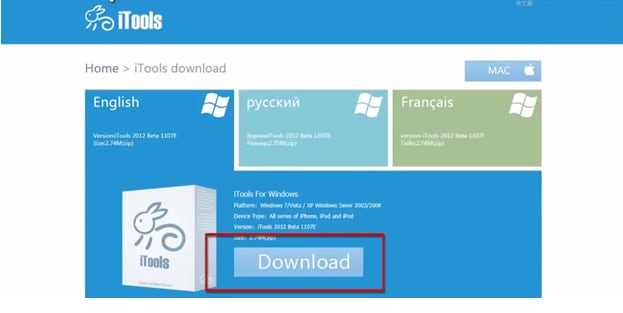
2. Once the download is completed, extract the zip file and drag the program to your desktop.
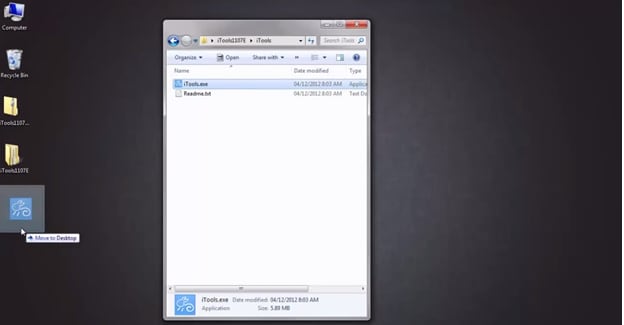
3. Open iTools and connect your iPhone to your computer using a USB cable.
4. Select the Media folder and you will see all your music in the right panel.
5. Select all the music you want transferred to your computer and simply drag it to your desktop.
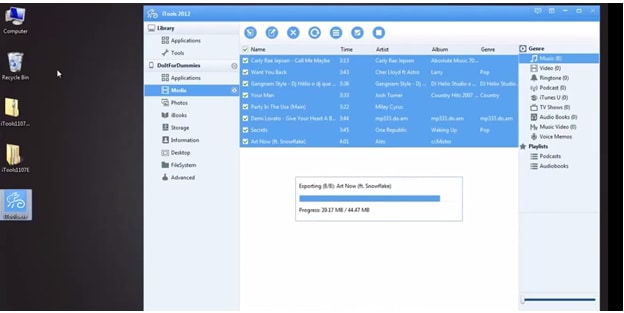
6. Wait for a few seconds and your files will be copied to your desktop.
There are hundreds of third party tools available to transfer your music collection from your iPhone but these three are currently the best. As we have seen, they differ from each other from the speed at which transferring is done and the amount of features they offer to users. If you’ve used one of these methods, you hopefully have been able to transfer music from iphone to computer without any problem.
