A Full Guide to Transfer Photos between iPhone 8/X and Mac
iTunes is the most popular way of transferring your photos from one iProduct to another. But, you will agree with when I say this, using iTunes to transfer photos isn’t as easy as it looks like! You can read a lot of manuals on the procedure, but during the procedure, you are bound to face a lot of troubles! And let me tell you this, if you are not a techy, this job can become even more difficult…
But not anymore!
The good news is, there are better ways of transferring your photos from mac to iPhones 8/X or vice versa….
In this guide, we will walk you through each and every step of transferring your photos from one iProduct to another. You will learn how to transfer photos from iPhone 8/X to Mac and how to transfer photos from Mac to iPhone step by step.
So, let’s get to the point!
- Part 1: How to transfer photos from iPhone 8/X to Mac
- Part 2: How to transfer photos from Mac to iPhone 8/X
Part 1: How to transfer photos from iPhone 8/X to Mac
Looking to free up some storage space on your iPhone? Or maybe, want to create a backup of your photos on Mac?
Well, whatever the case may be. Follow these simple steps to transfer your photos from iPhone to Mac.
Transfer selected photos from iPhone 8/X to Mac
Step 1. Download, install and launch Wondershare TunesGo for Mac
Step 2. Simply connect your iPhone 8/X with your mac. Once, the phone is connected, you will be able to access your phone’s data via TunesGo.
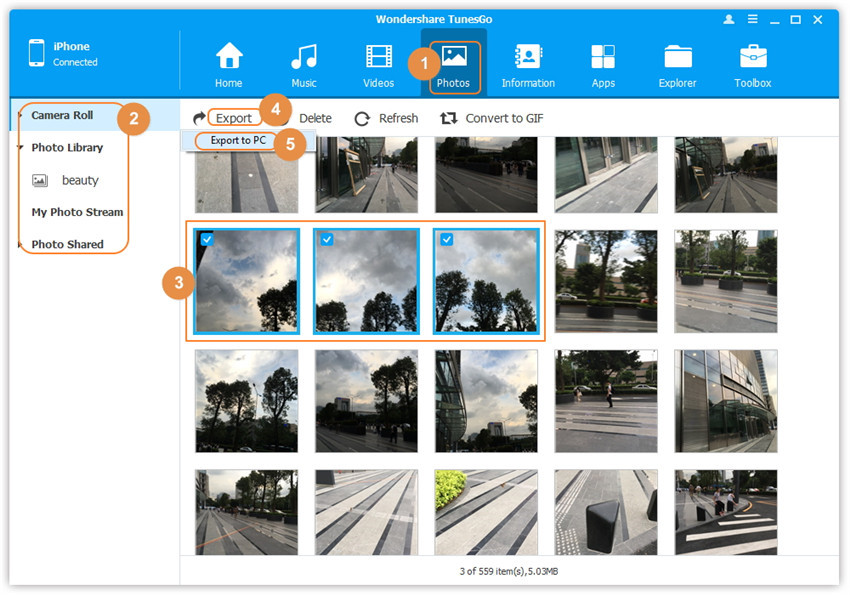
Step 3. Click on the option “Photos” appearing at the top center of your screen.
Step 4. Select the option “Camera Roll” or “Photo library” (depending on your need) appearing at the top left of your screen.
Note: Here you can choose selected photos and also transfer all photo from Camera Roll, Photo Library at once. Simply just need to right click on the location of the photo type. More over, if you'd like to transfer an album, under the photo location you will find out the whole album and you can transfer it by right click as well.
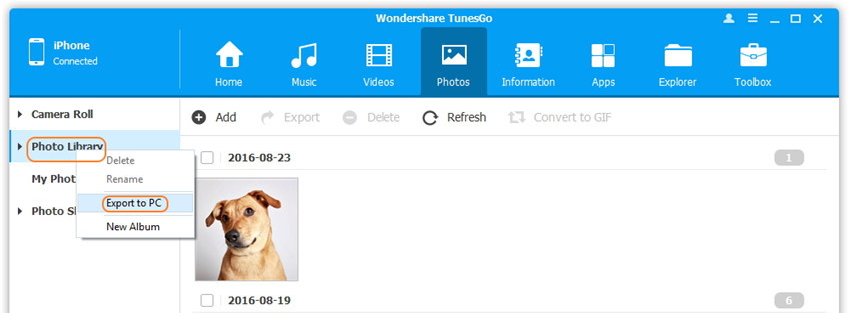
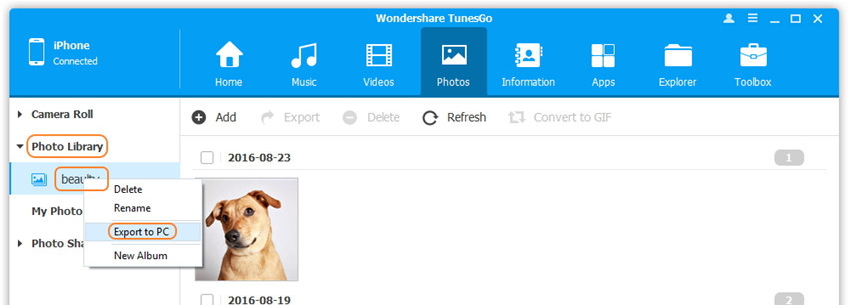
Step 5. Select the folder you want to transfer photos from and Click the option from the main menu or right-click on the selected pictures: "Export">"Export to PC".
Step 6. Selecting the destination folder for the photos
A new window will appear asking you to select the destination folder of your Mac that you want to save the photos in.
Transfer all photos with one-click
If you want to transfer all your photos from iPhone 8/X at once , follow these simple steps:
Step 1. Launch Wondershare TunesGo and connect your iPhone 8/X with your Mac.
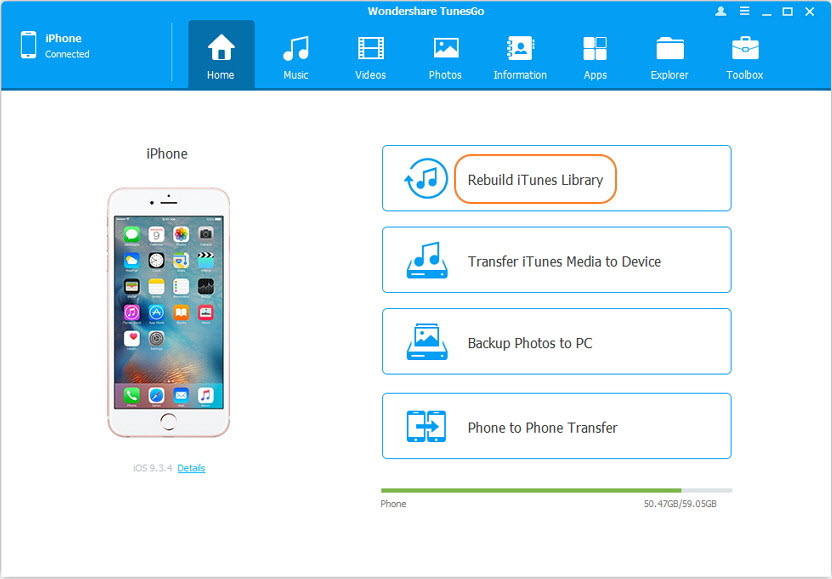
Step 2. Click the option “Backup photos to Mac”.
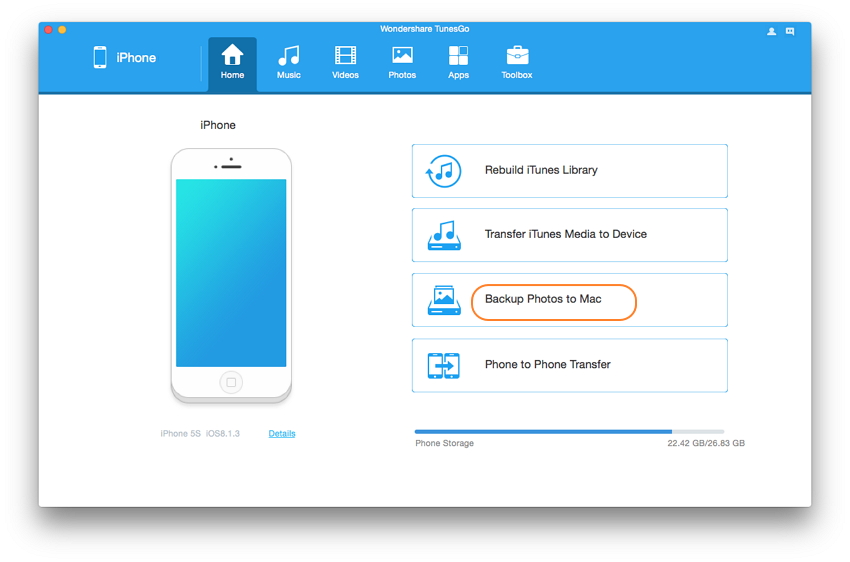
Step 3. Select the destination folder that you want your photos to save in.
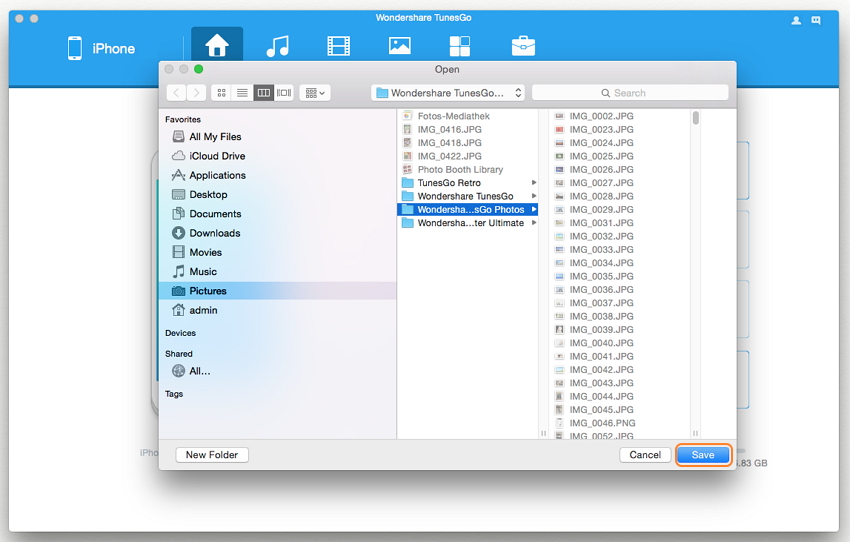
Step 4. Hit the button “Save”. And that’s it. All your photos will be saved.
Okay, so this how you can transfer your photos from iPhone 8/X to Mac. Now let’s talk about how to transfer photos from Mac to iPhone.
Video Tutorial: How to Transfer Music from PC to iPhone 8/X
The Best Tool to Transfer Photos between iPhone 8/X and Mac
Transfer Photos between iPhone 8/X and Mac without iTunes
- Transfer, manage, export/import your music, photos, videos, contacts, SMS, Apps etc.
- Backup your music, photos, videos, contacts, SMS, Apps etc. to computer and restore them easily.
- Phone to Phone Transfer - Transfer everything between two mobiles.
- Highlighted features such as fix iOS/iPod, rebuild iTunes Library, file explorer, ringtone maker.
- Fully compatible with iOS 7, iOS 8, iOS 9, iOS 10, iOS 11 and iPod.
Part 2: How to transfer photos from Mac to iPhone 8/X
If you have some photos on your Mac and you want to transfer them to your iPhone 8/X, here’s how you can do that.
Step 1. You need to download, install and then launch the best phone manager TunesGo.
Step 2. Connect your iPhone 8/X to Mac and then allow TunesGo to access your device.
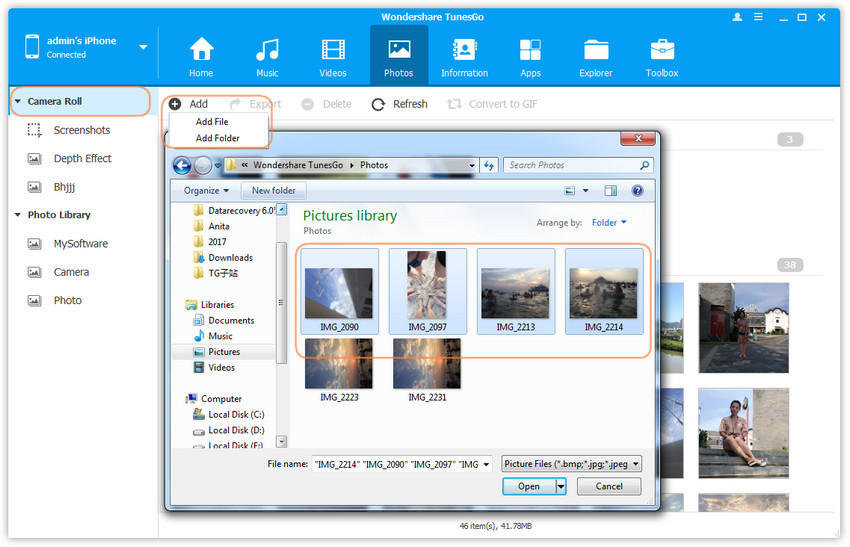
Step 3. From the interface, click on the option “Photos” at the top center of your screen. Then, click on the option "Add”> "Add folder" or file.
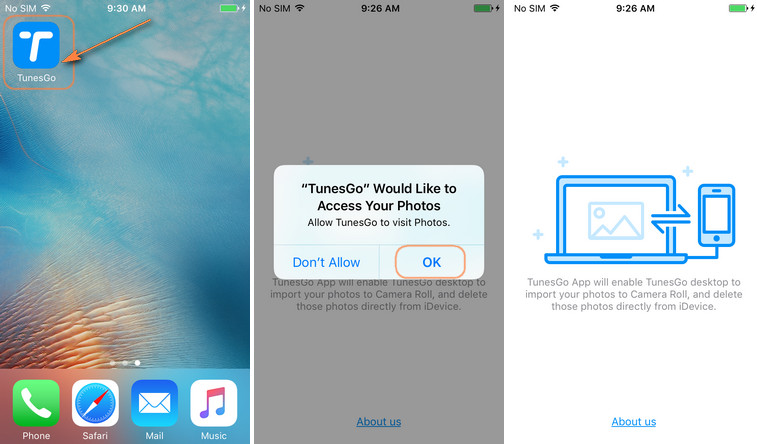
Note: If you want to transfer photos to iPhone 8/X Camera Roll, you should download TunesGo App to access your photos first.
An alternate method:
Step 1. Launch Wondershare Tunesgo and connect your iPhone 8/X with Mac.
Step 2. Click on the option “Photos” appearing at the top center of TunesGo’s interface.
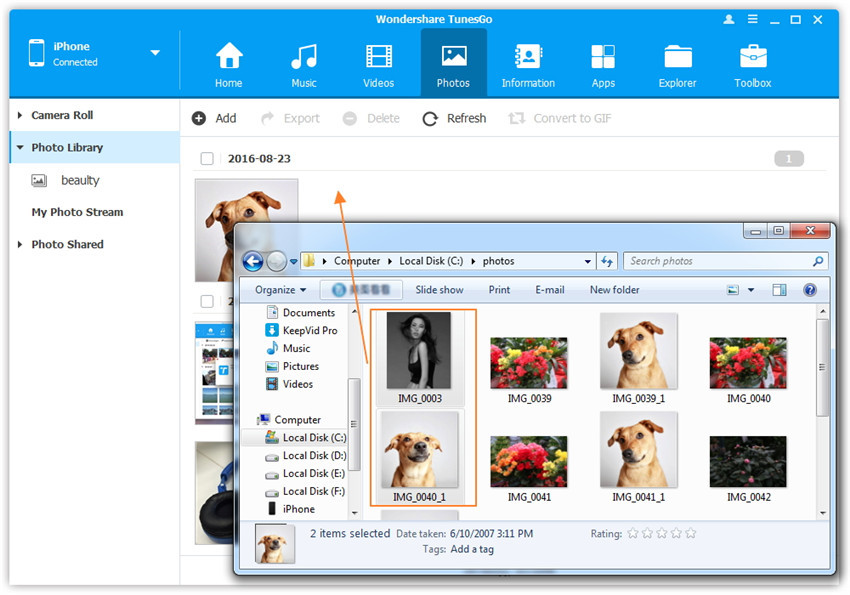
Step 3. Now, in a separate tab, open the folder of the photos that you want to transfer.
Step 4. Simply drag and drop those photos to the TunesGo’s interface.
Step 5. With the simple drag and drop, all the selected photos will be transferred to your iPhone 8/X almost instantly.
Conclusion
Transferring your photos from one device to another can be quite demanding but not now! With the above-mentioned steps, you can transfer your photos almost instantly and that too without any hassle!
If this guide was helpful, don’t forget to share it with your friends and family.
