iPhone Flashlight Not Working? Solved!
“Soon after I updated my iPhone to the latest iOS, its flashlight stopped working. Is there any way to fix the iPhone flashlight not working issue?”
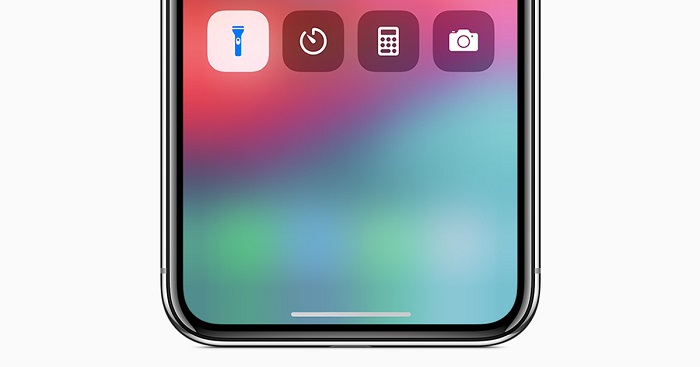
As surprising as it might sound, a lot of people complain that their iPhone’s flashlight has stopped working out of the blue. From firmware update problems to a hardware issue, there could be numerous issues behind it. While it is tough to fix a hardware issue at home, you can make some effort to resolve most of the firmware-related problems on your own. To help you troubleshoot the iPhone XS/X/8/7/6 flashlight not working, we have come up with 6 smart solutions that would come handy to you for sure.
- Part 1: Try to Force Reboot your iPhone
- Part 2: Go to iPhone Settings to Factory Reset it
- Part 3: A Professional Tool to Fix Flashlight not Working on iPhone Issue
- Part 4: Boot your iPhone in Recovery Mode
- Part 5: Try DFU Mode if the Recovery Mode Fails
- Part 6: Check the Device’s Hardware
Part 1: Try to Force Reboot your iPhone
If there is only a minor issue with your iPhone, then it can be fixed by a force restart. In this, we will make the device to forcefully restart and break its present power cycle. Therefore, if your phone was not restarted properly before, then this would be able to fix the flashlight not working on iPhone X/8/7/6/5 issue.
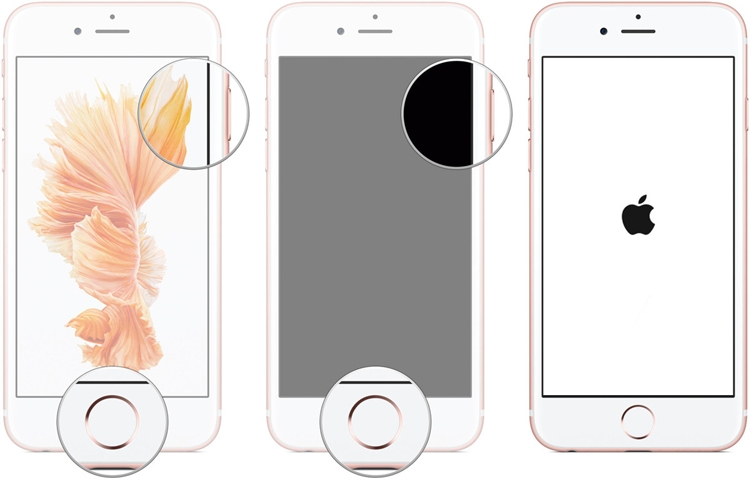
For iPhone 6s and previous models
Press the Home and the Power button together for at least 10 seconds or so. Let go once the device restarts and you see the Apple logo.
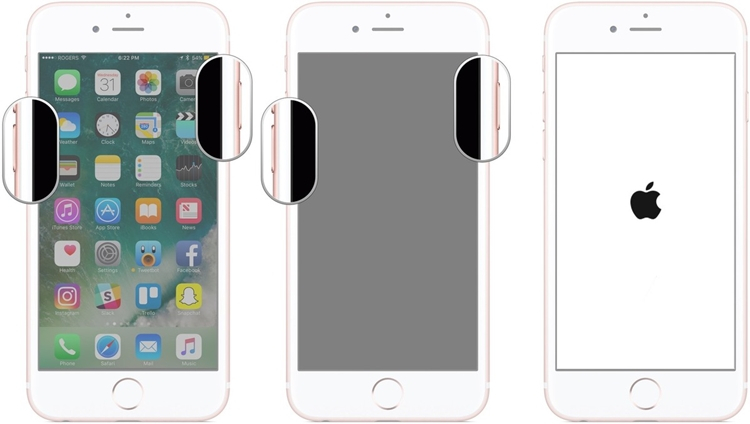
For iPhone 7/7 Plus
Press and hold the Power (wake/sleep) key as well as the Volume Down button. Hold them for another 10 seconds or so and release when the device restarts.
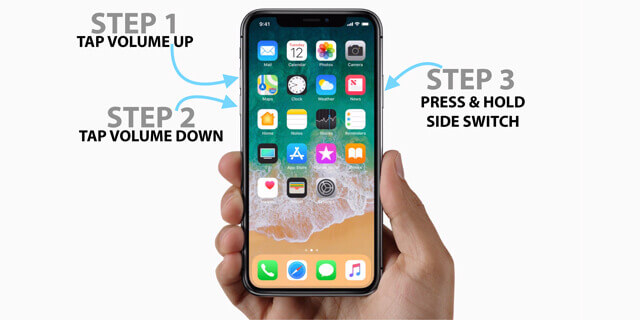
For iPhone X and later models
Quick-press the Volume Up button and as soon as you release it, quick-press the Volume Down button. In succession, press and hold the Side button for the next 10-12 seconds. Release the Side key when your iPhone reboots.
Part 2: Go to iPhone Settings to Factory Reset it
If there is a problem with your phone’s settings or the device has been corrupted, then you should perform a factory reset. This would reset your device’s settings and will wipe off its storage. Since your data would be erased in the process, consider taking its backup beforehand using dr.fone – Backup & Restore (iOS). With just one click, you can take your iPhone’s backup and later restore it to your device. Once it is done, you can fix the iPhone flashlight not working issue by following this simple drill.
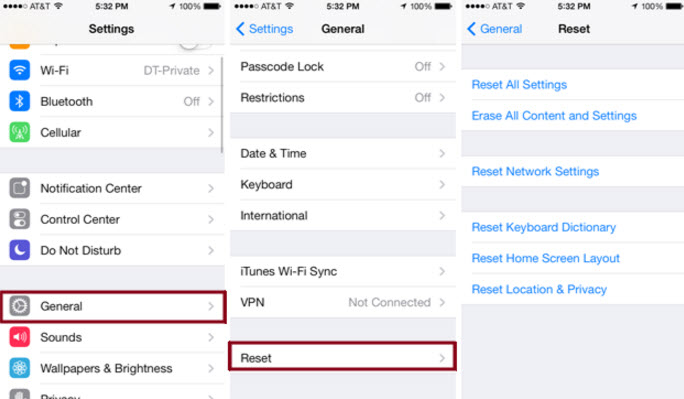
Step 1. Firstly, unlock your iPhone and go to its Settings > General > Reset.
Step 2. Tap on the “Erase All Content and Settings” option and enter the passcode of your device to confirm your choice.
Step 3. Sit back and wait for a while as your iPhone would be restarted with factory settings and no previous data. You need to setup a new iPhone from scratch now.
Part 3: A Professional Tool to Fix Flashlight not Working on iPhone Issue
If a native solution is not able to fix iPhone 6/7/8/X flashlight not working issue, then consider using a professional tool. Developed by Wondershare, dr.fone - Repair (iOS) can fix all kinds of firmware related issues with an iPhone. Some of the common problems that it can fix are iPhone flashlight not working, device stuck in reboot loop, the screen of death, a bricked device, and so on. The tool is extremely easy to use and has two modes – standard and advanced. The standard mode can resolve most of the iPhone issues without causing any data loss on the device. Here’s how you can use this iOS system repairing tool on your own.
Step 1. To begin with, connect your iPhone to your system and launch the dr.fone toolkit’s interface. From its home, just open the “Repair” section.

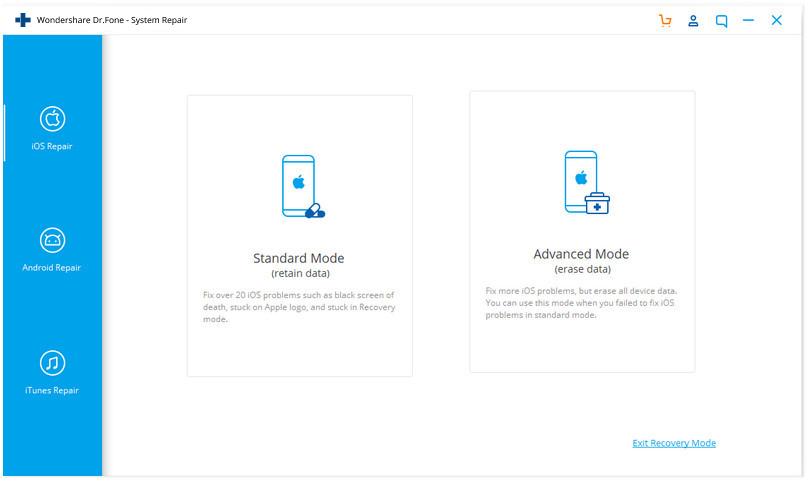
Step 2. At first, you can go with the Standard Mode of the iOS Repair feature. In case if it won’t work, then you can select the Advanced Mode. It has a better success rate, but will also delete the existing data on your device.
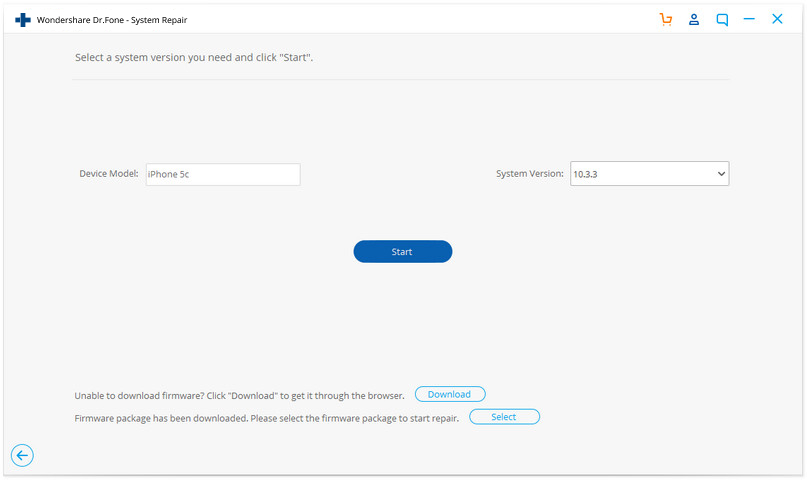
Step 3. The application will detect your device’s model and its compatible latest firmware version. It will display the same for you to verify and start the repairing process.
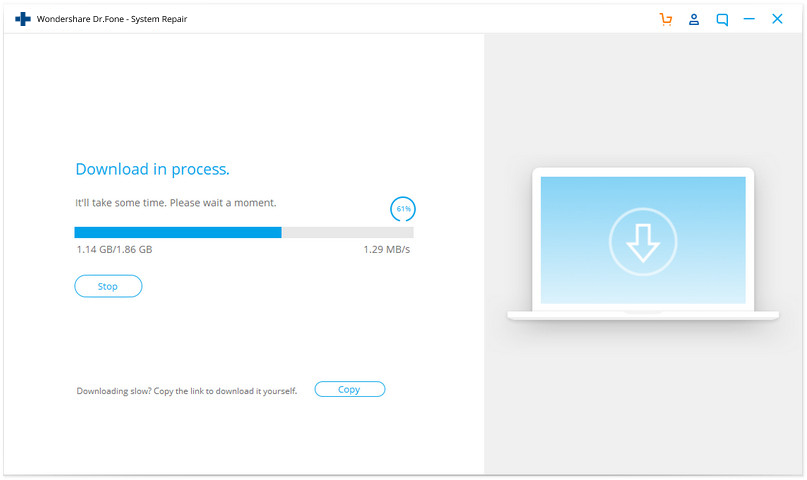
Step 4. Once you click on the “Start” button, the tool will download the firmware update and would verify your device for its compatibility. Since it might take a while, you are recommended to wait and not disconnect the device.
Step 5. In the end, when the download is completed, you will be notified with the following screen. Simply click on the “Fix Now” button to resolve the iPhone 6/7/8/X torch not working problem.
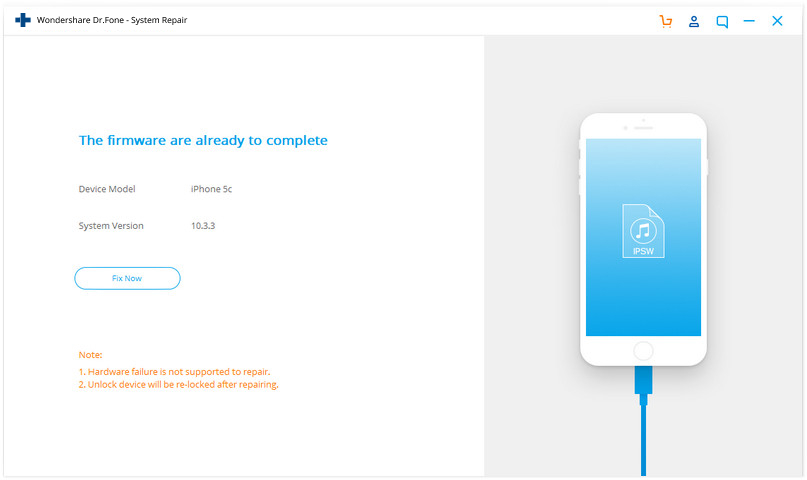
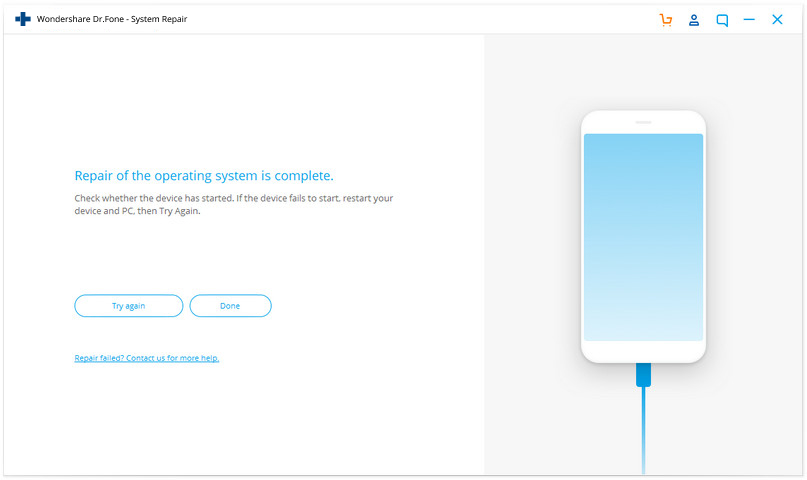
Step 6. The device would restart with the updated firmware and in the normal mode. You can now remove the device and check if its flashlight works or not. If not, follow the same process, but pick the advanced mode instead of the standard mode this time.
Part 4: Boot your iPhone in Recovery Mode
The good thing about iOS devices is that they provide several native solutions to fix an unwanted issue. For instance, by applying the correct key combinations, you can boot your phone in the recovery mode. This will let you update your device to the latest firmware version or simply restore it to factory settings.
For iPhone 6s and previous models
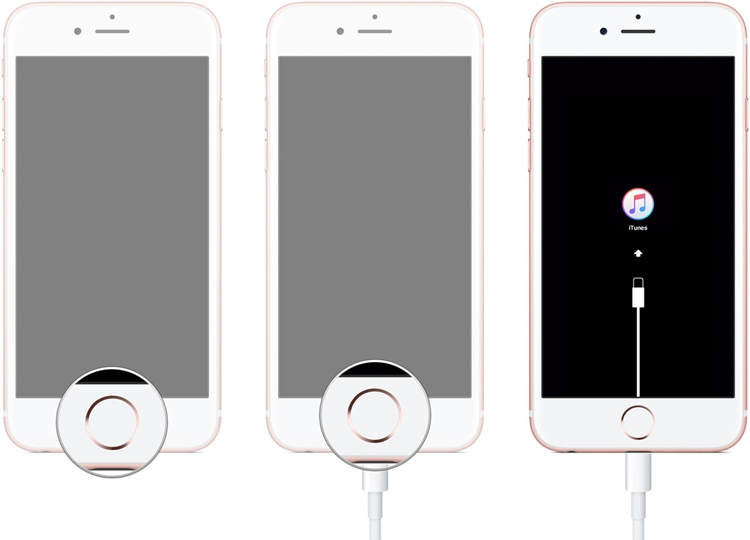
Launch iTunes on your system and connect one end of the lightning cable to it. While connecting the other end of the cable to your iPhone, press and hold the Home button.
For iPhone 7 or 7 Plus
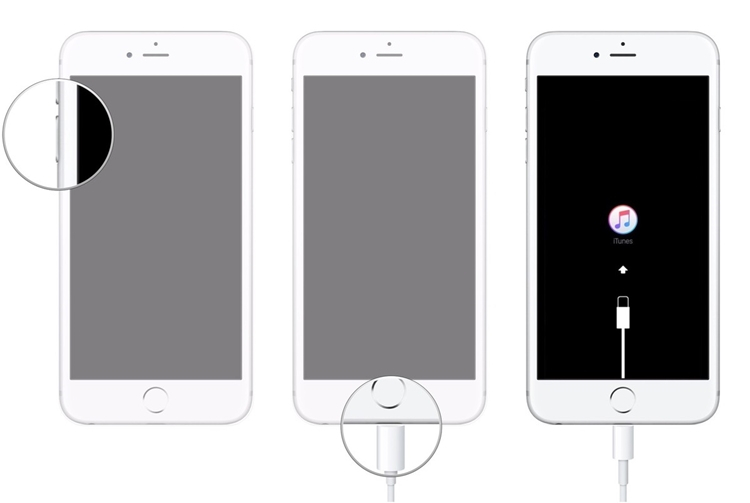
Update iTunes on your system and launch it to fix your device. Now, power off your iPhone and press the Volume Down button while connecting it to the computer. Keep holding it for a while till your device enters the recovery mode.
For iPhone 8 and newer models
Turn off your iPhone and launch an updated iTunes application on your Mac/Windows system. Hold the side button and press it for a few seconds while connecting it to iTunes.
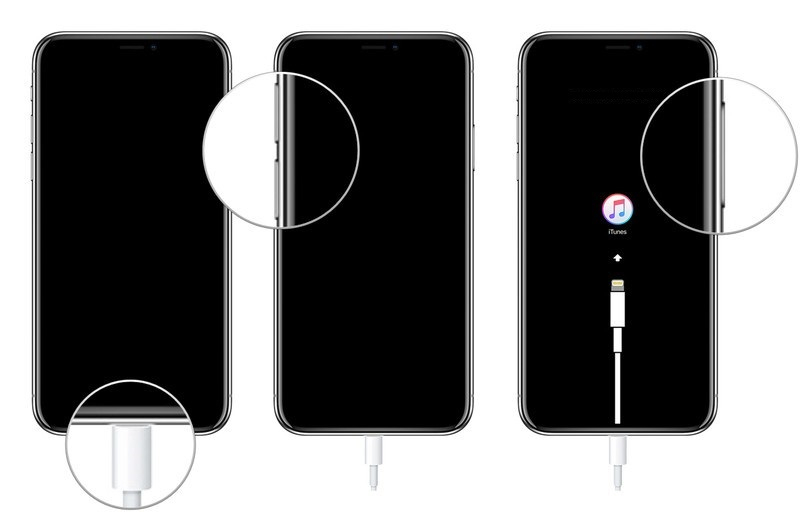
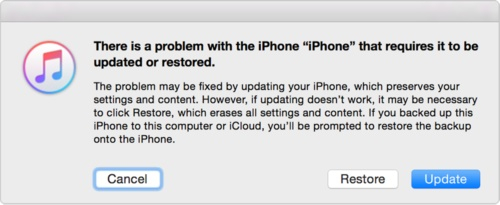
Let go of the respective keys when the connect-to-iTunes symbol would appear and the application will detect that your device is in the recovery mode. It will display a similar prompt like this and would ask you to restore your device. Agree to it and reset your iPhone while fixing the iPhone flashlight not working issue. Just be aware that this would delete all the saved data from your phone.

Part 5: Try DFU Mode if the Recovery Mode Fails
If the issue is severe, then the recovery mode might not be able to fix iPhone XS/X/8/7/6 flashlight not working problem. In this case, you can boot your phone in the Device Firmware Update mode instead. This would even skip the bootloading process and will let you restore as well as update your device. Though, while doing so, it will erase its existing data and saved settings.
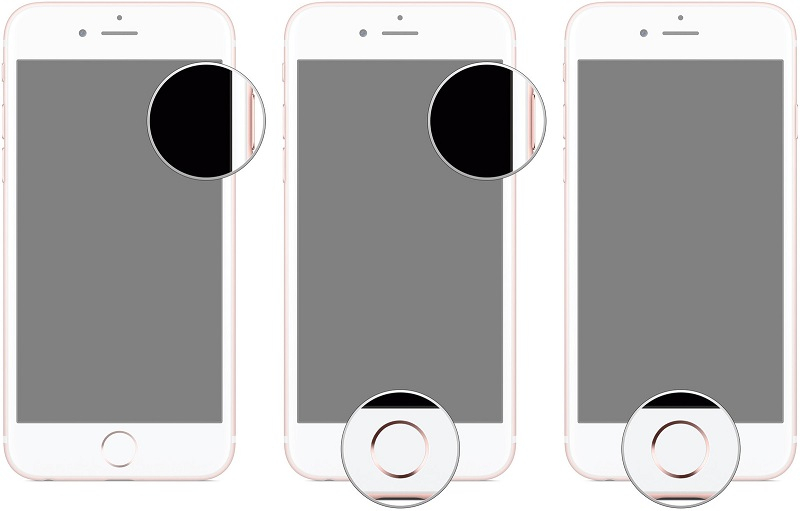
For iPhone 6s and older versions
Turn off your device and connect it to iTunes using a working cable. Hold both the Power and the Home buttons for 10 seconds first. Later, release only the Power key, but keep pressing the Home button for the next 5 seconds.
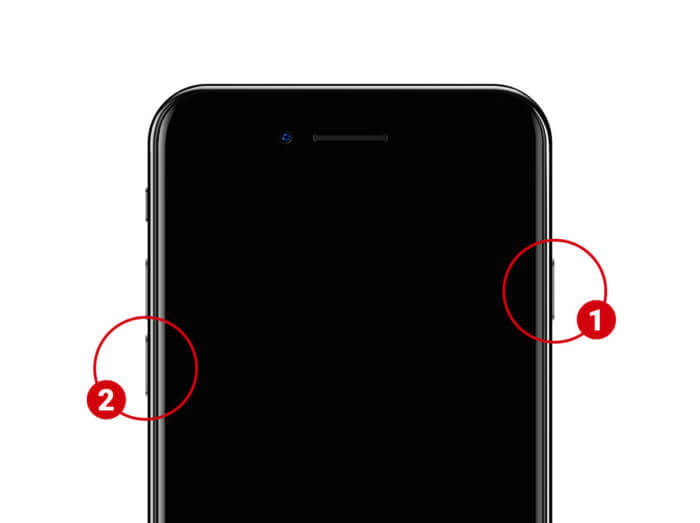
For iPhone 7 and 7 Plus
Firstly, launch iTunes on your system and power off the device. Connect it to the system and press the Power + Volume Down keys together for 10 seconds. After that, let go of the Power key, but keep holding the Volume Down button for another 5 seconds.
For iPhone 8 and newer models
Power off the device first and later connect it to the latest version of iTunes. Afterward, press both the Side and the Volume Down keys at the same time for exactly 10 seconds. Release only the Side key and press the Volume Down key now for the next 5 seconds.
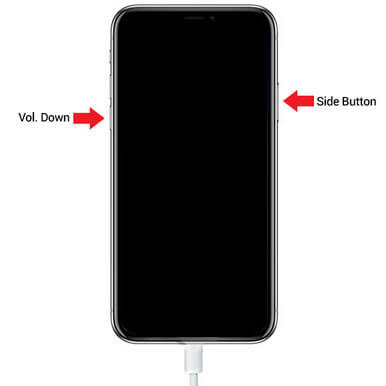
In case if the device displays the iTunes or Apple logo in the end, then you need to restart the process. Ideally, it should only display a black screen when iTunes will detect your iPhone is in the DFU mode. It will give you an option to restore the device to its factory settings now by displaying a prompt like this.
Part 6: Check the Device’s Hardware
Last, but not the least, chances are that there could be a hardware-related issue with your iPhone as well. If you have suitable experience, then you can disassemble the device and check for any hardware damage yourself. Though, it is recommended to simply visit a nearby Apple service center to get your phone checked by a professional. It will make sure that the flashlight and every other component is working on the device.
This extensive guide on how to fix iPhone flashlight not working would have certainly come handy to you. With a reliable tool like dr.fone - Repair (iOS), you can fix all kinds of system related problems on your device without much trouble. It can fix every leading issue without causing any kind of data loss on the device. Since the tool has a free trial version available, you can experience it yourself without spending a single dime.
