How to Backup Android Phones and Tablets
Backing up your Android data is as important as it is to back up your files on your PC. However, unlike computers, the backup process on smartphones may be a bit challenging if you are unaware of the proper procedure and the third-party tools that are available to ease your way out.
- How to Selectively Backup Android Data
- How to Back Up Android Automatically
- How to Back Up Android Emails
Part 1. How to Selectively Backup Android Data
The bitter truth is, you can’t selectively back up your data from your Android device using the stock tools offered by the smartphone, tablet, operating system, or Google itself. The term ‘selectively’ here refers to picking up individual objects from a category, for example music files or even messages, and then backing them up.
That being said, in order to take more control over the data you want to back up, you must rely on an efficient third-party tool. One such program called TunesGo is developed by Wondershare. Wondershare TunesGo not only allows you to back up your Android data, it also helps you manage your smartphone or tablet with ease.
A few other key features that Wondershare TunesGo has are:
Android Manager - One Stop Solution to Manage Your Mobile Lifestyle
- Backup your music, photos, videos, contacts, SMS etc. to computer and restore them easily
- Manage, export&import your Contacts and SMS, deduplicate Contacts, reply SMS with computer
- One-click Root - root your Android phones/tablets to take full control of your device
- Phone to Phone Transfer - transfer music, photos, videos, contacts, SMS between two mobiles ( both Android and iPhone are supported)
- App Manager - Install, uninstall, import or backup Apps in batch
- Gif Maker - create Gif from photos, motion photos, videos
- iTunes Manager - Sync iTunes Music to Android or transfer music from Android to iTunes
- Fully compatible with 3000+ Android devices (Android 2.2 - Android 8.0) from Samsung, LG, HTC, Huawei, Motorola, Sony etc.
To back up your data from your Android smartphone or tablet:
1. Download and install Wondershare TunesGo on a Windows PC.
2. Power on and connect your Android device to your PC using its data cable.
3. Launch Wondershare TunesGo and wait until it detects and connects to your device.
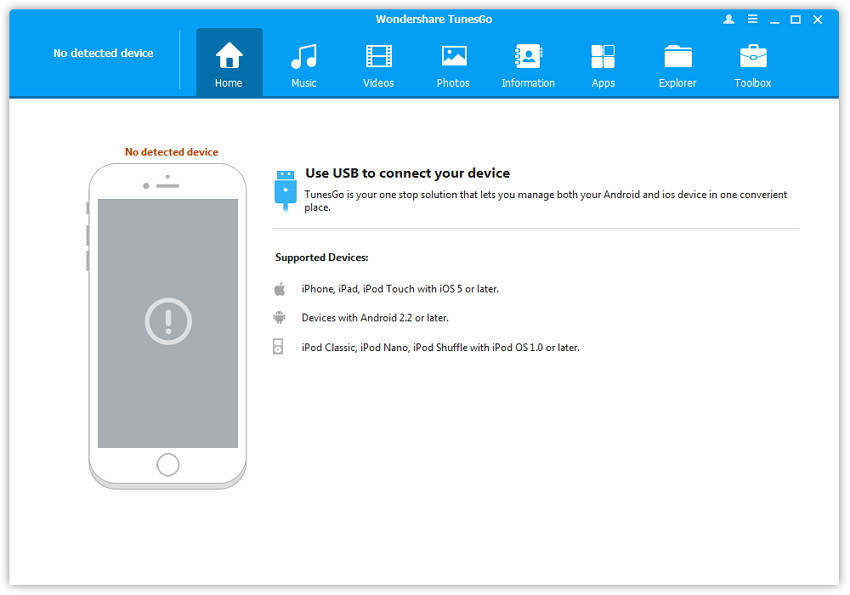
4. On the main window, click "Toolbox" to enter the featured functions` list.
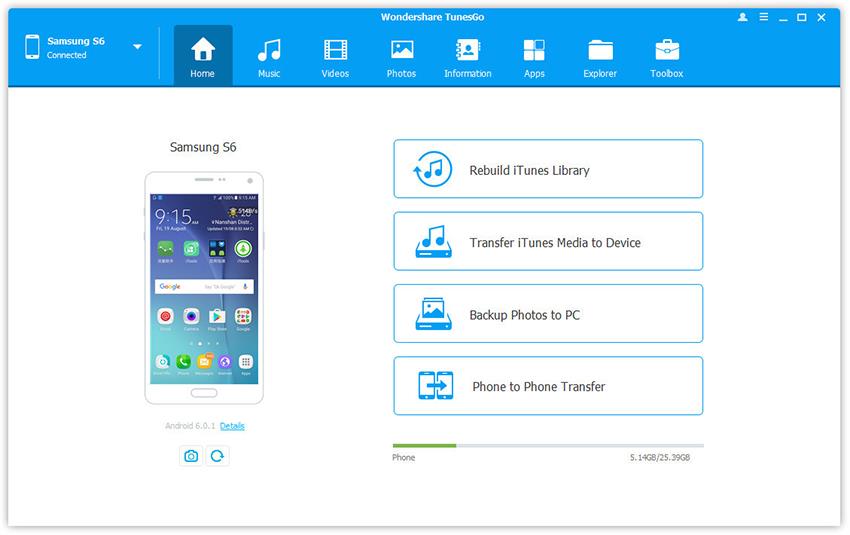
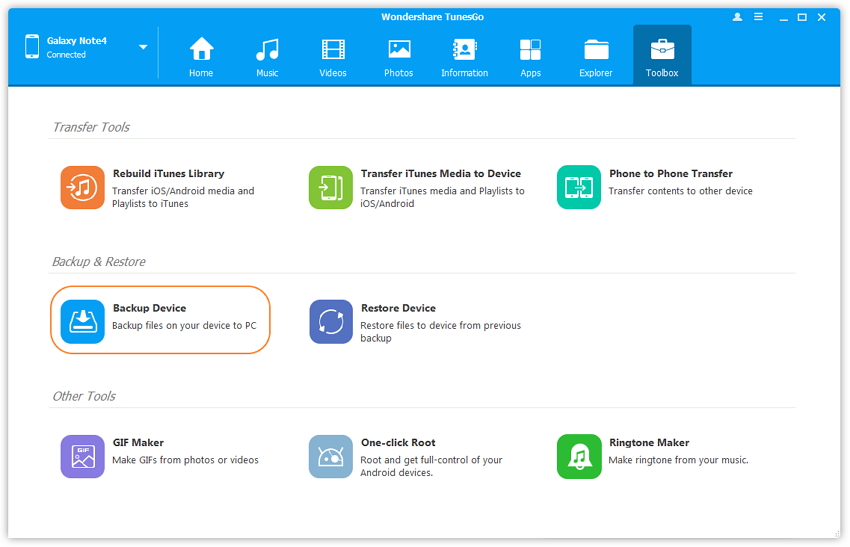
5. Click "Backup Device" to start the backup process.
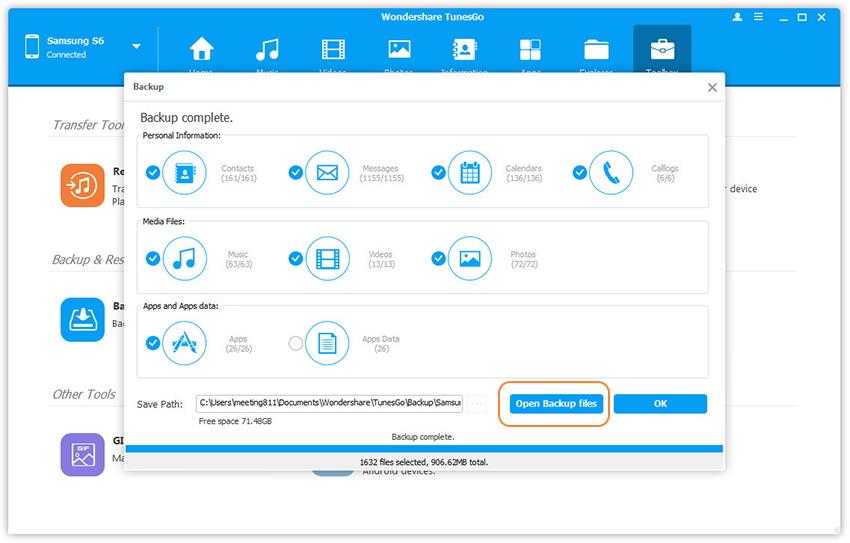
6. Select the files you want to backup from your Android phone to the computer by checking or unchecking the file types.
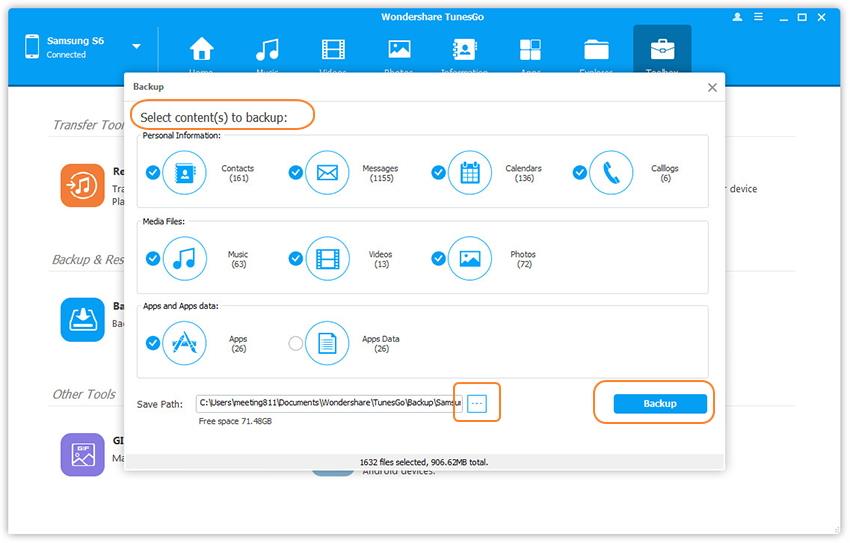
7. Click "Bakcup" and it`ll take a while untill the backup process is complete.
Note: You can click "Open Backup Files" to check the files on the computer and restore them to your Android whenever you want by clicking "Restore Device".
Part 2. How to Back Up Android Automatically
Automatically backing up your Android data requires no rocket science. All you need to do is, associate your existing Google account to your Android smartphone or tablet, and configure your device for auto-synchronization with the added account.
Note: Needless to mention, if you don’t have a Google account, you can create a new one for free anytime.
Assuming that you have not associated a Google account to your smartphone yet, to back up your Android automatically:
1. Power on your Android phone.
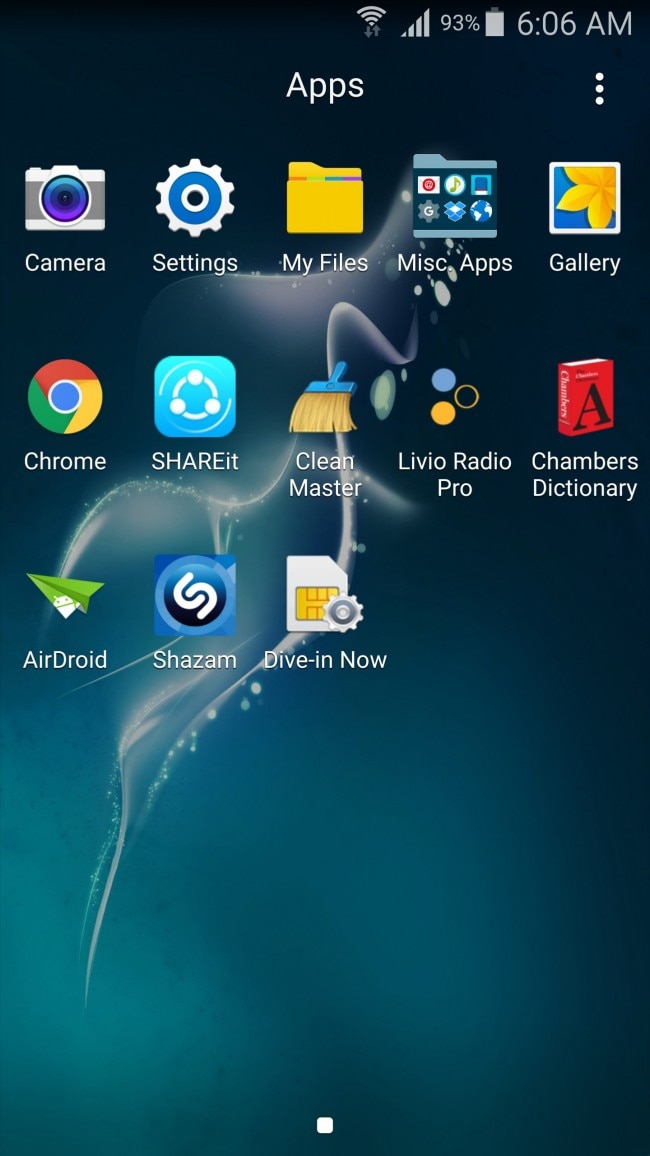
2. Open the Apps Drawer.
3. Tap Settings.
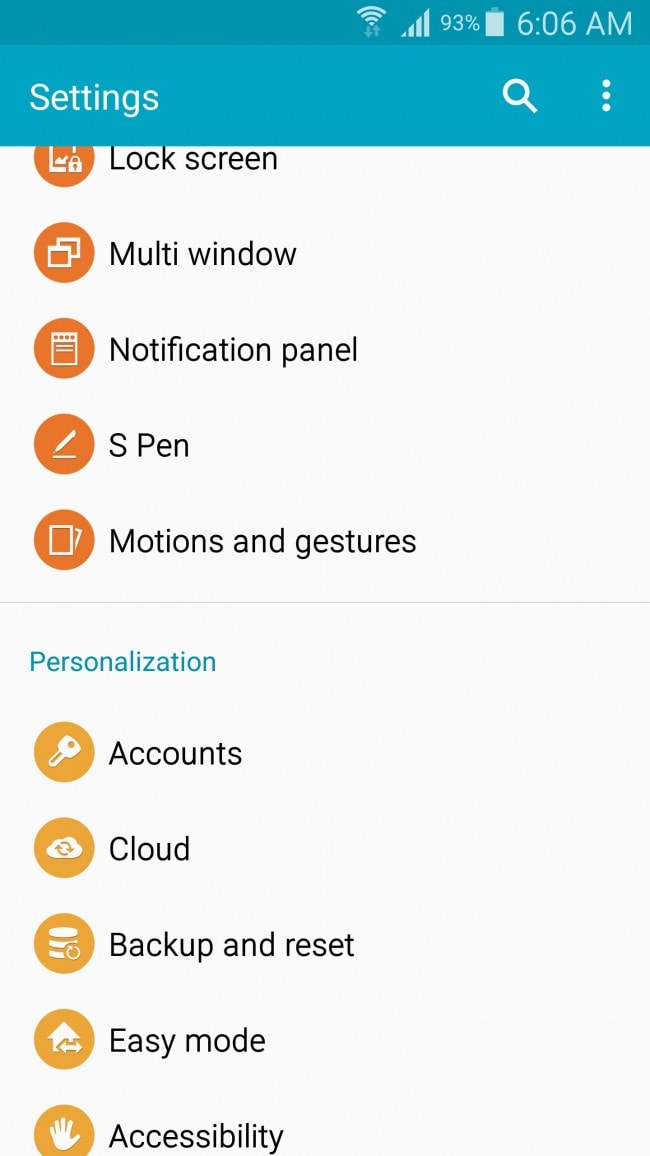
4. From the Settings window, under the Personalization section, tap Accounts.
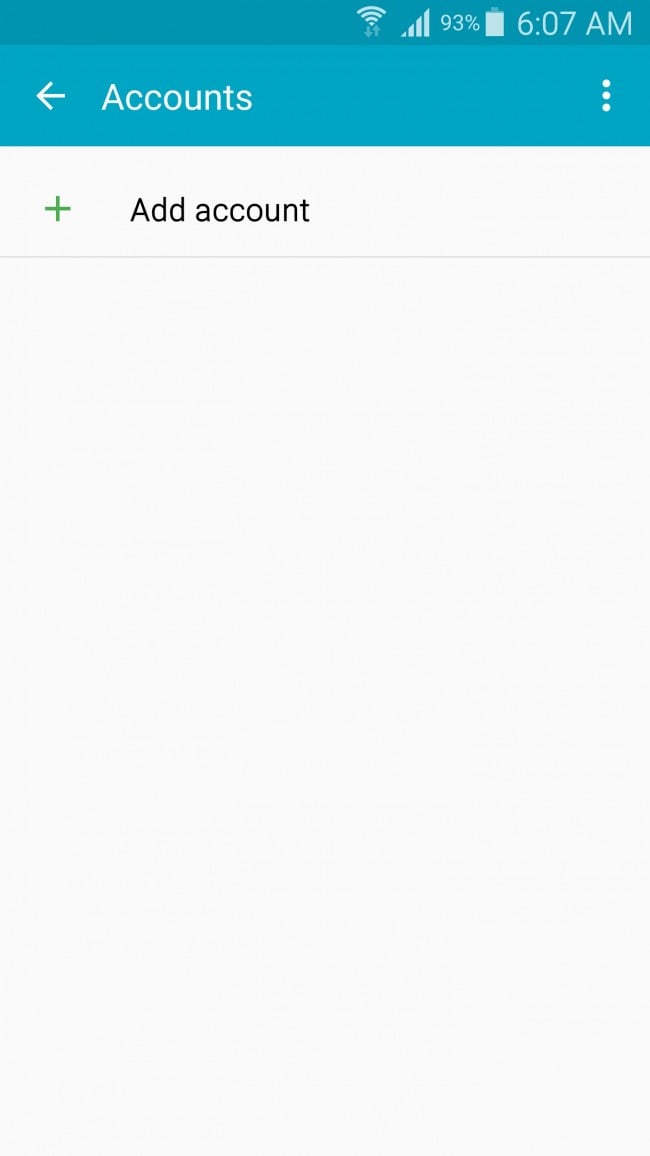
5. Tap Add account from the Accounts window.
6. From the displayed options on the Add account window, tap Google.
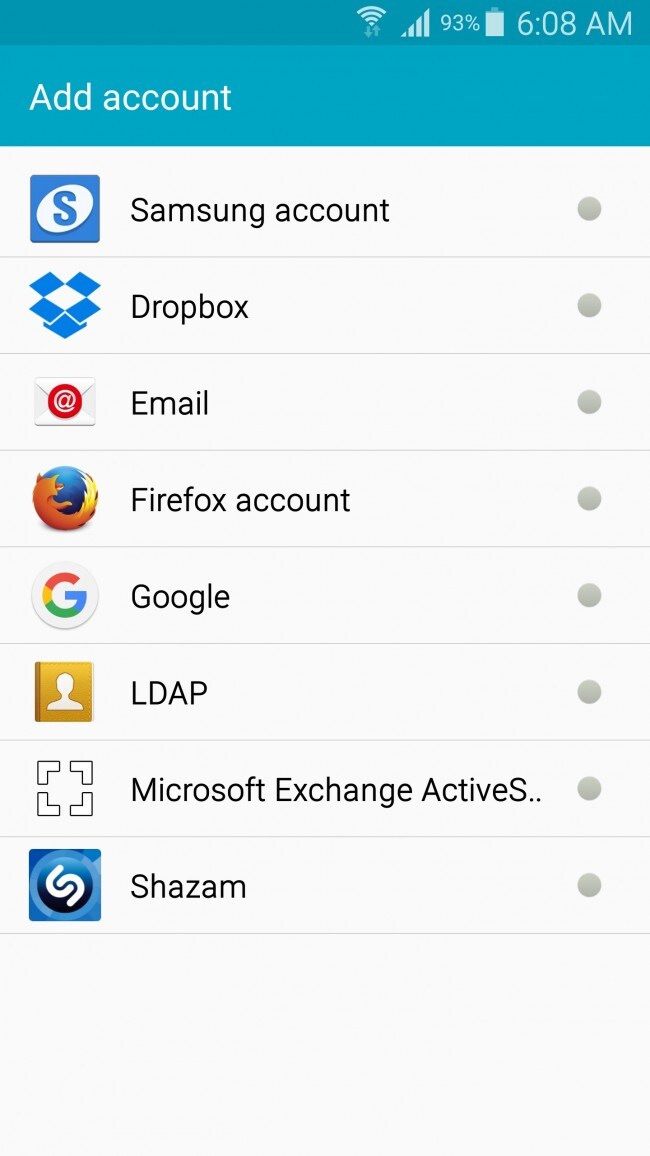
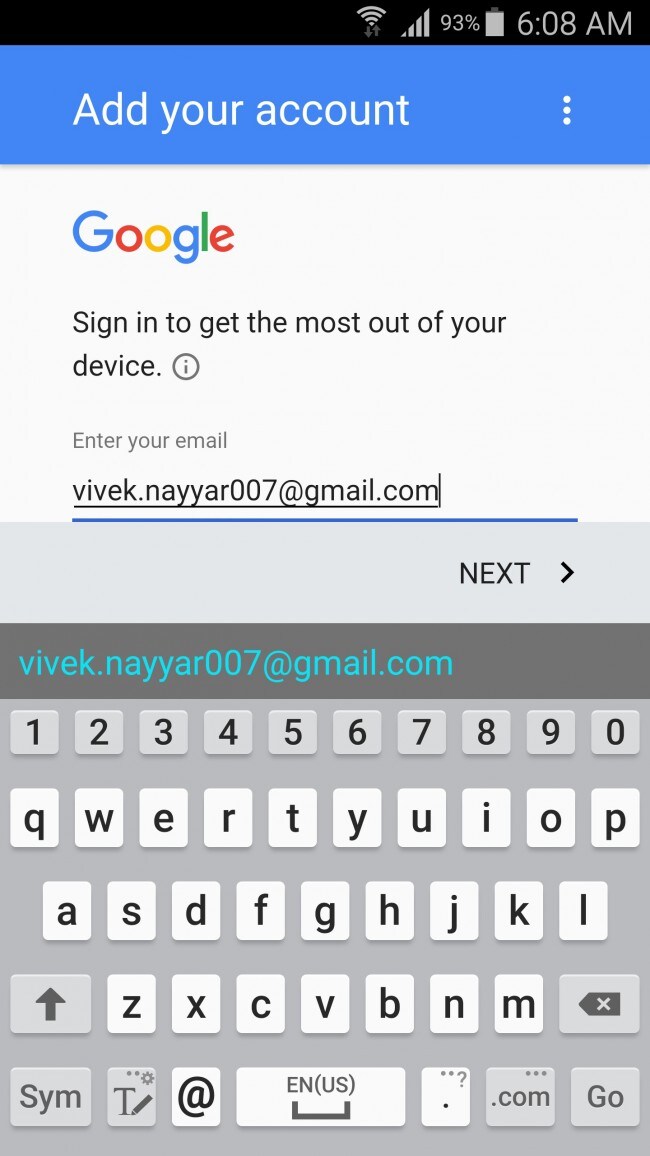
7. On the Add your account window, in the Enter your email field, type your Gmail account.
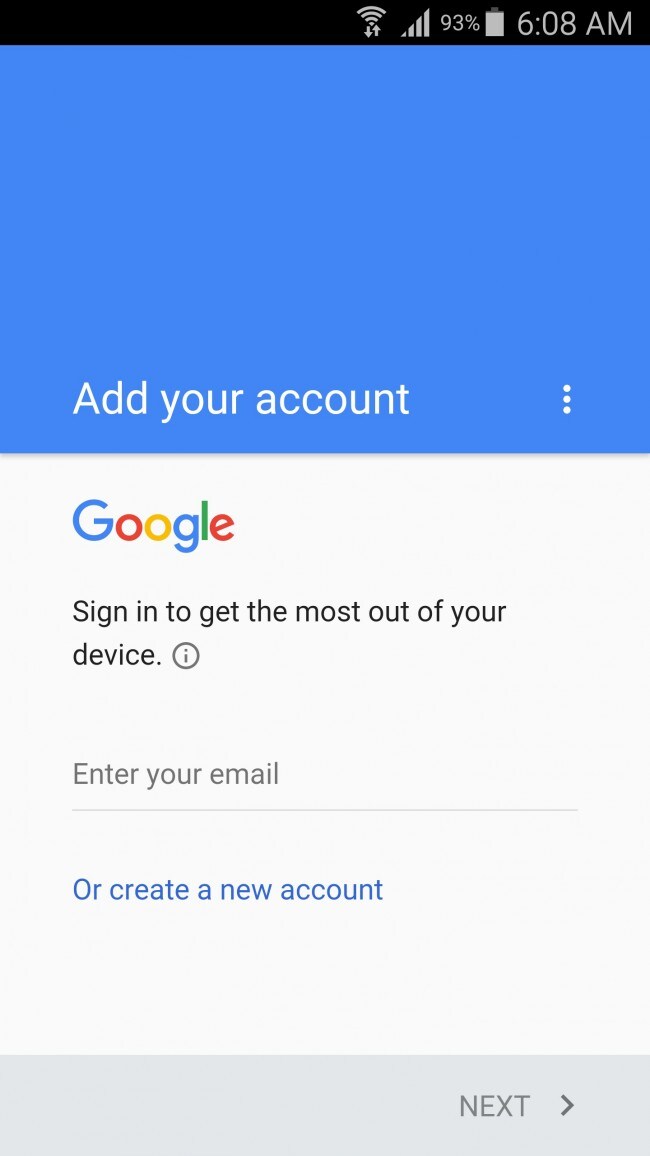
8. Tap NEXT to proceed.
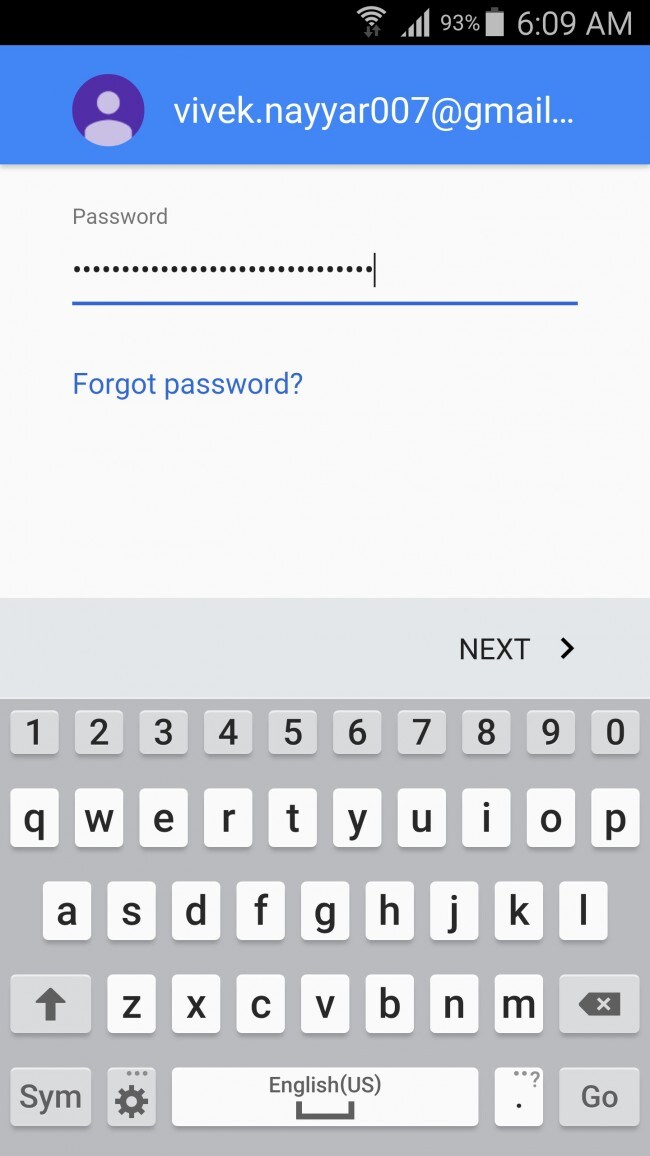
9. In the Password field on the next window, type the password for your Gmail account, and tap NEXT.
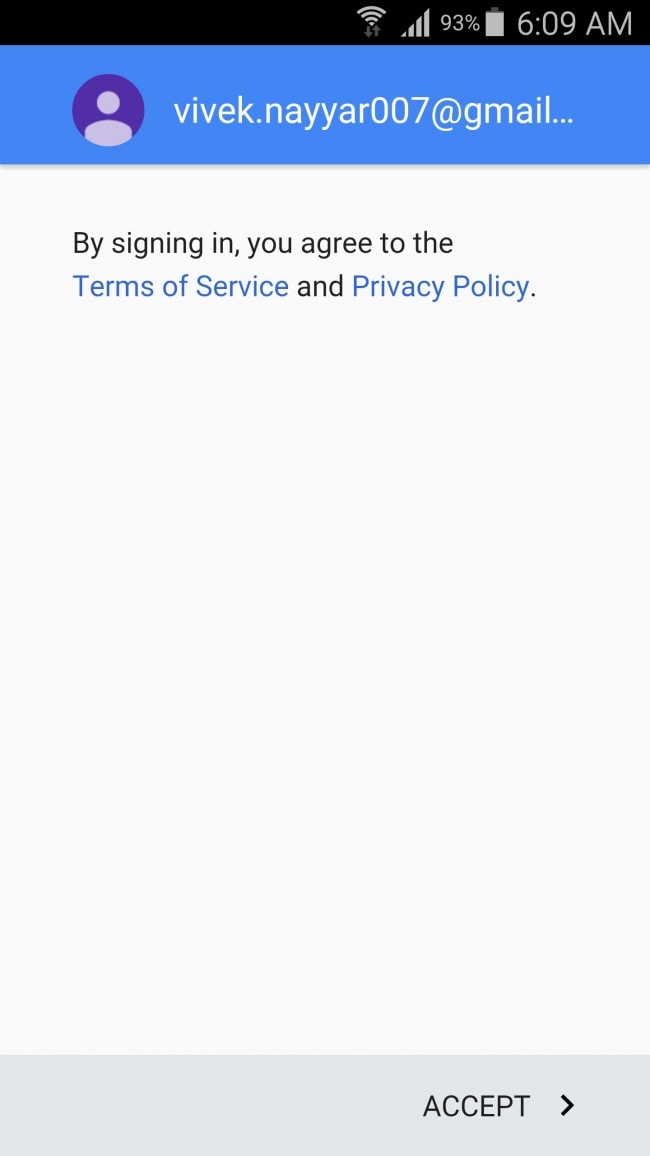
10. On the next window, tap ACCEPT.
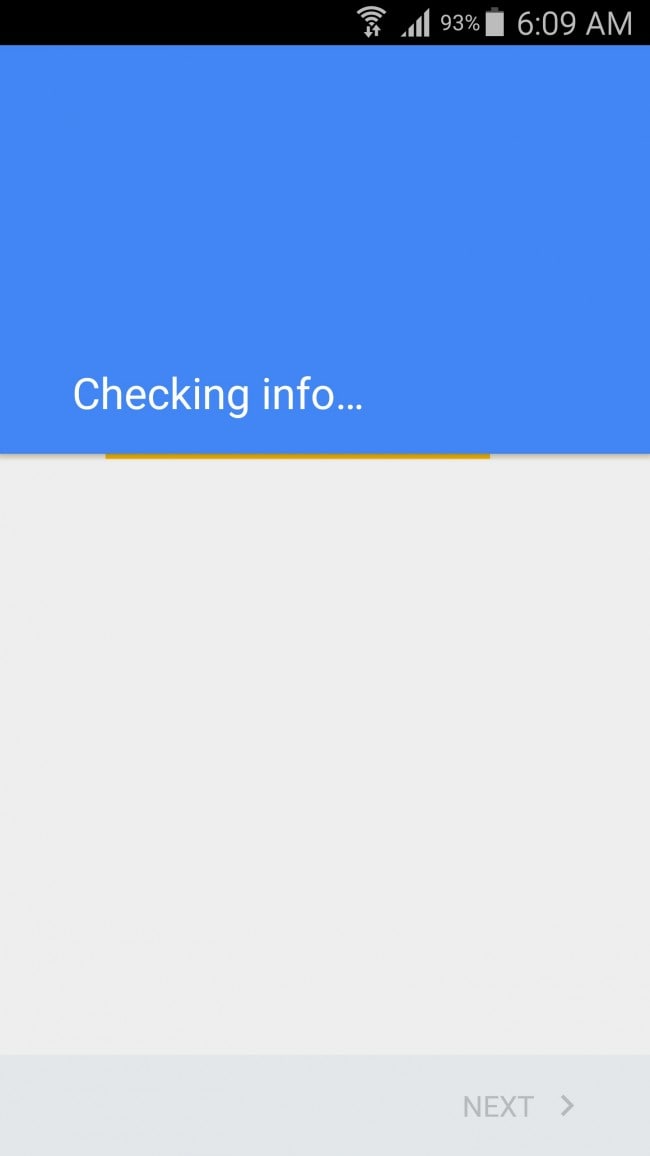
11. Wait until Android checks and verifies the provided information.
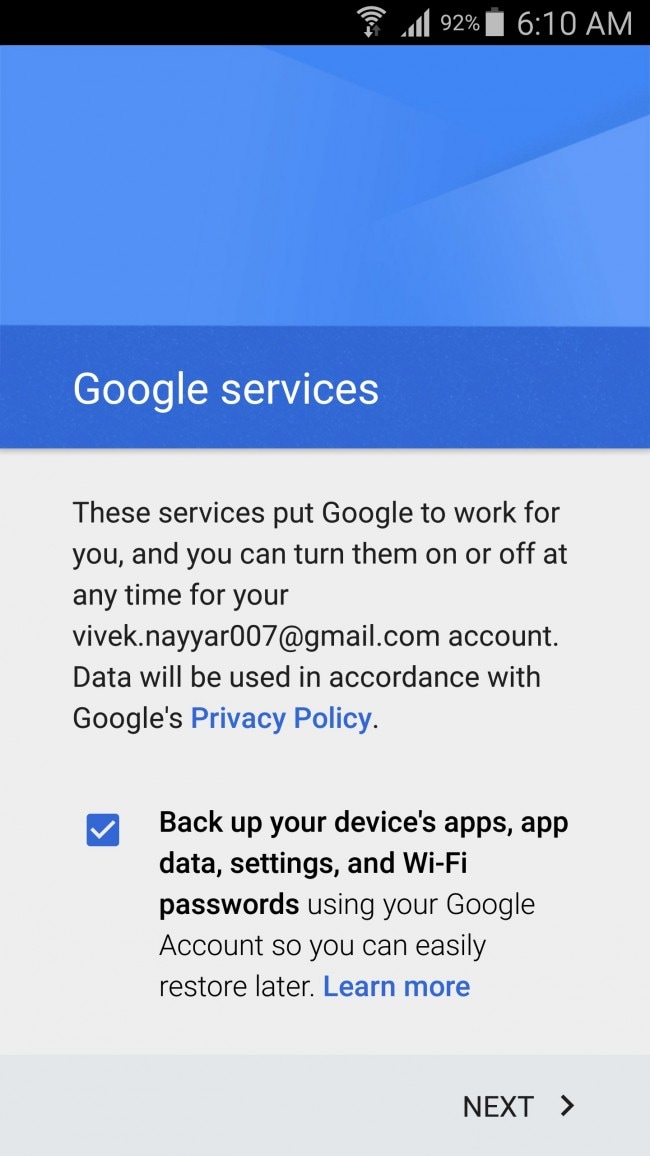
12. On the Google services window, check or uncheck the available checkbox as needed, and tap NEXT to continue.
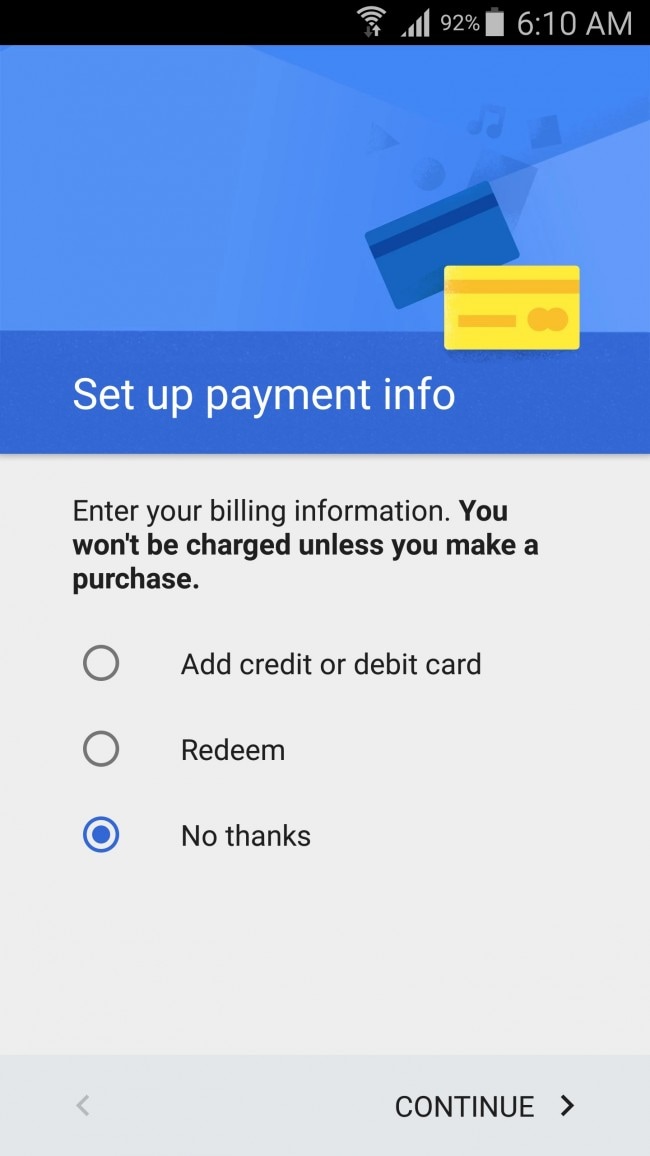
13. On the Set up payment info window, choose your preferred radio button and tap CONTINUE.
14. Once the account is added, back on the Accounts window, tap Google.
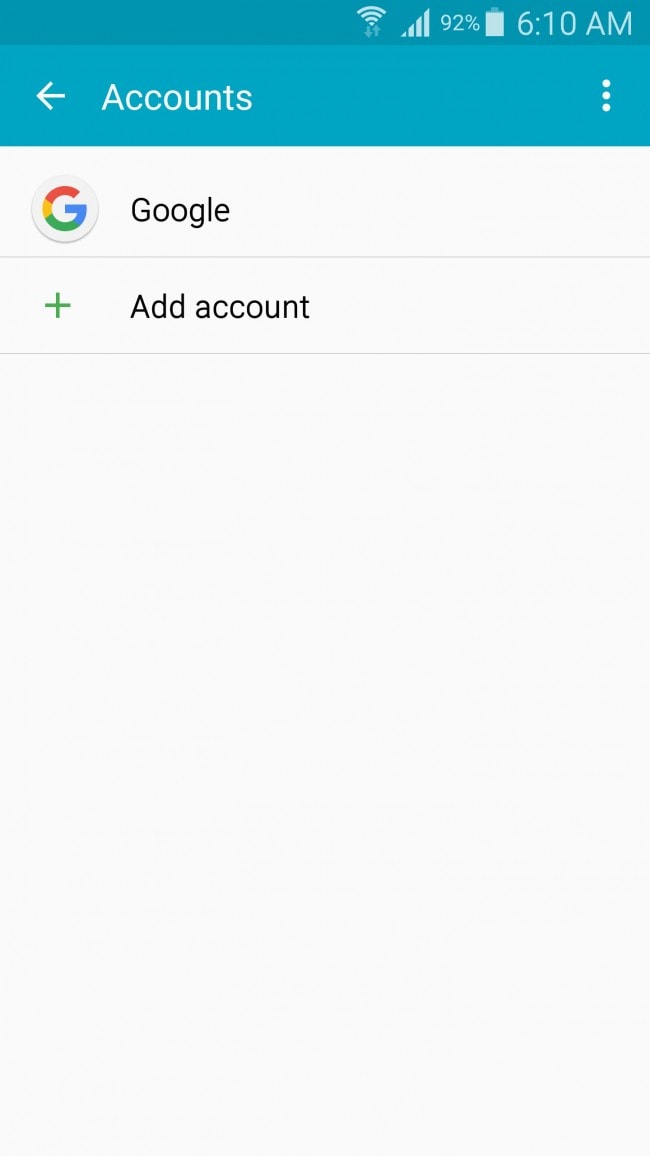
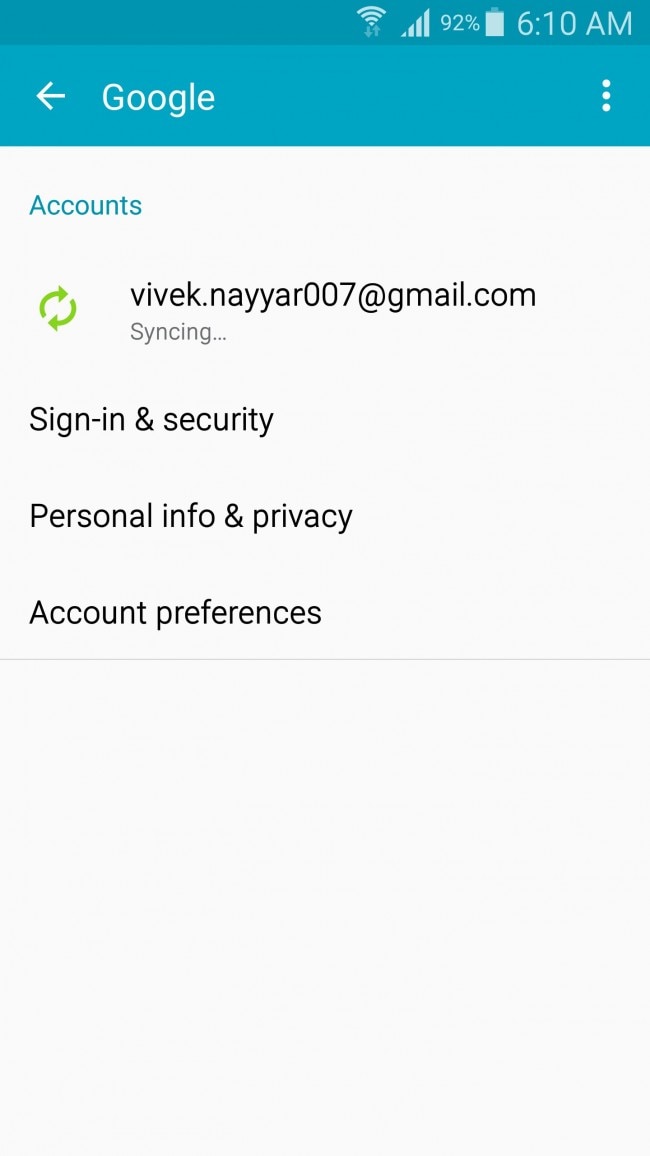
15. On the Google window, below the added email address, verify that the current status is Syncing.
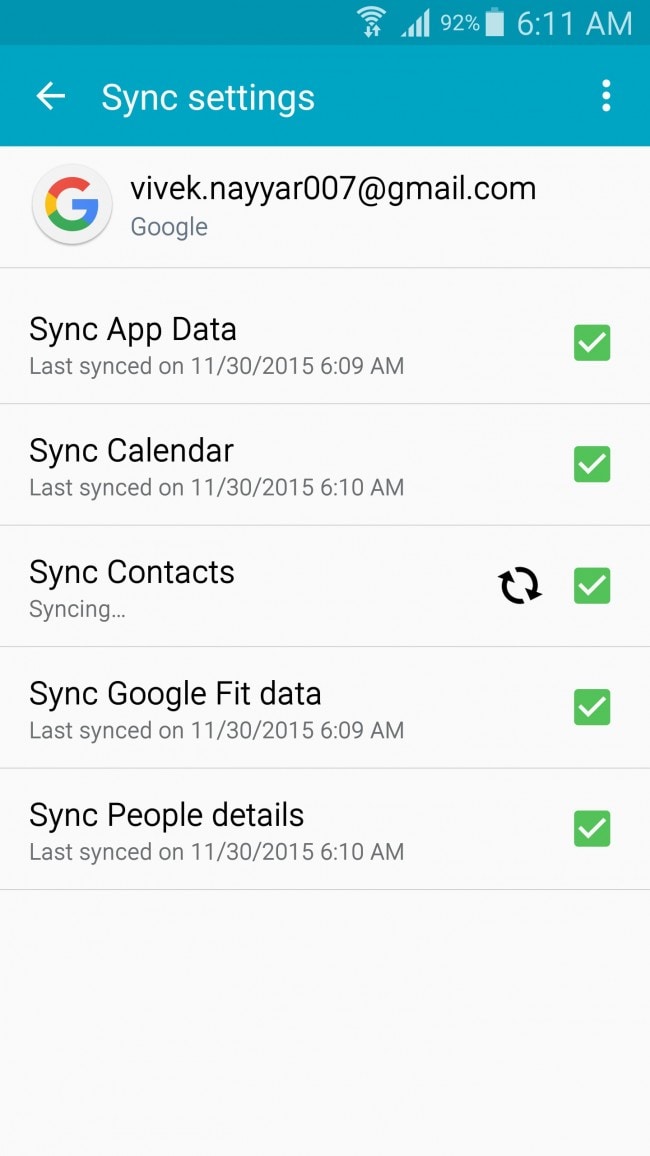
16. To confirm, you can tap the email address, and on the next window, ensure that all the Sync checkboxes are checked.
Note: This makes sure that all your Android data is automatically synced with the Google server on regular basis.
Part 3. How to Back Up Android Emails
Normally, as soon as you associate your Gmail account to your Android phone and leave the syncing enabled, all the emails that your Gmail account has are replicated accordingly, and you can see them right on your smartphone/tablet.
If the syncing is turned off, you can enable it by going through the steps given below:
1. Power on your Android smartphone/tablet.
2. Open the Apps Drawer.
3. Tab Settings.
4. From the Settings window, from under the Personalization section, tap Accounts.
5. On the Accounts window, tap Google.
6. On the next window, tap your email account from the top.
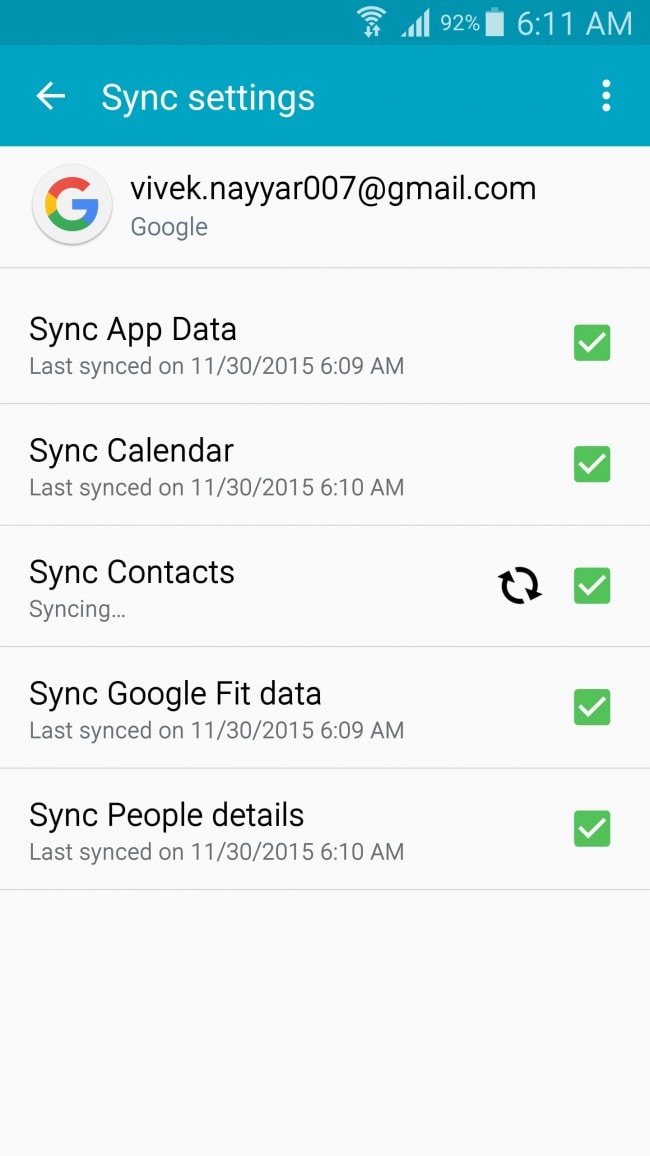
7. Once the next window opens, check all the available checkboxes representing the type of data to be synced.
8. Wait until your data is synced successfully.
Note: Regardless of the syncing status on your smartphone/tablet, your emails always remain saved on your email account unless you delete them manually. That being said, even if your email account gets unassociated with your Android device, your emails remain intact.
Backing up your Android data and restoring it whenever needed can be a hassle-free process provided you are well-aware of the proper tools and know how to use them.

