How to Enable and Disable automatic App updates on Android
Part 1: Apps and its excellent applications on Android smartphones.
In the information technology era at present, smartphones definitely have become a must - have item for every single person in the world. The use of smartphones has not been limited for just calling and responding as well as texting, but they are also capable performing unbelievably wonderful tasks that were just far beyond human's imaginations in the past.
In order to come up with the huge and impressive demands of the world's users, a number of companies have tried their best to innovate and introduce the finest brands of smartphones, along with a plenty of compatible operating system. And Android - in the last few years, has proved to be a trust - worthy, reliable and free - risk tool for smartphones' avid fans to make use of.
A key factor that results in the success of each smartphone and its operating system is the apps that come along. Apps stand for applications - which have the similar functions as softwares in the computer. Plenty of apps are used in the process of using Android smartphones in order to offer their customers the best potential form of information, entertainment, work form as well as any other related things.
Usually, an app is innovated and developed months by months, let alone years after years. It is a matter of fact the Android apps update is definitely a need for all the loyal users who wish to make use of the latest versions. But having Android apps update frequently is something that not all the users know how to tackle.
To the surprise of the majority of Android's users, there is always a feature that enables Android automatic updates. With a certain knowledge of how to use it, people can easily and automatically updates apps on their Android devices.
Part 2: How to enable the automatic app updates on Android.
Step 1 From the main screen or menu of your Android smartphones or tablets, swipe or roll through all of the icons to search for the Google Play Store icon. Tap on it to open the feature.
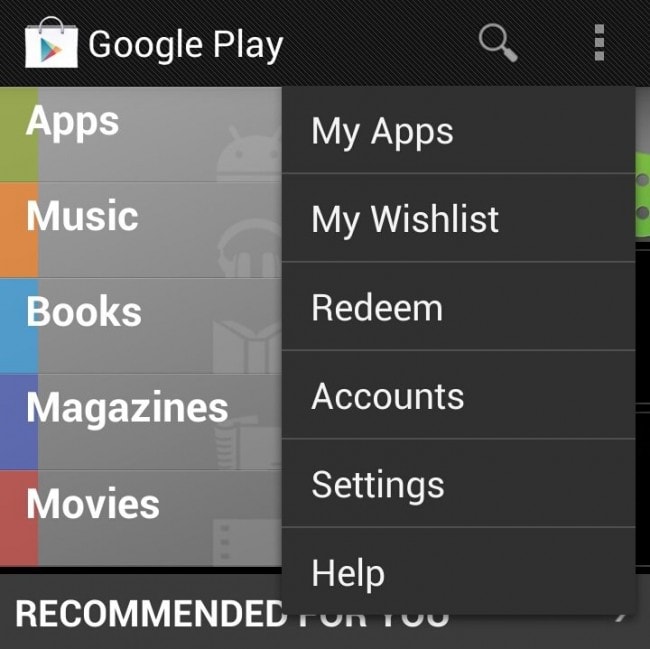
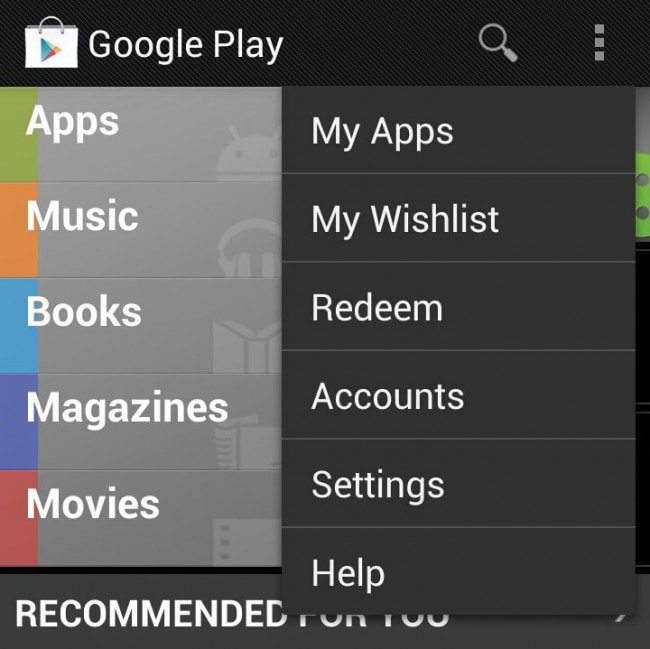
Step 2 Once you have chosen the Google Play Store, a brand new screen will pop up. On the right side of your screen, on the upper part, you will see a three dot option. It is the menu button. Tap on it. A long list of choices will appear, and on the fifth selection, tap on Settings bar to choose it.

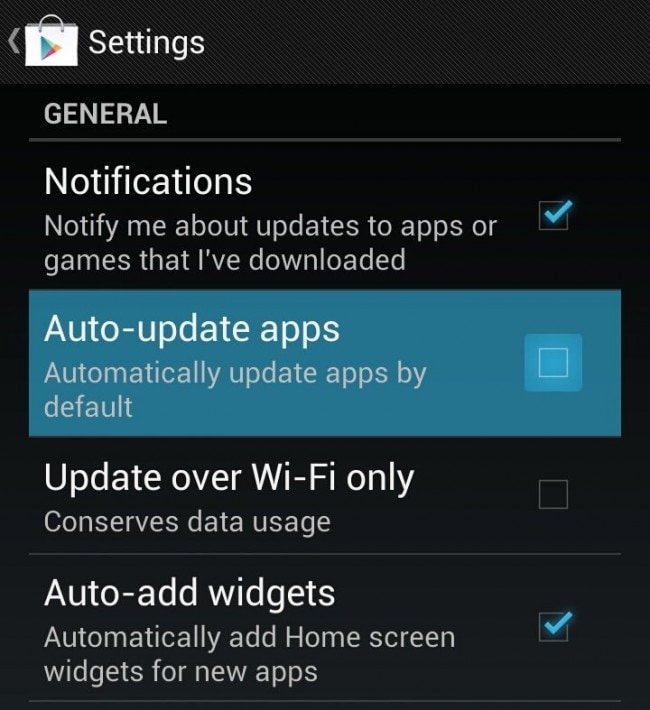
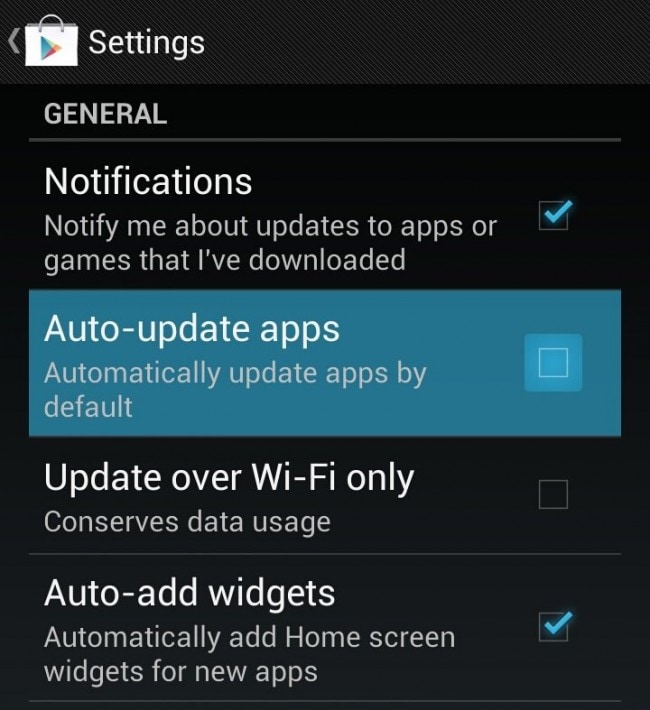
Step 3 The moment you have successfully performed the previous step, you will then see a new window pops up. Under the General headline, just simply put a tick on the box next to the lines: "Auto - update apps".

Step 4 Make sure everything is in your control one last time, and then you will see the difference. Now that every moment there is a new version or update of your Android apps, it will auto update apps for you immediately, or at least, inform you with a message about the updates.
Part 3: How to turn off the automatic app updates on Android.
Step 1 Open the main menu from your home screen of your Android devices. Look through all the menus and icons until you have found the Google Play Store app. Select that choice to begin the work.
Step 2 As soon as you have done with the selection, you will notice a new window's appearance. On the up, right side of the screen, a three square dot icon will be there for you to tap on. It is also called the Menu option. In the dropdown menu that appears, tap on the Settings option to choose it.

Step 3 Once you have chosen to open the Settings menu, you will see a plenty of new choices. Under the headline that is entitled General, you will see a number of options and spare boxes come along. In the second bar, you shall notice there is a blue check on the box next to the sentence "Auto - update apps". Tap on that box once again to remove it. Save your settings.

Step 4 Once you have done with all these steps above, your settings will be back to original. You will no longer have Android automatically apps updates.
Part 4: Tips related to Android apps
Although the apps on your Android smartphones or tablets are undoubtedly efficient in helping you with a lot of things, the biggest drawback of these apps is absolutely its notifications. These notifications can vary from the useful ones, such as new apps updates, to the rubbish advertisements that really get on your nerves. All you have to do in this situation is to turn off the notification feature. This task will also prevent them from using up your battery for nothing. So below are the steps you have to follow in order to stop this annoying problem. First, wait and grasp the first notification that you can see. Then tap on it and hold the home button for a few seconds. To your surprise, a new box will pop up in the screen. Tap on the option App info, you will then see a list of all the available choices. Uncheck the box next to the line Show notifications. Then confirm OK one last time to finish it.
When you first purchased your Android smartphones or tablets, there will be a number of apps that have been set default. If you want to perform any changes, follow these steps. First, open the Settings menu from your main screen. In the dropdown menu that pops up, swipe down and then tap on the Apps option to open it. Swipe through the right to see the All option. Then in all the apps presented, select the apps that you would like to remove as default ones. Then finally tap on the Clear default blue bar to confirm your choice.
Android Phone Manager - One Stop Solution to Manage Android Phone
- Backup your music, photos, videos, contacts, SMS etc. to computer and restore them easily
- Manage, export&import your Contacts and SMS, deduplicate Contacts, reply SMS with computer
- One-click Root - root your Android phones/tablets to take full control of your device.
- Phone to Phone Transfer - transfer music, photos, videos, contacts, SMS between two mobiles ( both Android and iPhone are supported)
- App Manager - Install, uninstall, import or backup Apps in batch
- Gif Maker - create Gif from photos, motion photos, videos
- iTunes Manager - Sync iTunes Music to Android or transfer music from Android to iTunes
- Fully compatible with 3000+ Android devices (Android 2.2 - Android 8.0) from Samsung, LG, HTC, Huawei, Motorola, Sony etc.

