How to Create Custom iPhone Ringtones Using iTunes 12
There is something that Android devices have over iOS devices- it is easier to create a custom ringtone for Android devices. Custom ringtones are cool to have although they are not very easy to create custom iPhone ringtongs. It is however not impossible as we shall see very shortly.
The new iTunes 12 has however simplified the process. It comes with a lot more options as compared to its predecessor with a line of icons for music, TV, Music audio-books and Apps all contained along the top left of the navigation bar. It does however retain some of the practical aspects of iTunes that make it easy for users to make ringtones and alerts for iPhones and iPads. This guide will show you how to use iTunes 12 to make Custom Ringtones and sync them to your iPhone or iPad.
To create a custom ringtone, you will need to have installed iTunes 12 on your Windows or Mac and then follow the simple steps below.
Step 1 Launch iTunes 12 on your Windows and Mac.
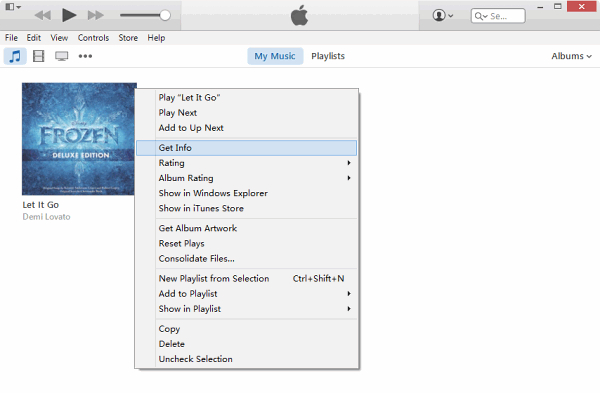
Step 2 Right click on a song and then select “Get info” from the options provided to view the song properties. If you are using a Mac press Ctrl and click the mouse to select “Get info”. If there are no songs in the library, you can click “File-> “Add File to Library” to add some music to iTunes 12.
Step 3 In the popup window that appears select the “Options” and fill in the “Start time” and “Stop time” of the custom ringtone you want to create. This is basically where you choose how the length of your ringtone.
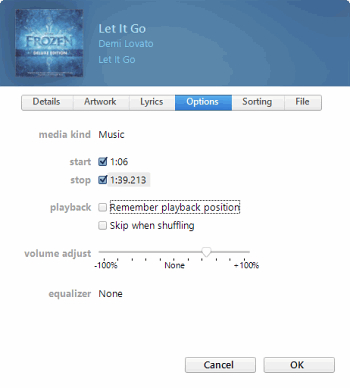
For better quality, make sure that the ringtone is no longer than 40 seconds and text alerts are no longer than 2-5 seconds.
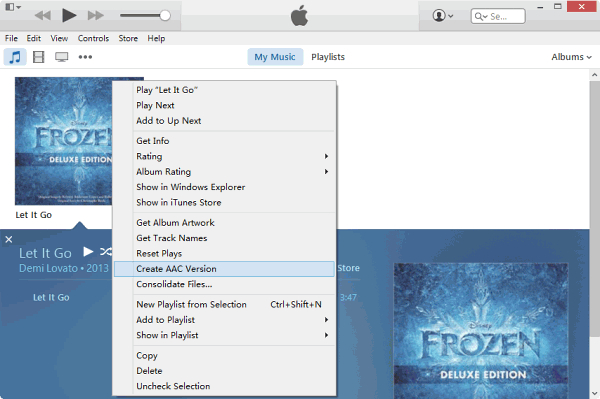
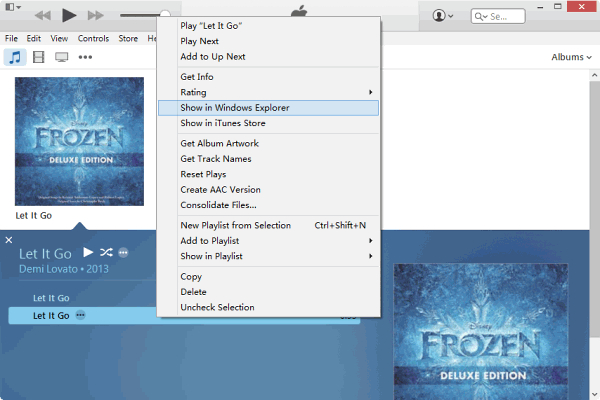
Step 4 Next, you need to right click on the song and select “Create ACC version”.
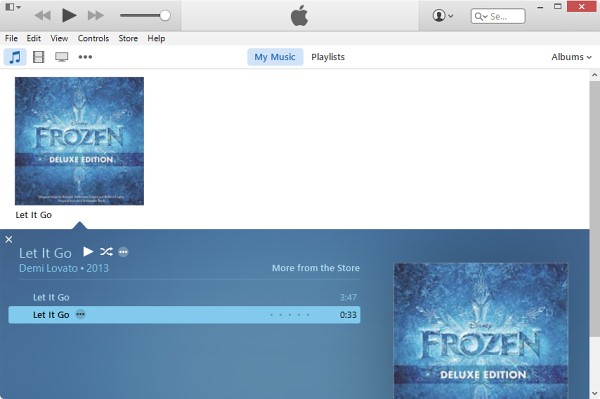
Step 5 iTunes will automatically extract the portion of the song you specified in step 3 which will appear in the iTunes Music Library.
Step 6 Now, let’s locate the AAC file. For windows right click the mouse and then select “Show in Windows Explorer” to locate the file that will now have a .m4a extension.
If you are on a Mac press Ctrl and then click to select “Show in Folder” to locate the file.
Once it is located rename the .m4a extension to .m4r extension. For mac users the process will be as simple as just renaming the file.
For Windows especially Widows 7 and 8, file extension will not be visible until you unhide extensions for the known file types. You can do this by clicking on “View” on the top toolbar within File Explorer and select file extension.
Step7 The next step is to add the newly renamed file to .m4r file to iTunes. Within iTunes, move to “Tones” section and then click on “File > Add File to Library” to add the .m4r file to iTunes. The ringtone will then be added to the “Tones” library in iTunes. You can now sync it to your iPhone and use it as a ringtone or text tone. Sync your iPhone with “Sync Tones” and your new ringtone will be on your iPhone as well.
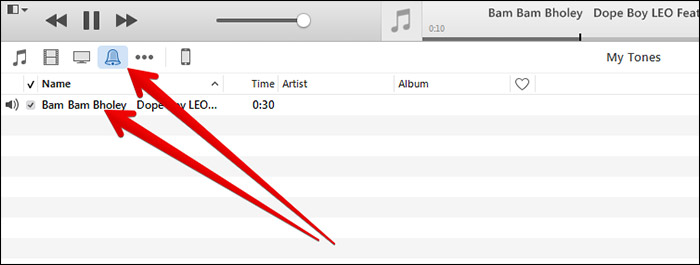
And that’s it, you have created a custom ringtone. You can do this with just about any song you have on your library and create yourself a whole set of custom ringtones.
Wondershare TunesGo - Phone Manager

- Transfer between iOS/Android devices directly
- Transfer audio and video from iDevice to iTunes and PC
- Transfer files from Android device to iTunes and PC
- Make any photos or video PC to GIF images
- Delete photos/videos by batch with a single click
- De-duplicate the repeated contacts
- Selectively transfer exclusive files
- Fix & optimize ID3 tags,covers,song information
- Export & Backup contact, text messages, MMS
- Transfer music, photos without iTunes restrictions
- Perfectly backup/restore iTunes library
