How to Transfer All Photos from iPhone to PC
People love taking photos on their iPhones; these capture moments of fun, adventure, and other precious memories which nobody would love to lose. Similarly, the photos take up a lot of space on your iPhone, and it is best to move them to your PC, which has a larger storage capacity, to free up more memory to be used to take more photos. Backing up your photos on your PC is the best way to keep them safe and also freeing up memory. There are several ways in which you can do this and you will learn how to transfer all photos from iPhone to PC in this guide.
TunesGo by Wondershare is a versatile mobile phone management application, which allows you to manage all aspects of your phone from one place. This tool is easy to use and safe so you do not end up bricking your iPhone as you try to transfer files to your PC or other iPhone. You can use it to root your iPhone, streamline your iCloud and iTunes accounts, Backup all data on your device, and so much more. This tool allows you to perform these functions at a click of your mouse, which makes it so convenient. When you think about how to transfer all photos from iPhone to PC, you should look no further; TunesGo is all that you need.
Wondershare TunesGo - iPhone Transfer Tool

- No iTunes needed
- Transfer music, photos without iTunes restrictions
- One-click backup iPhone/iPad/iPod to PC
- Perfectly backup/restore iTunes library
- Transfer between iOS/Android devices directly
- Transfer audio/video from Device to iTunes and PC
- Make any photos or video PC to GIF images
- Delete photos/videos by batch with a single click
- De-duplicate the repeated contacts
- Selectively transfer exclusive files
- Fix optimize ID3 tags,covers,song information
- Fully compatible with iOS 11
How to Transfer All Photos from iPhone to PC using iPhone Transfer
The importance of the precious memories that you store in your iPhone in the form of photos cannot be understated. However, you need to protect these memories by storing these photos on your computer. This will also free up more space for you to be able to take more photos in the future. Here is how to transfer photos from iPhone to PC TunesGo from Wondershare with just a simple click of a button.
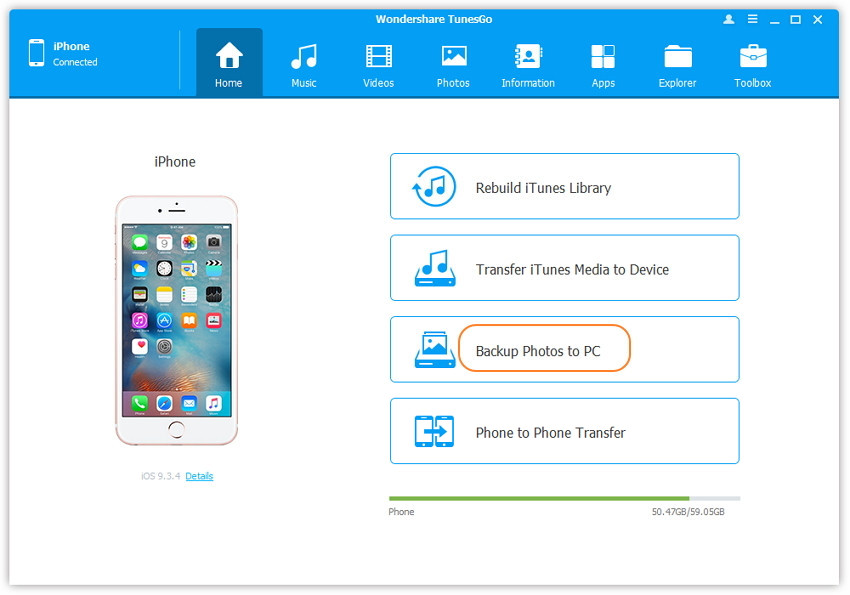
Step 1 Start TunesGo iPhone Photos Transfer tool and connect your iPhone to your PC or MAC. Wait for it to be recognized.
Step 2 Create a backup of your photos on your computer.
On the main interface, click on the “Backup Photos to PC” icon and you will be presented with a pop-up window. On this window, scroll down and select the destination folder where you will send the photos. Once done, click on “OK” and the photos will be transferred. When using a Mac, simply click “Backup Photos to MAC”.

You will get a dialogue box where you can click “Open Folder” to see if your photos appear in the destination folder that you created. Alternatively, you can click on “Finish” to close the dialogue box.
How to Import All Photos from iPhone to PC using the Import Method
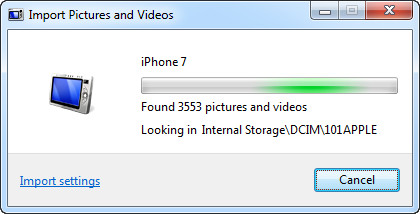
In case you have too many photos on your iPhone, it could take you hours to browse through them using the above method. Luckily, you can import all pictures in your iPhone using the Windows Import option.
When you connect your iPhone to you computer, select the “Import Pictures and Videos – using Windows Explorer” Option. Your pictures will then be imported to windows. This method does not offer you the flexibility of selecting which files should be imported, but is extremely useful for people who may have thousands of photos in the iPhones.

When you want a simple and safe way of transferring your photos from your iPhone to your computer, Wondershare TunesGo offers you the safest and easiest channels to use. With just a simple click of a button, you get to move your pictures immaculately. This tool has a lot of other features that you can use to manage the data on your iPhone. Apart from photos, you can backup your videos, messages, contacts, and so much more. If you have found this guide useful, share it with your friends and family.
