How to Transfer Photos from iPhone X to Windows (7/8/9/10) PC
iPhone X has been the talk of the town ever since Apple made it official that it will launched to mark the 10th anniversary of iPhone. 12th September, 2017 is the official date for its launch, and we, just like you, cannot wait to see the final product. To begin with, iPhone X is bigger than iPhone 7 but a bit smaller than iPhone 7 Plus, With OLED display, facial recognition and have glass body.
With all the changes introduced by Apple in the new iPhone X, there are some changes which are being brought about in the specs too. Need to mention that, iPhone X will be launched with three different specifications, each model being different from the other in terms of the size.

iPhone X has the OLED display edge to edge screen with 750by 1330 pixels. People have been speculating the size of a 4.7 inches iPhone and new iPhone to be the same, but the new iPhone X will have a display screen of 5.X inches. To our dismay, Apple has gone ahead and inserted a blob like bezel at the top of the screen which reduces the usable screen area to 5.15 inches. This bezel will house the front camera, sensors and speaker along with the flashlight. of course, these are essential components in a phone and cannot be done away with, but if the iPhone had an undisrupted edge-to-edge screen, users would have appreciated it a little more than now.
With so much excitement already building up before the release of iPhone and iOS 11, people are contemplating about the new iPhone X’s performance levels as well. In order to increase the performance graph of iPhone, Apple has introduced system-on-chip (SoC) as a part of the new iPhone X, with A11 processor. Which altogether going to enhance the workability and performance of iPhone X.
If you remember, the dual-lens feature was widely used by iPhone 7 Plus users. Well, this time again Apple is going to have this feature embedded to your iPhone X. This feature enables the images optimize with optical image stabilization, where one is wide-angled lens and the other one is telephoto lens. Its selfie camera is equipped with 3D sensing, under which judging the depth of an object with 3D visualization becomes easy and more effective. You can say that this feature will result in real time imaging.
Nowadays, we love to use our phones to captures our moments in format of photos. This is because using a phone to take photos is very handy, indeed. And when the phone is the latest iPhone X, there’s no need to talk about the awesome photos that you can snap with it.
But problem arises when it comes to storing the labor-intensive photos in a stable platform, I mean in a PC. You tend to keep your photos taken with your iPhone in your computer, don’t you? You may find it a bit difficult to do this. Don’t worry as I’m gonna show you how to transfer photos from iPhone X to computer in this blog post.
So, don’t waste your time by making any delay, jump into the main part of this post now.
- Method 1: How to transfer iPhone X photos to PC with iTunes Alternative
- Method 2: Import photos from iPhone X to Windows 7/X/9/10 PC via AutoPlay
- Method 3: Transfer photos from iPhone X to Windows (7/X/9/10) PC through iTunes
Method 1: How to transfer iPhone X photos to PC with iTunes Alternative
Note that you have two options to transfer your photos from the iPhone X to your PC. You can transfer all the photos at a time or do it just by selecting your preferred photos.
Now, I’ll show you both the methods so that you can learn them individually.
Export all photos from iPhone X to Windows (7/X/10) computer
In this part, I’ll show you how to transfer all photos together to your iPad from the iPhone using the 1-click option of Wondershare TunesGo.
Step 1. Launch Wondershare TunesGo and connect the iPhone X to your PC
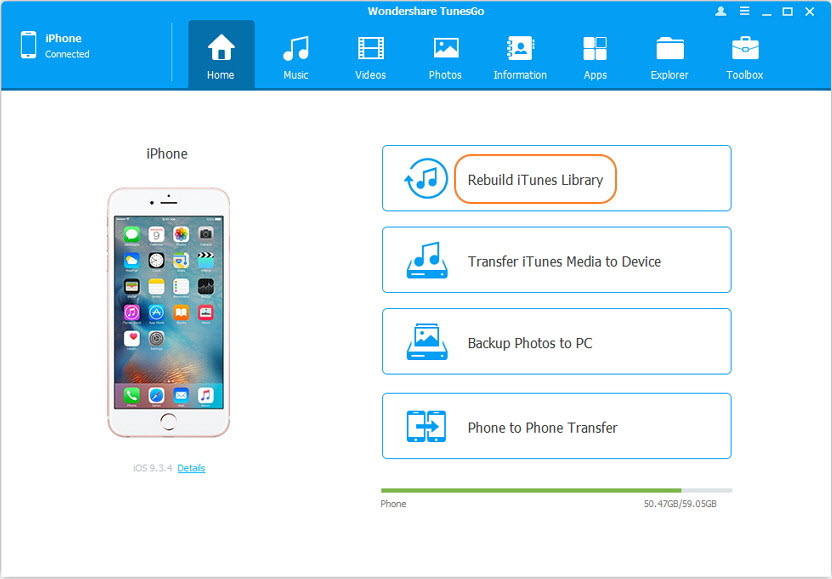
Step 2. Click on the “Backup Photos to PC” button shown at the third position of the main interface of the software.
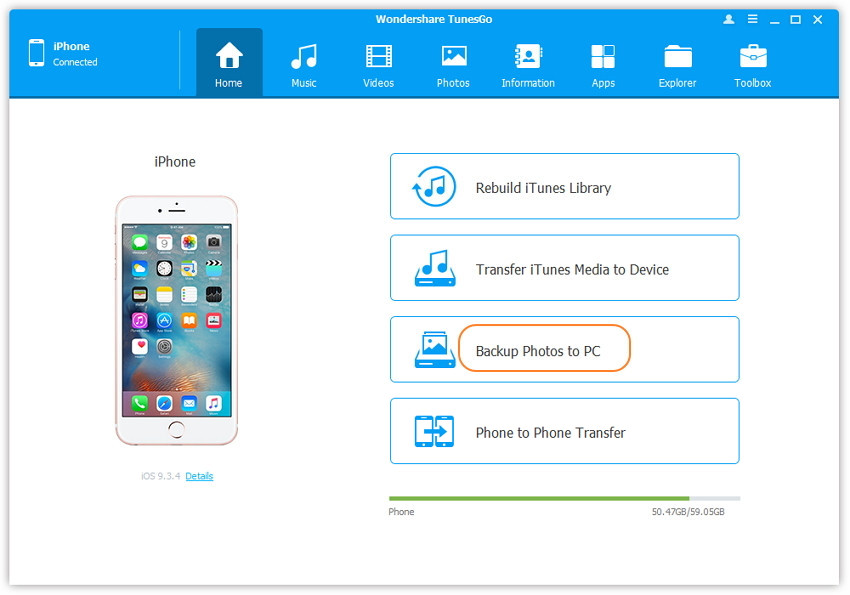
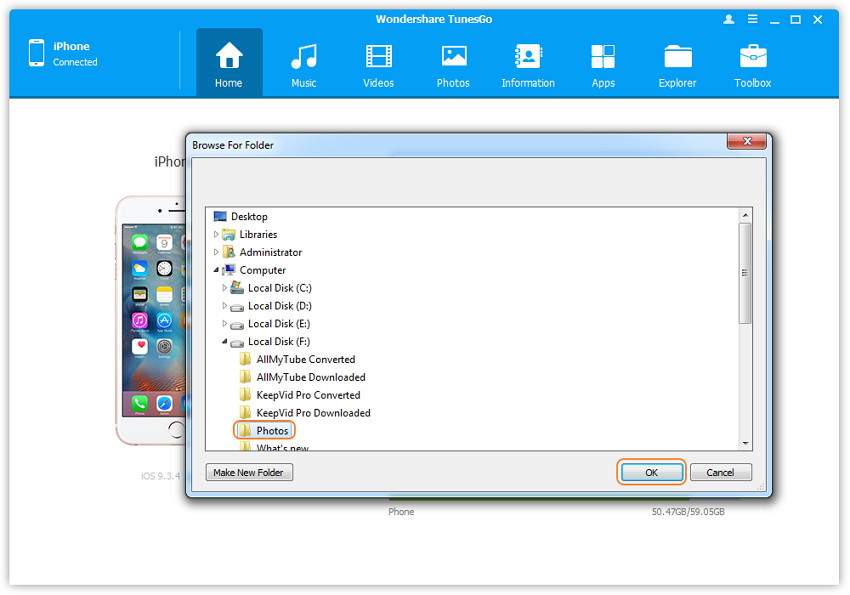
Step 3. Choose your destination frolder on your PC.
Step 4.To export the photos, you can either tap the “Open Finder” or the “Finish” button as per your need.
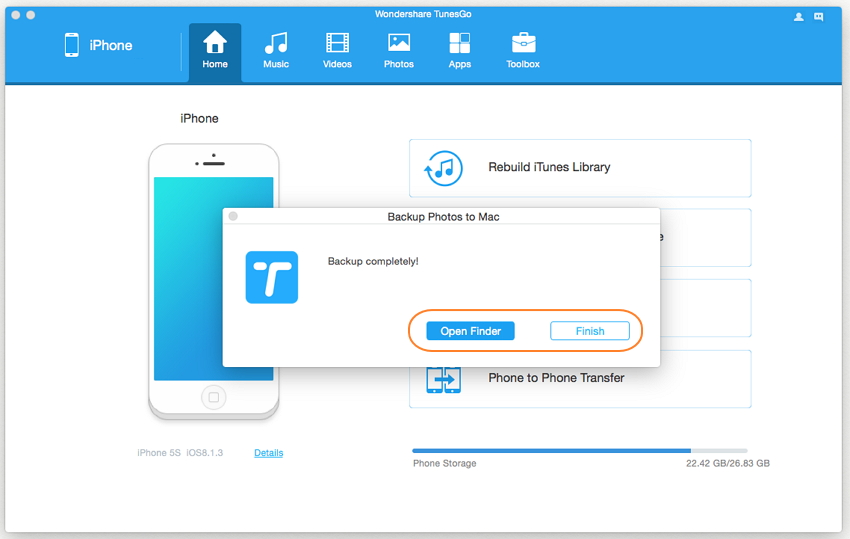
You’ll see that all the photos are in your chosen folder. You can reach out to the folder where you have saved the photos from the file explorer if you ignore the “Open Finder”.
Transfer selective photos from iPhone X to Windows (7/X/10) computer
In this method, you could learn how to transfer photos selectively from your iPhone X to your Win PC.
Step 1. Start Wondershare and connect the iPhone X to your Windows computer
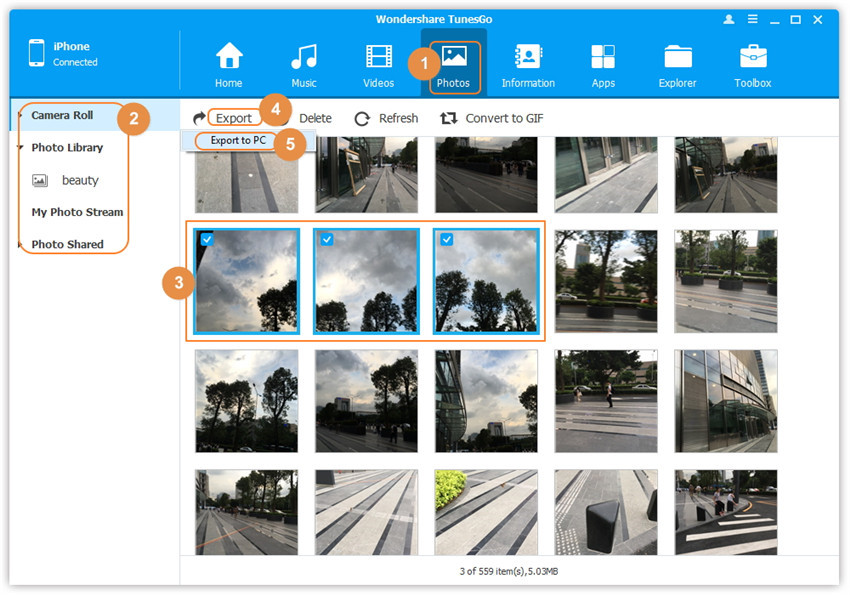
Step 2. Click on the “Photos” option situated on the top bar of the main interface
Step 3. You’ll land the default photo type named Camera Roll. You can select any locations of the photo types as per your requirement.
Step 4. Select the photo (s) that you wanna export.
Step 5. Once your photo selection is complete, click on the “Export” button > Export to PC.
NOTE: By clicking the right button of your mouse on any photo, you can select the option of “Export to PC” too.
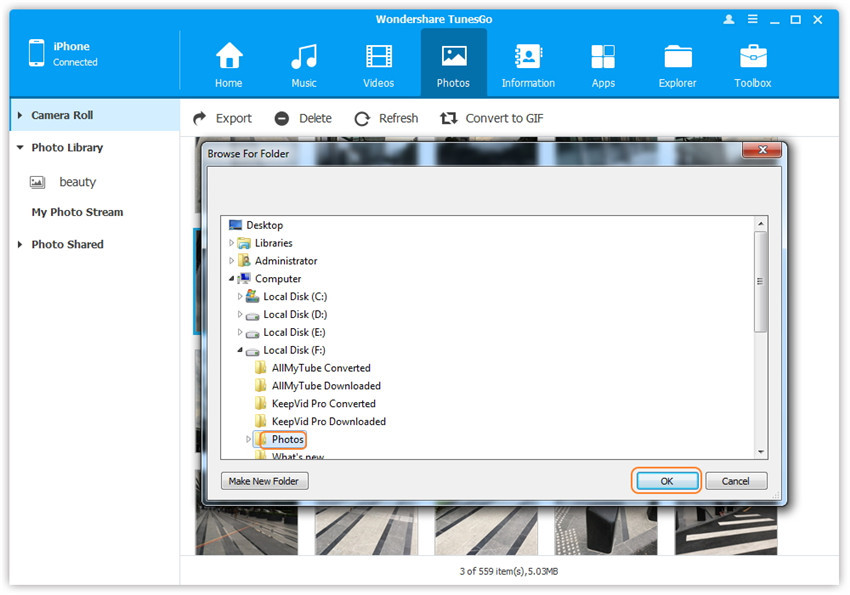
Step 6. browse and choose your preferred folder from the file explorer where the photos will be exported. After that, click on “OK”.
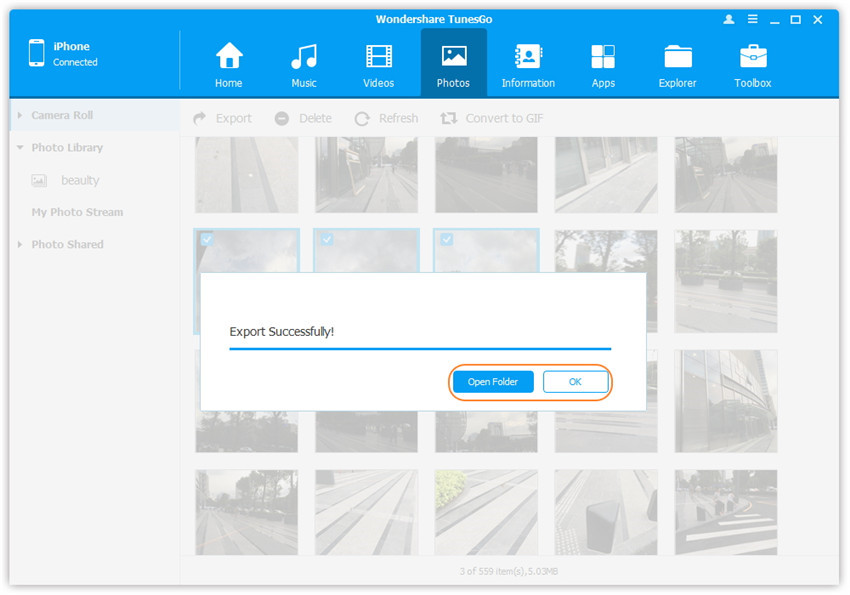
Step 7. Hit the “Open Folder” button to check the exported photos or hit the “OK” to close the dialog box.
Video Tutorial: How to Transfer Music from PC to iPhone X
The Best iTunes ALternative to Manage iPhone X Photos
Transfer Photos from iPhone X to Windows (7/8/10) without iTunes
- Transfer, manage, export/import your music, photos, videos, contacts, SMS, Apps etc.
- Backup your music, photos, videos, contacts, SMS, Apps etc. to computer and restore them easily.
- Phone to Phone Transfer - Transfer everything between two mobiles.
- Highlighted features such as fix iOS/iPod, rebuild iTunes Library, file explorer, ringtone maker.
- Fully compatible with iOS 7, iOS 8, iOS 9, iOS 10, iOS 11 and iPod.
Method 2: Import photos from iPhone X to Windows (7/X/9/10) PC via AutoPlay
You can also import photos from iPhone X to Windows vis AutoPlay. Note that you can only transfer the photos that are stored in Camera Roll.
Step 1. Connect your iPhone to your Windows PC. Don’t run iTunes.
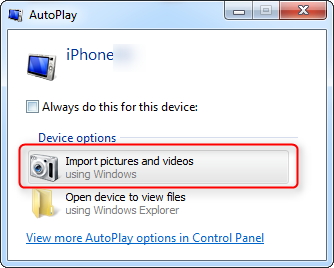
Step 2. You’ll likely to see a pop-up window which will ask your further intension. Wait for a while to see its appearance.
Step 3. Go for “View Content”.
Step 4. From the shown folders, try to pick the folder of photos.
Step 5. Finally, copy the photos on your PC.
So, this is the easy way that you can use to transfer photos from iPhone X to PC.
Method 3: Transfer photos from iPhone X to Windows (7/X/9/10) PC through iTunes
You can also use iTunes to have your iPhone photos on your PC. Now, I’ll show you how to do this.
Step 1. First of all, you have to organize all your photos on your iPhone X. This is to do the process of transferring much more convenient.
Step 2. Connect your iPhone X to your PC and then, launch iTunes.
Step 3.You now have to find the iPhone icon on the menu. You may need to wait to see the icon. Once you find the icon, tap the “Photos” folder. You’ll get the “Photos” button under the settings option.
Step 4. Now, check that there’s an option called “Sync Photos”. You have to click on the button which will start syncing all your photos.
Step 5. After that, you have to go for the “Choose folder…” from the presented drop-down menu.
Step 6. Browse your preferred folder where you want to store the photos.
Step 7. Then, choose the picture folder in order to sync.
Step X. Lastly, tap “Apply” in order to start transferring.
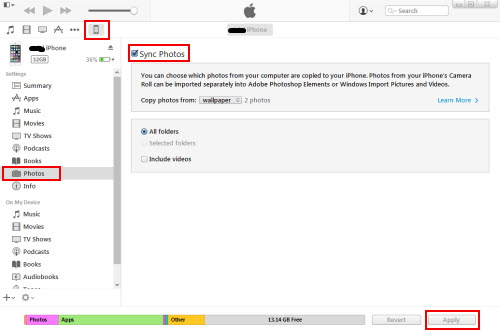
This will take some time and once the transferring is complete, you have successfully saved all your photos on your PC.
So, these are some of the ways of transferring photos from iPhone X to PC.
