Transfer and Manage photos on iPhone 8
It is pretty difficult to manage photos on iPhone 8 especially with ITunes. ITunes is definitely not an effective tool when it comes to managing your pictures on iPhone 8. In most of the cases photos are not synced with iTunes giving you no control to manage them. Most of the iPhone users also struggle with transferring the photos from their iPhone 8 device to PC and deleting photos in bulk on iPhone 8 is really tiresome. That is why it is reason it is difficult to manage photos on iPhone 8 and it is necessary that there should be an effective tool to transfer the photos from iPhone 8 to PC. This article guide will give you information for the effective tools and techniques through which you can manage and transfer your photos on your iPhone 8.
As mentioned earlier it is not perhaps the most convenient way to transfer the photos between iPhone 8 and your PC or any old iPhone old device to iPhone 8 through iTunes. Wondershare TunesGo is a tool that is considered to be best alternative for transferring the data between iPhone 8 and PC or from and old iPhone to new iPhone. With TunesGo you can effectively transfer and manage your Photos, Music, Videos, Messages and much more. It is much effective and easier to use as compared to iTunes because of its user friendly interface and extensively developed functions. If you are looking for a tool that can manage the photos on our iPhone 8 device TunesGo is an alternative you should opt for.
iPhone 8 Transfer Tool
Transfer and Manage photos on iPhone 8 without iTunes
- Transfer, manage, export/import your music, photos, videos, contacts, SMS, Apps etc.
- Backup your music, photos, videos, contacts, SMS, Apps etc. to computer and restore them easily.
- Phone to Phone Transfer - Transfer everything between two mobiles.
- Highlighted features such as fix iOS/iPod, rebuild iTunes Library, file explorer, ringtone maker.
- Fully compatible with iOS 7, iOS 8, iOS 9, iOS 10, iOS 11 and iPod.
- Part 1: Transfer photos between iPhone 8 and PC
- Part 2: Transfer photos from old phone to iPhone 8
- Part 3: Bulk delete photos on iPhone 8
How to transfer photos between iPhone 8 and PC
This part of the article guide focuses on steps through which you can transfer the data from iPhone 8 and PC using TunesGo:
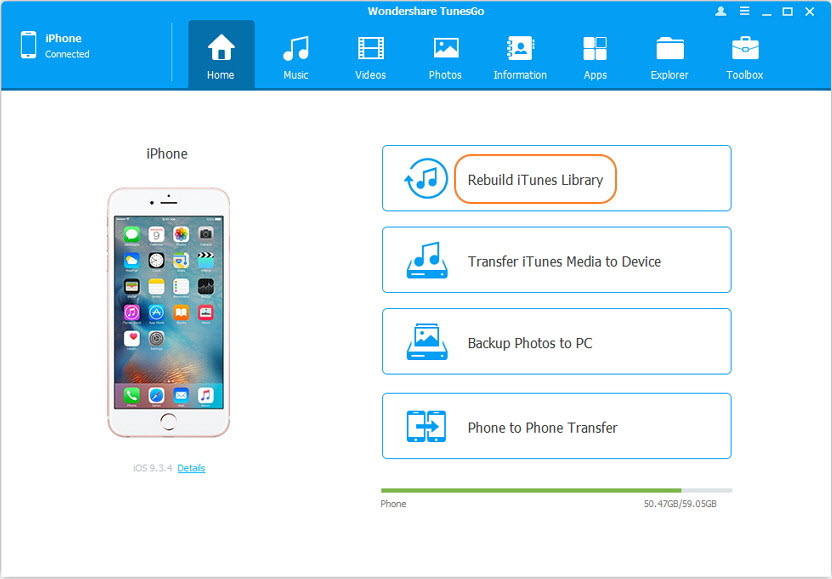
Step 1 The first step includes launching the TunesGo and connecting your iPhone 8 device. As you will connect your device, the iPhone 8 Transfer tool will automatically detect your device and display it on the main window.
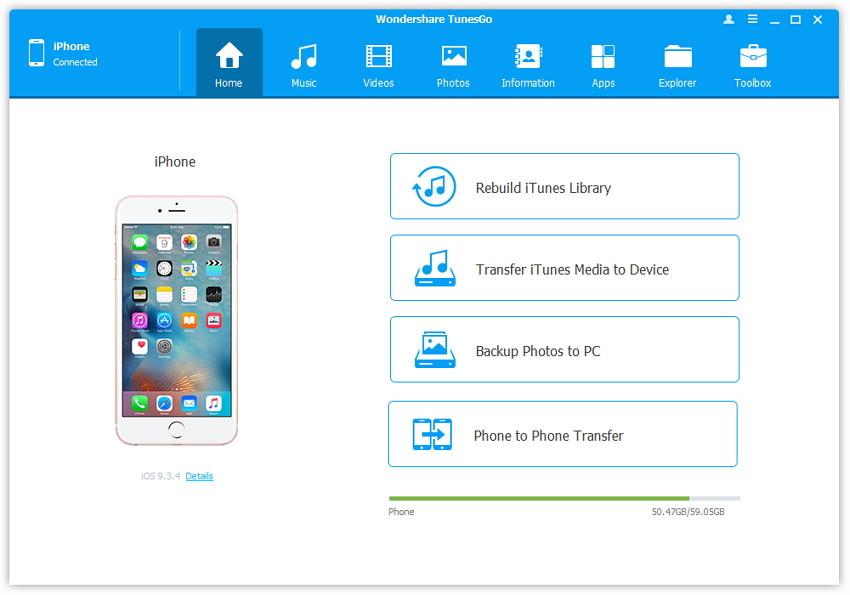
Step 2 Now that your device has been connected successfully, simply click the Photos tab on the top this will direct you to a new window.
Step 3 On the left top of the interface you will have selections for the photos to enter into default camera photos. Simply select Camera Roll your camera photos will be display on the left side of the tab. Simply check the photos that you want to be transferred to your computer and click Export on the tool pane and select Export to PC selection. You can also select the pictures and right click on one of them this will also give you “Export to PC” selection.
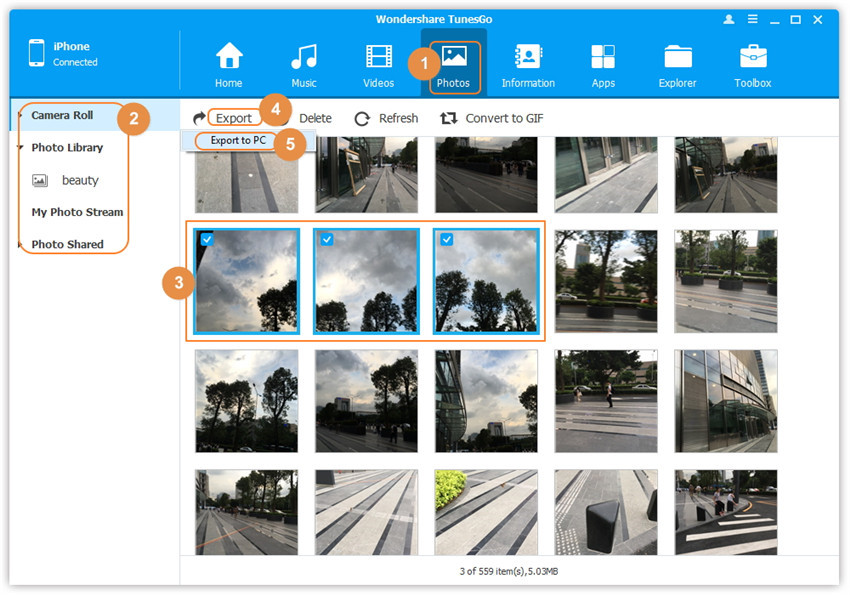
Step 4 You will be asked to specify the target folder where you want the pictures to be transferred simply select the folder in your PC and click ‘ok’ all of your photos will be transferred to your PC.
Transfer photos from PC to iPhone 8
Using TunesGo, you can easily transfer your photos from your PC to your iPhone you need to follow the following steps to ensure transfer.
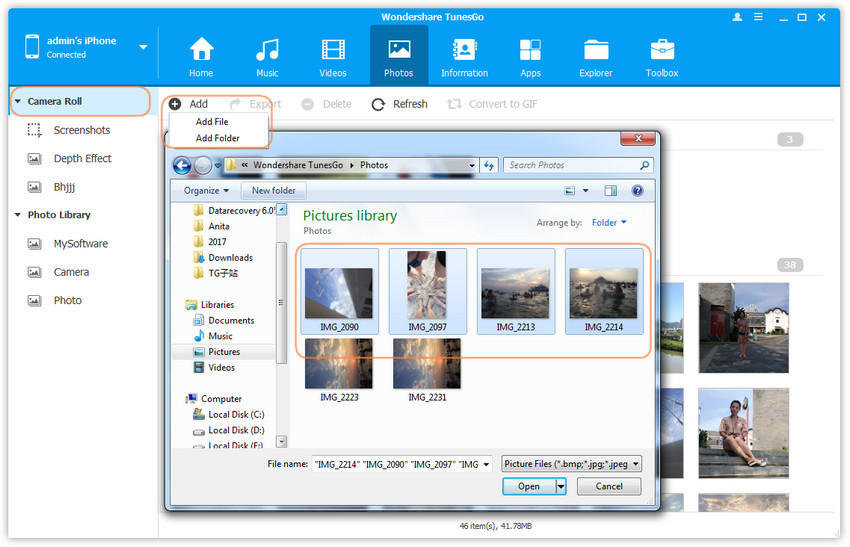
Step 1 Simply click on Photos tab on the top of the main interface and select the folder where you want to add the photos. In this case we selected camera roll.
Step 2 Now that you are in the camera roll folder. You will click the Add button this will give you 2 options either you can add files or you can add the whole folder.
Transfer photos from old phone to iPhone 8
This section of the article focuses on the steps through which you can transfer your photos from an old phone to your new iPhone 8, including old iPhone or Android devices.
Step 1 The first step includes connecting both of your devices to your computer through data cable and launches the Wondershare TunesGo application. TunesGo has ability to connect and detect more than one device at a time, select your source device which in this case would be your old iPhone device.
Step 2 After you have selected your source device you need to click Phone to Phone Transfer in the home tab.
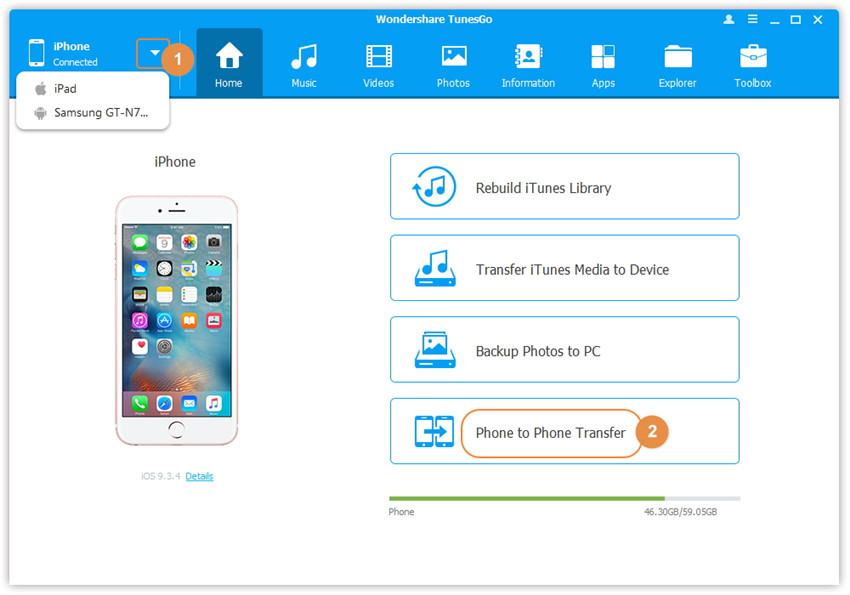
Step 3 The popup window will ask you to specify the target device which in this case would be your new iPhone 8 device.
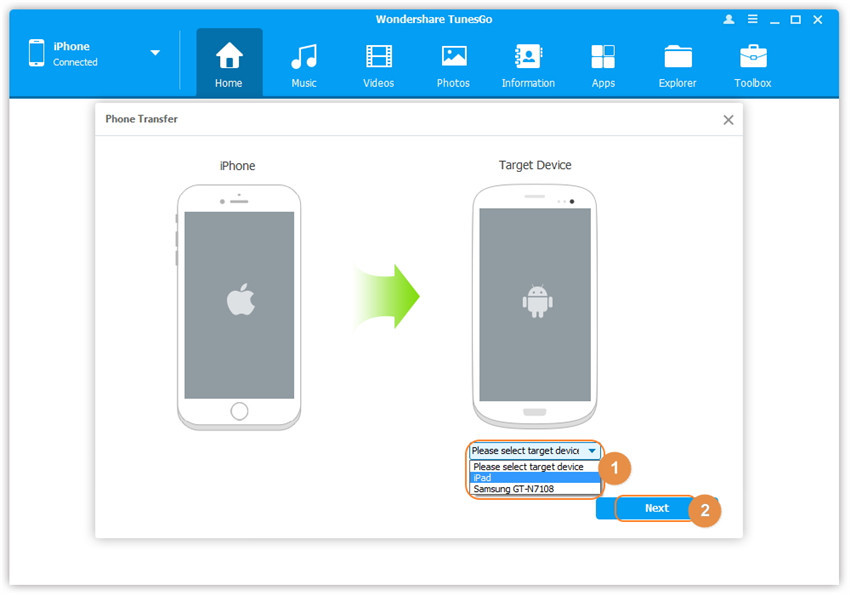
Step 4 After you have specified the target device you will be asked to specify the type of content you want to transfer. Make sure you have selected Photos in this case, since we want our photos to be transferred to new device.
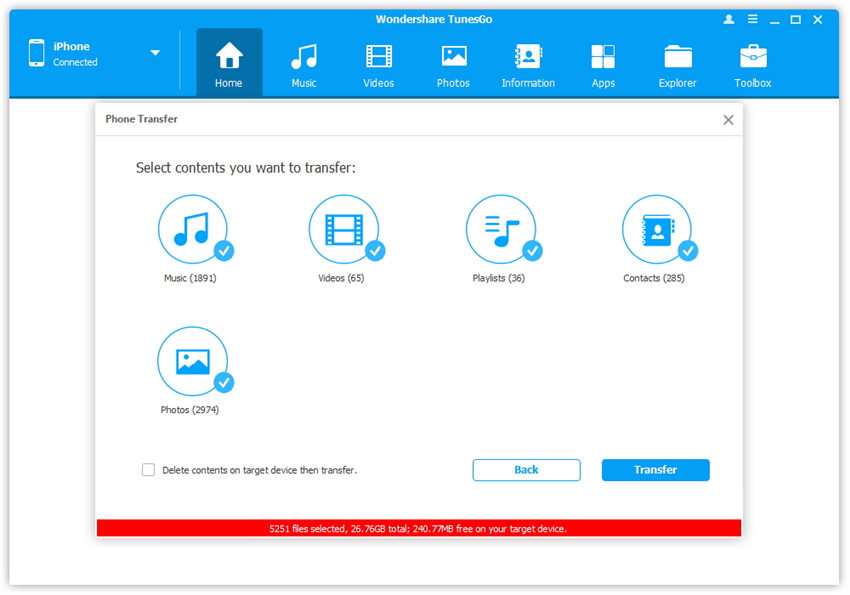
Step 5 After you have selected the data type to be transferred simply click transfer. Your data will be transferred to the new device. You can also delete the existing data on your device before transferring new data. Simply check the delete delete on your target device check box.
How to bulk delete photos on iPhone 8
This section of the article focuses on the steps through which you can delete the photos in bulk from your iPhone 8 using TunesGo.
Step 1 Connect your iPhone 8 with your computer using data cable and launch Wondershare TunesGo. The iPhone Transfer tool will automatically detect your device and display the details in the home screen.
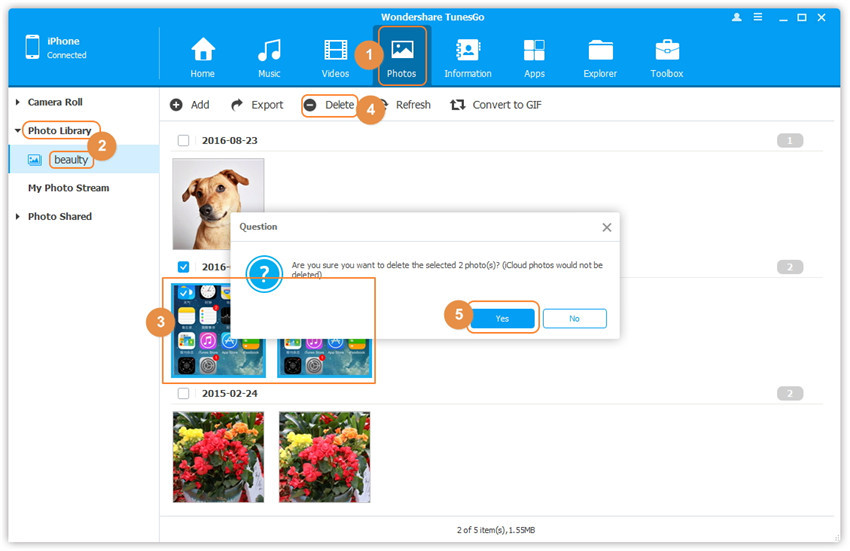
Step 2 Click Photos icon at the top of the main interface, and then select the camera roll or photo library selection once you have selected the specific album from the selection pane, the photos in that album would be display on the right side of the window tab. Simply select the photos you want to delete and click the delete option button on the top of the menu you can also delete via right click on the selected photos and click Delete.
TunesGo is an ultimate tool for transfer the photos from your iPhone 8 and PC, with TunesGo managing your iTunes has never been this easier. Although you can transfer the data through iTunes but selectively content data transfer is an issue for all iPhone users. With TunesGo you can easily transfer your, messages, photos, music, videos and much more. TunesGo can effectively perform all the management functions for iPhone 8 including transfer, backup and bulk delete for iPhone. iPhone 8 users must give it a go, you can easily download TunesGo from their official website.
