How to Delete Ringtones from Your iPhone
Every iPhone user likes to customize their device and impart a distinctive appeal to it. You can easily do it by adding unique wallpapers or setting an interesting ringtone on your device. Nevertheless, we still need to manage our device and delete ringtones from iPhone as well. Getting rid of unwanted data is also a crucial part of managing a smartphone. In this guide, we will teach you how to delete ringtones from your iPhone in no time. Let’s get it started with!
- Part 1. The Difficulty of Deleting Ringtones from iPhone
- Part 2. How to Delete Ringtones from iPhone with Wondershare TunesGo?
- Part 3.How to Make Ringtones for iPhone?
Part 1. The Difficulty of Deleting Ringtones from iPhone
It is a well-known fact that the entire process of making or deleting ringtones from an iPhone is quite cumbersome. Chances are that you must have already synced your phone with iTunes. If you wish to delete ringtones from iPhone, then you need to remove it from iTunes. Whenever you will delete it from your device, it will either fail to authorize the operation or would sync it again.
Managing your iPhone with iTunes is not that easy and plenty of users face unnecessary complications while managing their data files. Not just music, you might not be able to get rid of other kinds of data as well from your device. Don’t worry! We are here to make your life a lot easier. There are tools that you can use to delete ringtones from your iPhone.
For instance, Wondershare TunesGo provides a hassle-free way for its users to manage their devices. Not just to make ringtones, the application can be used to manage the overall storage of your device. Additionally, you can manage your apps or take a backup of your data with it. It has a dedicated feature of the ringtone maker that will help you create free ringtones on the go.
Read on to know how to delete ringtones from iPhone using Wondershare TunesGo.
Ringtone Maker - Be Different with your Ringtone

- Transfer music, photos without iTunes restrictions
- One-click backup iPhone/iPad/iPod and Android to PC
- Perfectly backup/restore iTunes library
- Transfer between iOS/Android devices directly
- Transfer audio/video from Device to iTunes and PC
- Make any photos or video PC to GIF images
- Delete photos/videos by batch with a single click
- De-duplicate the repeated contacts
- Fix & optimize ID3 tags,covers,song information
- Export & Backup contact, text messages, MMS
- Support all iPhone, iPad, iPod, Android devices
- Fully compatible with iOS 11
Part 2. How to Delete Ringtones from iPhone with Wondershare TunesGo?
One of the best things about Wondershare TunesGo is that it provides a safe and reliable way to create and delete ringtones from your iPhone. It is compatible with almost every version of iOS and provides an easy to use interface. It already has readily available wizards that will let you perform the desired operation with a simple click-through process. If you wish to delete ringtones from iPhone, then follow these steps.
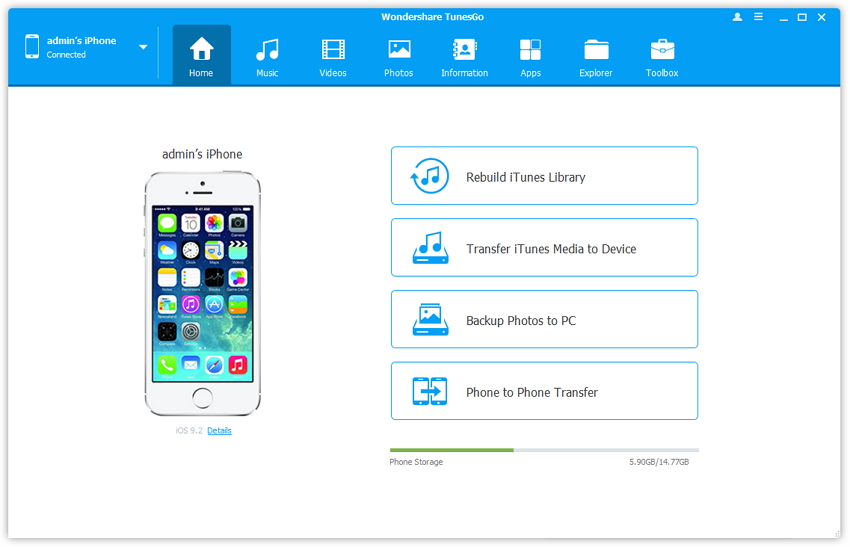
Step 1 Install Wondershare TunesGo from its official website. It runs on both Windows and Mac systems. Launch it on your system and connect your iPhone to it as well. Give it a few seconds as the application will automatically detect your phone and provide a list of various operations that you can perform.
Step 2 Now, click on the “Music” icon which is located at the top menu bar.This will display a list of all the music files that are already stored in your device. Select the option of “Ringtones” from the left panel to access various ringtones available on your device. Now, select the ringtone you want to remove and click on the “Delete” button. Agree to the pop-up message by clicking on the “Yes” button. This will delete ringtones from your iPhone without any trouble.
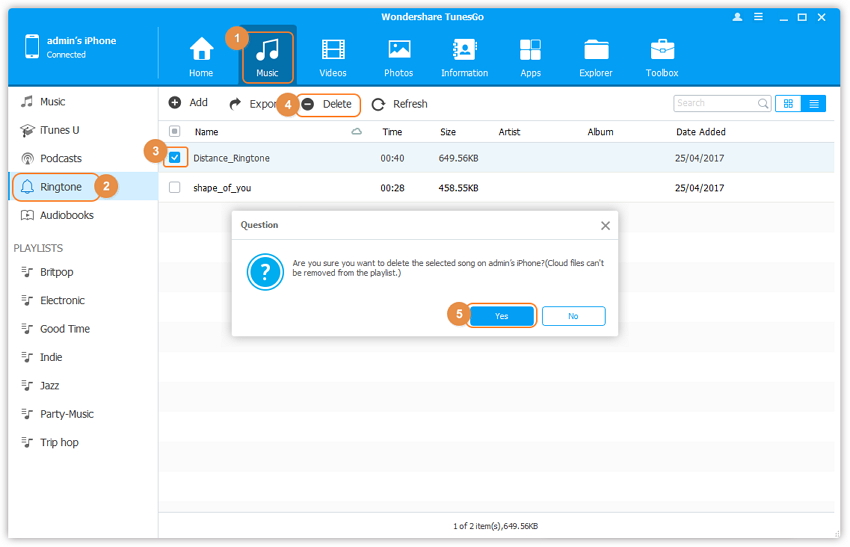
Not just ringtones, the same process can also be implemented to remove other kinds of data from your device as well.

Part 3. How to Make Ringtones for iPhone
Not just to delete ringtones from iPhone, TunesGo can also be used to make your own ringtones. We know how tedious the process of making custom ringtones can be for any iOS device. Though, with the help of TunesGo, you would be able to create and set amazing ringtones for free. Now when you know how to delete ringtones from your iPhone, take a step up and learn how to make them with TunesGo by following these steps.
Step 1 Launch Wondershare TunesGo on your system and connect your device to it as well. After a while, the application would be able to detect it automatically and display a snapshot of your device.

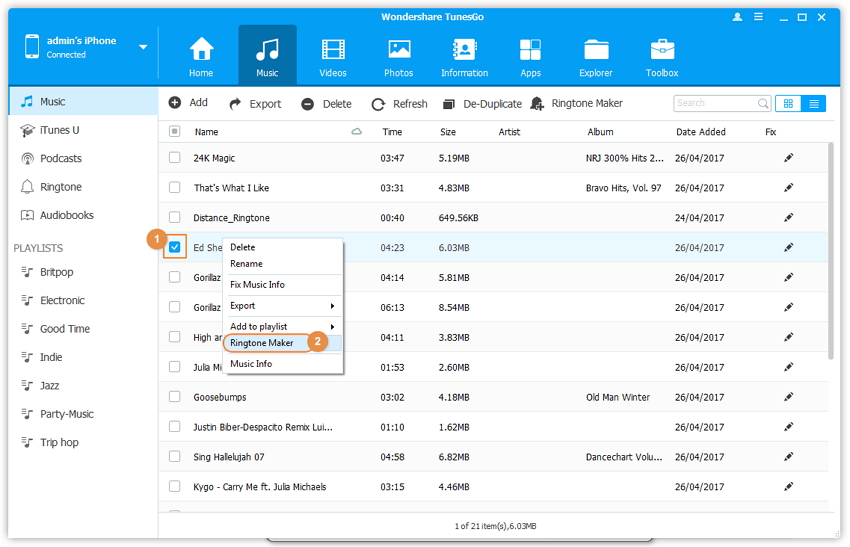
Step 2 Now, select the “Music” tab to get a list of all the audio files from your phone. From here, you need to click on the option of “Ringtone maker”.
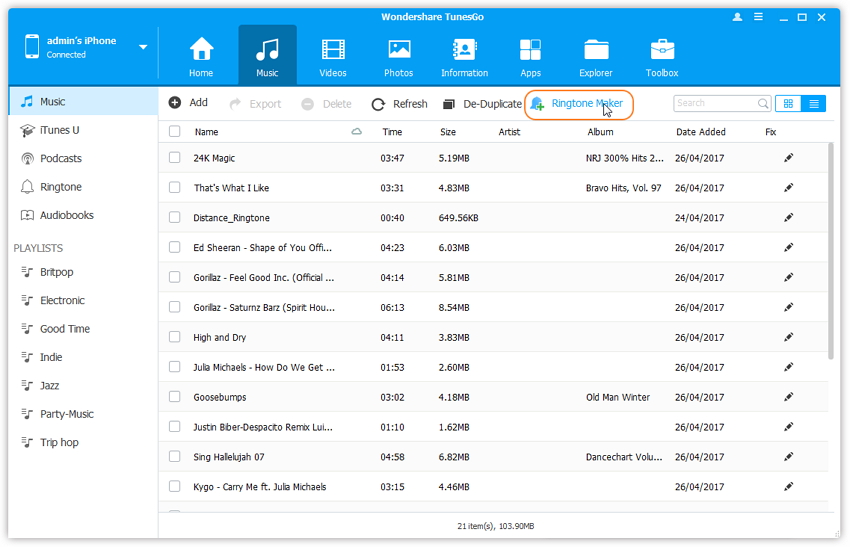
Step 3 This will open another window. To start with, import an audio file that you wish to clip to make your ringtone. You can either import files from your device or a local storage.
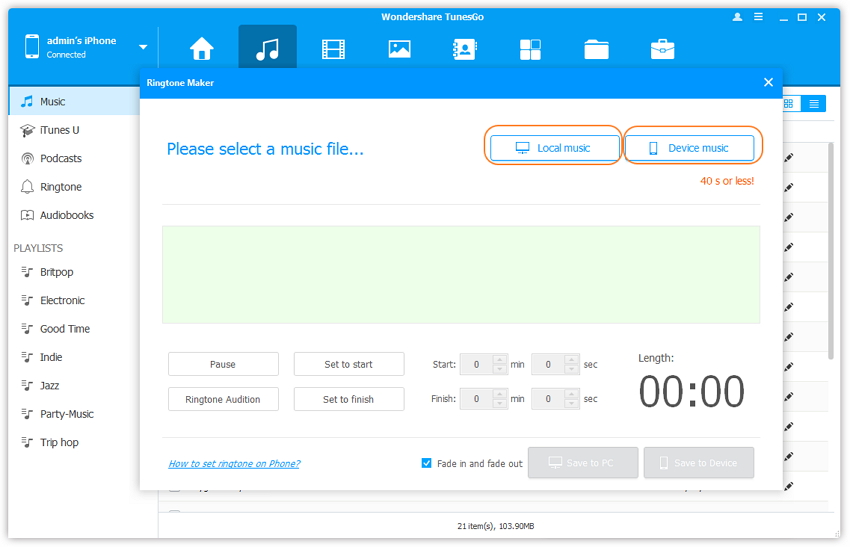
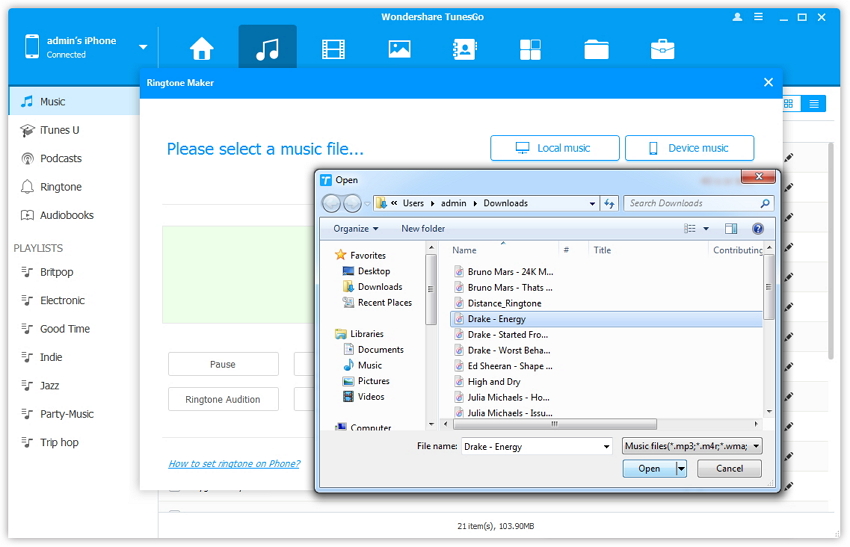
Step 4 Click on “Local Music” button to open a new window. Simply go to the location where your desired music file is stored and select it.
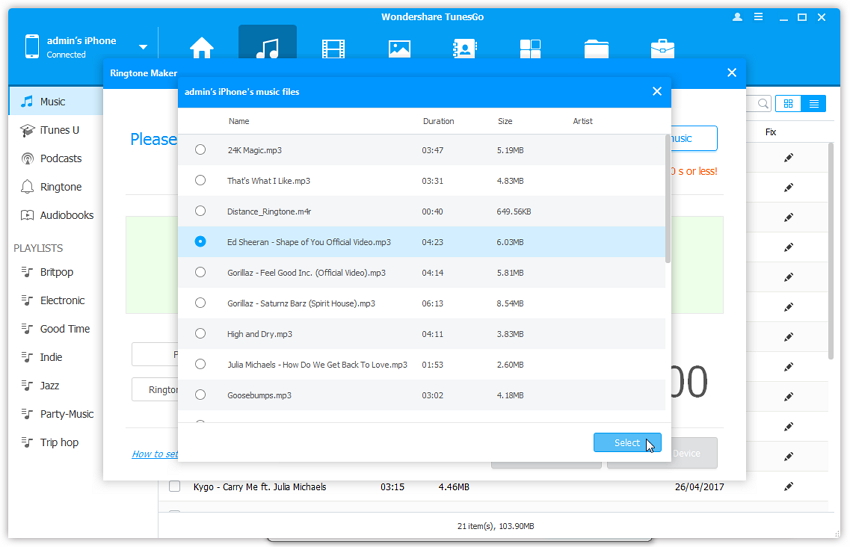
Step 5 If you click on “Device Music” then you will get a screen like this. Here, you will get a list of all the music files stored in your phone. Simply load the music file you want and proceed.
Step 6 After loading the file, you will get a dedicated ringtone maker interface. From here, you can clip out the desired section of the entire music file and make it as your ringtone. The “Ringtone Audition” button can be used to listen to the clipped section. You can also set the starting and the ending point manually (with a numeric value) or select it from the wavelength. Once you are done, just save it to your device (or system) and set it as your new ringtone.
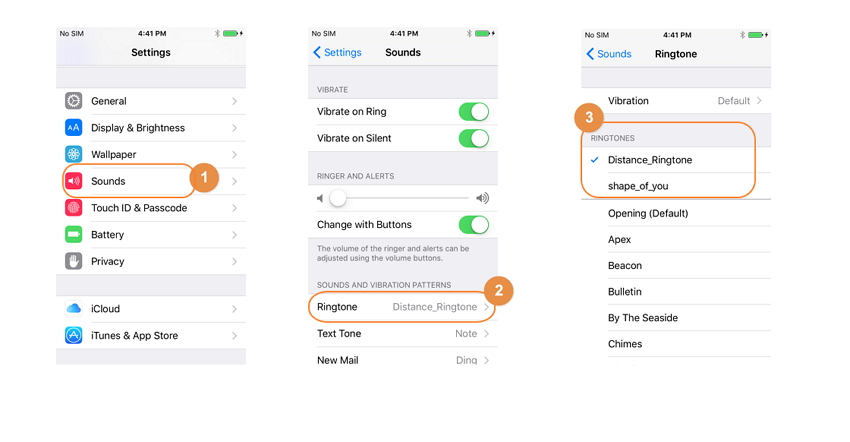
Step 7 The ringtone would be available on your device after saving it. Simply visit its Settings > Sounds > Ringtone and select your newly transferred music file to make it your ringtone.
Video Tutorial: How to Make iPhone Ringtone
Conclusion: Wondershare TunesGoprovides an easy and hassle-free way to make and delete ringtones from iPhone. We are sure that this remarkable tool would be used by you time and time again to serve various purposes. From taking a backup of your device to deleting ringtones from your iPhone, it has a diverse usage. All of this makes TunesGo a must-have tool for every iOS user out there. If you don’t have this application, then visit its official website and download it right away. It will certainly help you make the most out of your device.
