How To Root Huawei Y320
- How to Huawei Y320
- How to Root Huawei Y320 with Wondershare TunesGo
- How to Root Huawei Y320 with a PC
- Why need to Root Huawei Y320 Android Phone
In the given article, we shall understand how to root Huawei Y320, and as we know, rooting gives us access to the core of the Operating System of the phone, thus helping us to do more with you device. Basically, the idea of rooting is to get the performance of a device to its peak. However, it is convenient to note that almost android devices are having identical rooting procedures. In the following article, we shall fixate ourselves on Huawei Y320.

Part 1: How to Huawei Y320
In the following section, we shall discuss how to root Huawei Y320. However, we shall be looking at two different methods. While the first one shall deal with the process of how to root Huawei Y320 with a desktop application, the second shall deal without it. . The idea behind understanding how to root Huawei Y320 is to get more from the device, such as having an enhanced battery life and getting the background apps to cease. The android rooting has been very helpful for the users who are looking to enhance their drive performance.
Please note rooting your device would void or null its warranty forever. Having said that, you can reinstate the warranty if you are able to find a method that helps to undo the process you have otherwise carried out through rooting.
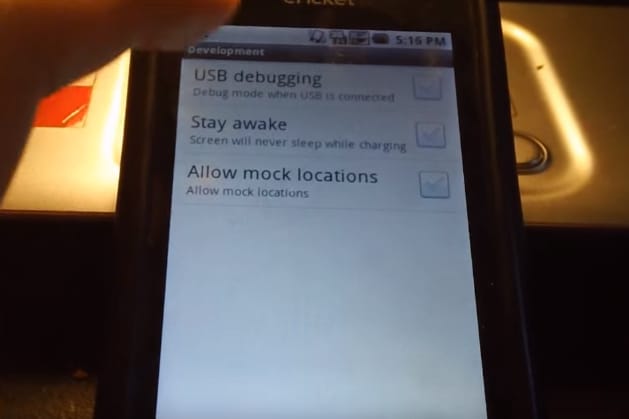
Step 1 We start with pressing the Menu Button and then follow the option of Settings. In the Applications section, we click on Development options.

Step 2 Please ensure that the USB debugging option is checked.
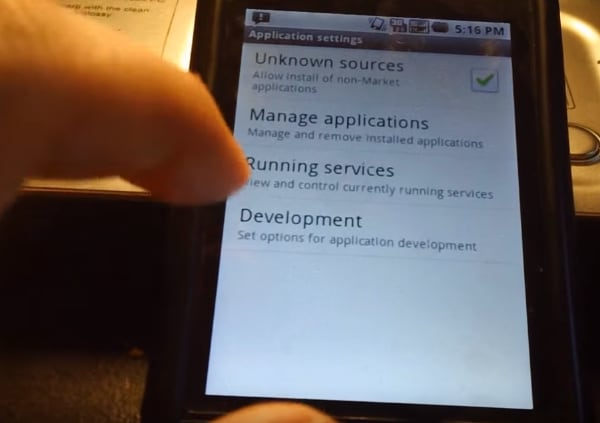
Step 3 The next step involves connecting the USB Cable to the device, and also ensures that the Micro SD is not mounted.
Step 4 When you operate your PC that you are going to use for rooting, please create a new folder as this will contain files that would help us to root Huawei Y320. Please ensure that your PC is running the latest version of WinRar.
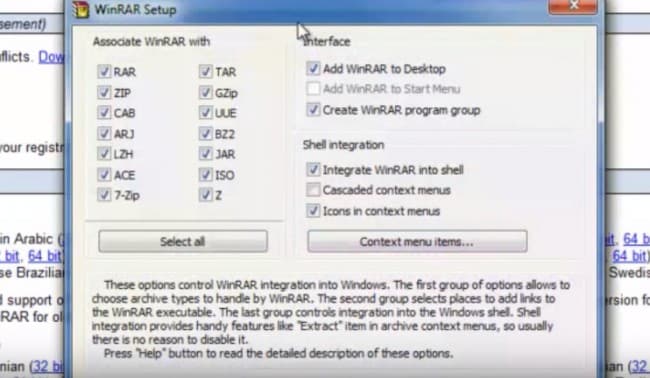
Step 5 It is important to add WinRar to desktop. You can check that option during the installation process of WinRar.

Step 6 We will then download the latest version of ‘Super One Click’ that is compatible with our systems. The next step is to visit their website and download the running files (screenshot attached). You have to click on the latest version of the file. Please don’t download all the files. Download the specified file, extract it, and save it to the folder you created in the 4th step.
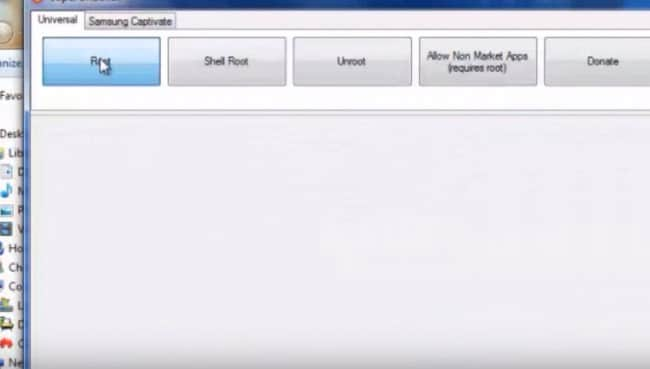
Step 7Once the download is done, visit the folder created in the 4th step. You then go on the ‘Super One’ file, right click, and run it as Admin. Click on the ‘Root’ button. Please note that some users might face the issue of looping and would be asked to uncheck the USB debugging option.
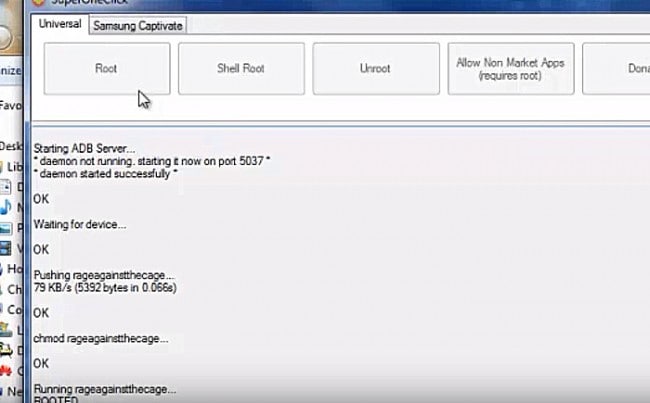
Step 8 Please wait while the device is being rooted. After the rooting is done, we shall check if the rooting has been accomplished successfully using the device.
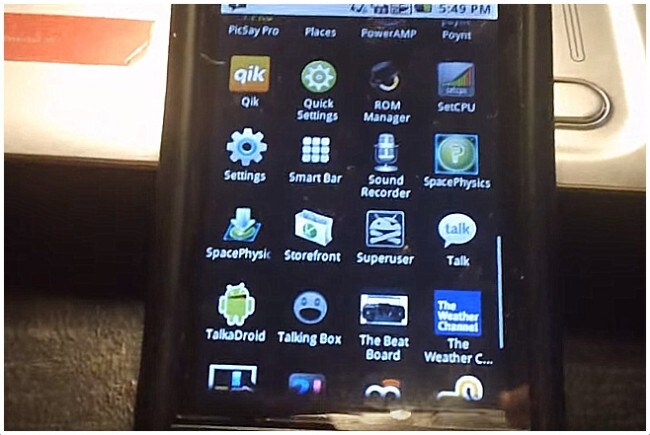
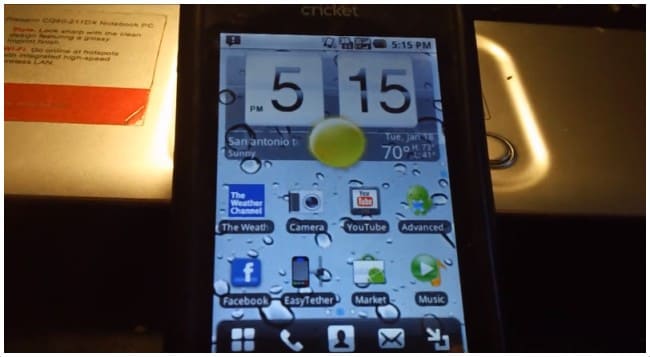
Step 9 You then have to check for the ‘Super User’ application in your phone. Run it, and the application would then request you to run the ROM Manager.
Part 2: How to Root Huawei Y320 with Wondershare TunesGo
Talking about rooting alternatives, it would be improper to leave Wondershare TunesGo out. Before we get into the technicalities, it is worth mentioning that TunesGo is an all-round manager that helps users download, manage, import, and export their multimedia content with a single click. For the ones who wish to manage their growing app collection, wish to send messages from their desktop, and are looking to enhance the performance of their devices, Wondershare’s ‘TunesGo’ has everything, and that’s not all.
Android Phone Root Software - One-click Root Huawei Y320 Phone
- One-click Root - root Huawei Y320 Android phone to take full control of your mobile phone.
- Backup your music, photos, videos, contacts, SMS etc. to computer and restore them easily
- Manage, export&import your Contacts and SMS, deduplicate Contacts, reply SMS with computer
- Phone to Phone Transfer - transfer music, photos, videos, contacts, SMS between two mobiles ( both Android and iPhone are supported)
- App Manager - Install, uninstall, import or backup Apps in batch
- Gif Maker - create Gif from photos, motion photos, videos
- iTunes Manager - Sync iTunes Music to Android or transfer music from Android to iTunes
- Fully compatible with 3000+ Android devices (Android 2.2 - Android 8.0) from Samsung, LG, HTC, Huawei, Motorola, Sony etc.
Rooting your Huawei Y320 with TunesGo
Serving as a popular mechanism to root android devices, TunesGo is known for its simplified version that has appealed to countless users. With a single click, users have the luxury to root their devices successfully. For everyone who is running an Android version 2.2 or later, TunesGo offers an impeccable compatibility, not to forget its general compatibility for 3000 devices. While discussing it is an alternative, we take an example of a Samsung Device to show you how TunesGo can help you with the rooting process of your Android Device.
Step 1 Lacunh Wondershare TunesGo Root Software and connect your Huawei Y320 to PC
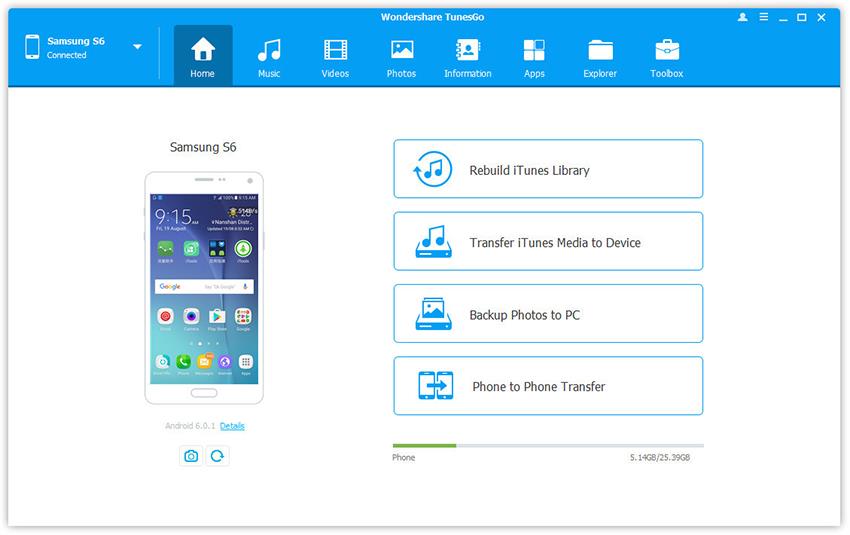
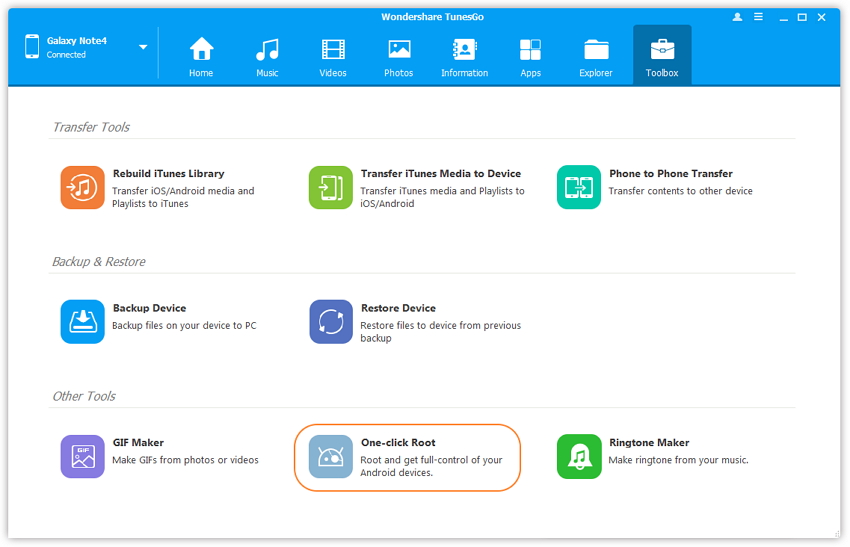
Step 2 Click ToolBox tab,and select One-click Root section and take full control of your Huawei Y320 android phone
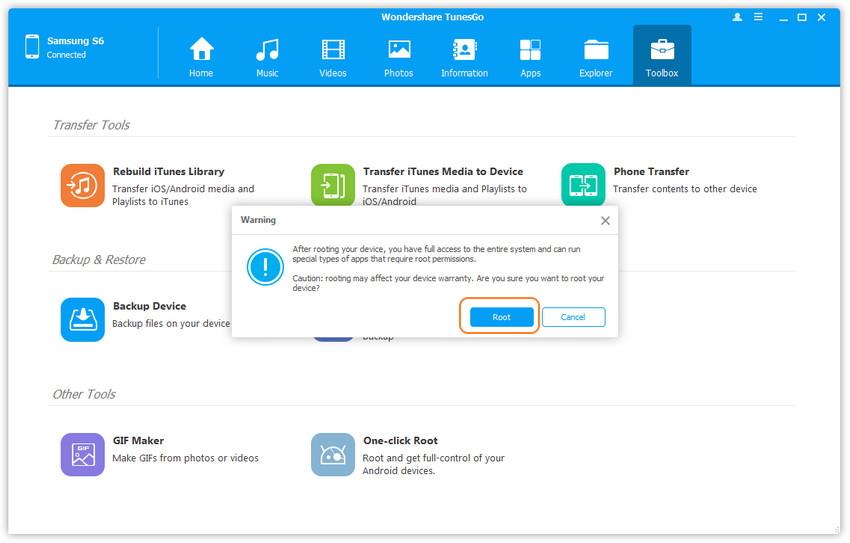
Step 3 After reading the warning message and click Root to start the process.
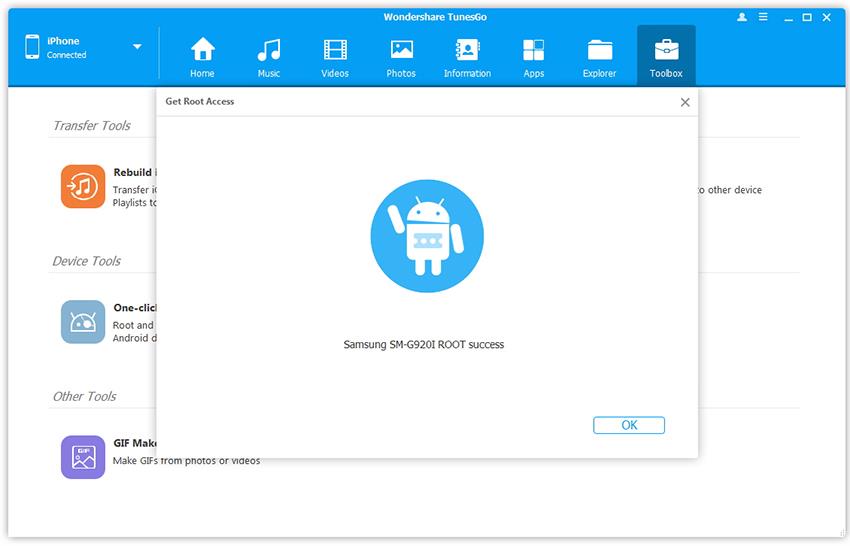
Step 4 Talking for a while, your Huawei Y320 root success.
As we saw in the above steps, the procedure to root Huawei Y320 is just like another Android Device. Before you begin the rooting procedure, always have a clear objective in mind as to why you are carrying the rooting process in the first place. If you are aimlessly rooting your device, you might just end up damaging it for no reason internally. The basic idea behind rooting your device is to get it perform better, and with the steps listed above, your Huawei Y320 will do the magic you want it to do.
Part 2: How to Root Huawei Y320 with a PC
Before you start the process to root Huawei Y320 through a PC, here are a few things that you must keep in mind.
1) The phone’s battery level should be above 75%. If your device loses its power during the rooting process, your phone would be rendered useless.
2) You must save a copy of all your important data, media files, messages, contacts, and other stuff, and use an online service like Google Drive to do the same. External memory card can also be used for the same purpose.
3) Enabling of the USB Debugging option is compulsory.
Now, let us understand the steps to carry out the process to root Huawei Y320.
1) The first step involves installation of the ‘Unlock Root Tool’ on your desktop as this is the app we are going to use for rooting our device.
2) For the ones who aren’t aware, ‘Unlock Root Tool’ can be downloaded here.
3) The mobile connectivity drivers of Huawei Y320 are required to be installed on the desktop as they will be used when your device is being rooted.
4) Move to the ‘Unlock Root Tool’ application to forward the process to root Huawei Y320.
5) Through the help of a USB Cable, you must then connect the device to your PC.
6) Tap the ‘Root’ button as this initiates the rooting process of your Huawei Y320.
7) The device can be ejected from the PC once the rooting is complete.
8) You can reboot your Huawei Y320 once the rooting is complete. If the device hangs, simply remove and install the battery again, and it should fix the issue.
Part 3: Why need to Root Huawei Y320 Android Phone
- Android doesn’t give you control all the features by default, and therefore, the process to root Huawei Y320 can help you gain access to these features. Some of these include on-the-fly screen capture, tethering capabilities (even on devices that don’t support it due to carrier restrictions), and other advanced firewall options.
- The process to root Huawei Y320 allows a user to access their phone’s Operating System. This allows the user to do more with stock Android Installation. For the ones who are looking to custom ROMs to remove the crap-ware that is otherwise very hindering and is offered by the manufacturers. You don’t have to update with lazy update schedules after custom ROMs.
- Performance tweaks are made possible through the process to root Huawei Y320. This includes CPU over-locking, better cache management, and through other custom ROM options, it also allows for speeding up your android.
- Even if you happen to be an amateur user, do not worry about the process to root Huawei Y320. This is one project you should always experiment with, and through some basic assistance, you can do a lot more with your device. For the advanced users, who are aware about all the risks that are involved with Android Jailbreak, we recommend they leave us with their ideas and innovation in the comment section.
Before concluding the article, let us discuss an alternate route to rooting your Android Device

