How to Put Pictures on iPod with Zero Loss
Want to put pictures on iPod with iTunes library, but you're afraid of losing the old photos? Or you are a new person who doesn’t know how to use iTunes to put pictures on iPod with zero loss then we have some solutions for you. You will get to know all ways to put picture on iPod with zero lose through this article. It is not necessary that you use iTunes only to put pictures on iPod with zero lose. There are some other third party ways are available as well. The best way is Wondershare TunesGo which allows you to put pictures easily without losing old pictures.
- Part 1. Best Way to Put Pictures on iPod with Zero Loss
- Part 2. How to Put Pictures on iPod with iTunes
- Part 3. How to Put Pictures on iPod with wifi
Part 1. Best Way to Put Pictures on iPod with Zero Loss
Wondershare TunesGo is a iPod picture transfer tool and easily enables you to add pictures to iPod directly without any issue or any restriction of iTunes. This picture transfer tool enables you to add unlimited photos at the same time mean you can add them in batch or add them one by one without using iTunes. This tool enables you to create picture album on iPod and add new photos to this or you can put picture to previous albums as well without losing old pictures of iPod.
Key features
How to Put pictures on iPod with zero loss using TunesGo
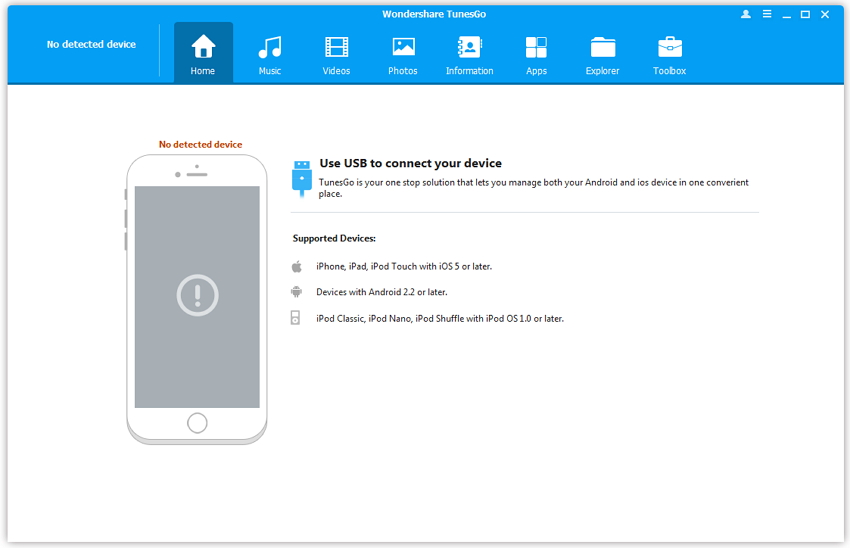
Step 1 Launch iPod Picture Tool
Open you windows browser and visit Wondershare TunesGo official page. Download and install it on your computer. After installing launch it.
Step 2 Connect iPod to Computer
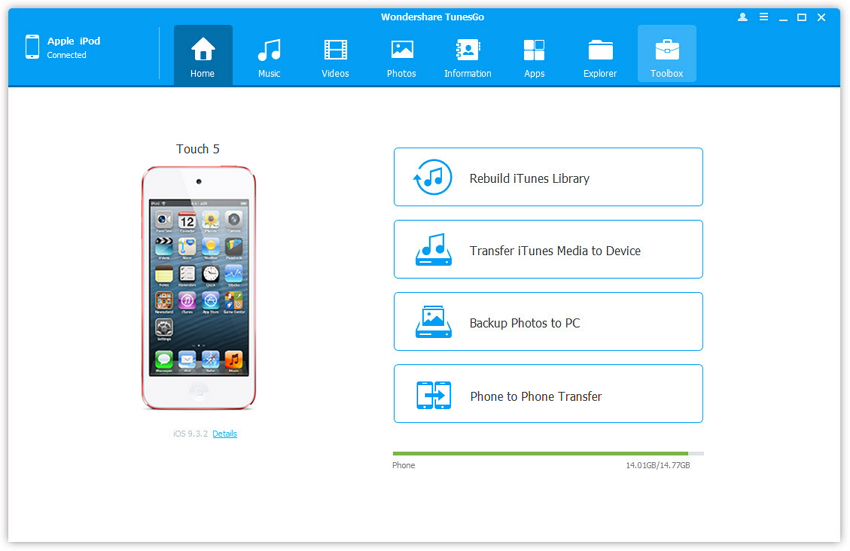
Connect iPod with TunesGo, once connected you will see home screen of iPod in TunesGo interface.
Step 3 Put Pictures on iPod
After detecting device in TunesGo interface, move cursor to Photos tab and click on it. Now it will load previous available photos of iPod. Click on Add and then Add File or Add Folder. One the popup windows locate the path of photos which need to add. And click on Ok button.
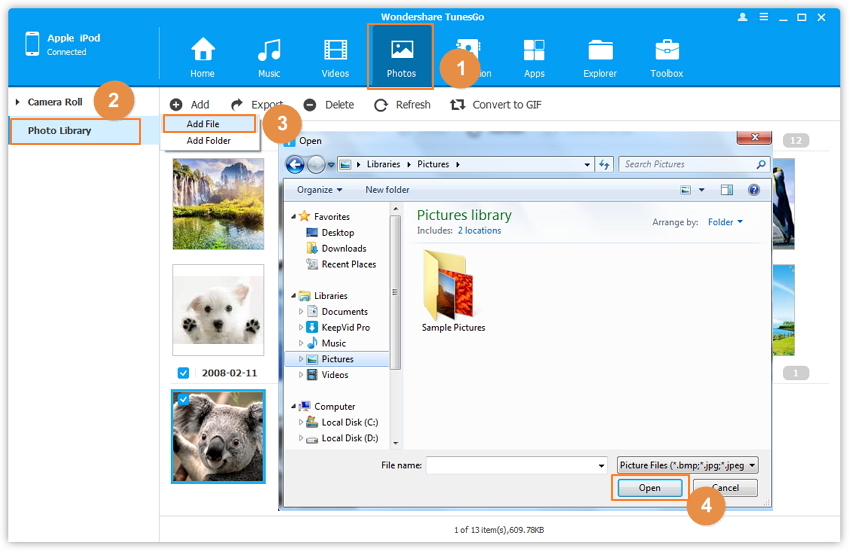
Now you can see your photos are successfully added to iPod without losing or replacing old pictures.
Part 2. How to Put Pictures on iPod with iTunes
While using iTunes you can put pictures to iPod. But this is not a good way because when you sync iPod with new pictures, your old pictures will be deleted. You can’t get them back again. If you want to delete old pictures and add new pictures only then you can follow this way because that time you are not worried about old pictures. To put pictures to iPod with iTunes users can follow below steps now.
Step 1 Install iTunes latest version on your computer and launch it to start the process. Now put USB cable one side with computer and another side with iPod to connect it with computer. Click on your device icon once connected.

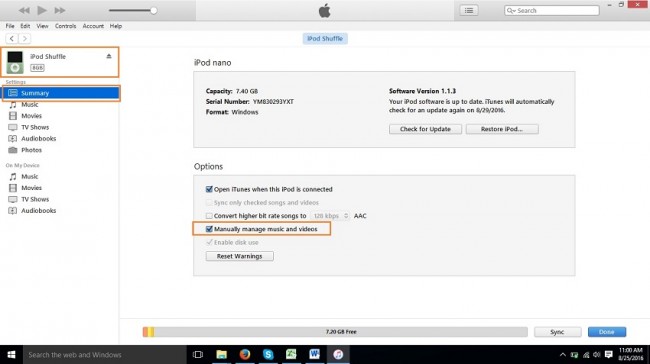
Step 2 When you click on device icon you will be redirected to iPod summary page. On this page at the bottom in the option menu, check option “Manually manage Music and Videos” and click on Apply Button.
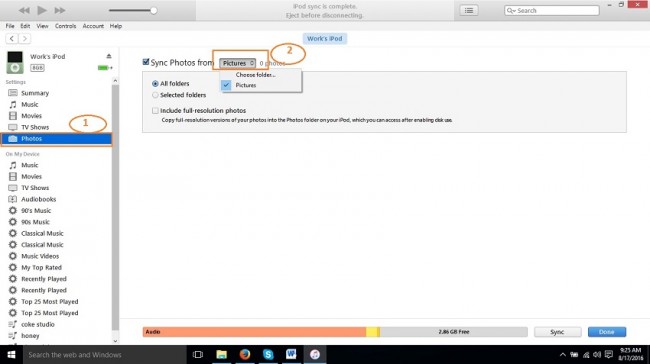
Step 3 Go to your photos folder on computer and copy all photos which you need to put on iPod. Paste these photos in a separate folder anywhere on windows drives. Go to iTunes again now. Now in the left side of iPod option menu click on Photos and check option sync photos from. Click on the box in front of sync photos from option and select Folder.
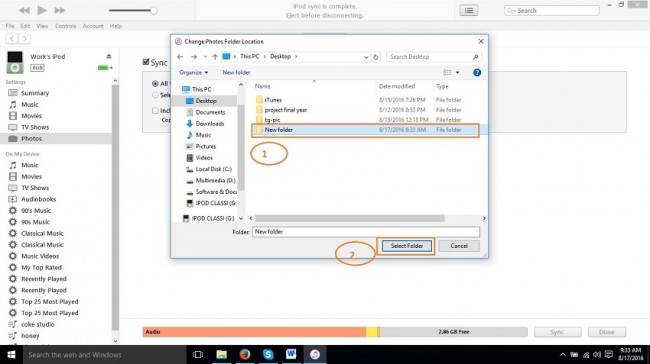
Step 4 Now you need locate the folder where you have copied images in this window. Locate the folder and select it and click on select Folder.
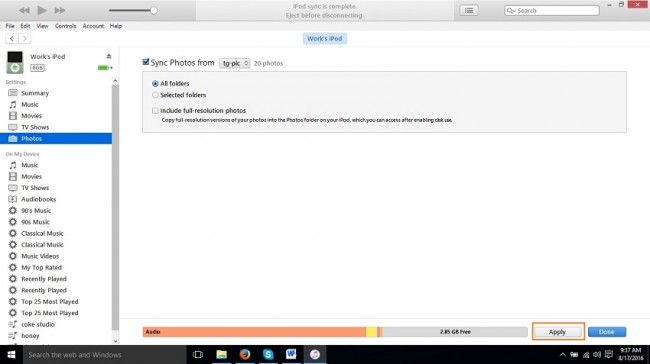
Step 5 After selecting folder, click on Apply button. Now iTunes will sync photos from this selected folder and your photos will be added to iPod.
Part 3. How to Put Pictures on iPod with wifi
iPod users can put picture to iPod with Wi-Fi as well easily. But before starting you must keep in mind that this way is available for those iPod only which supports Wi-Fi. Uses can’t put images to iPod Nano and iPod shuffle using Wi-Fi way. If you have iPod with Wi-Fi, then follow this below guide to put pictures using Wi-Fi.
Wireless transfer app is a software available for windows, ios, mac and android users as well to put pictures to iPod without USB cable. This software enables you to add images easily and quickly and best part is that you don’t need to use any cable to put pictures.
Step 1 You need to download and install wireless transfer app from app store on iPod Touch and on the windows from the official site. Connect both devices with same Wi-Fi network. Run wireless transfer app on both devices now.
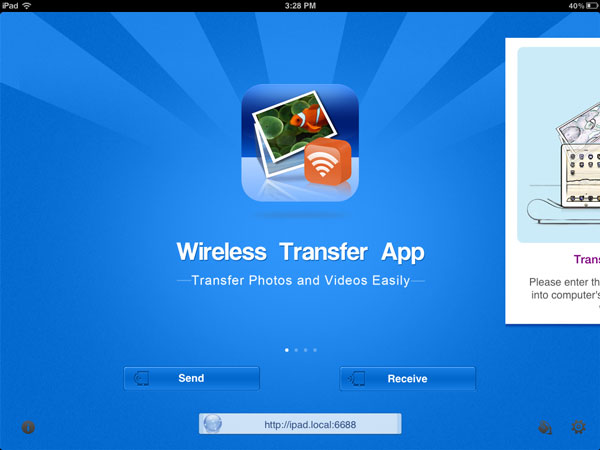
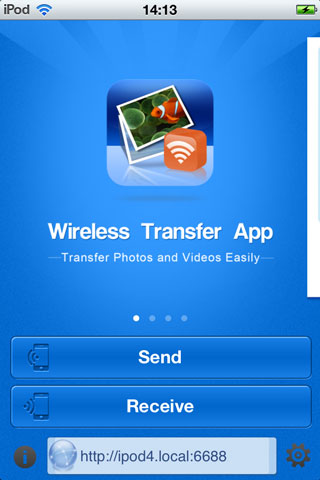
Step 2 Click on send button on computer and choose the pictures which you want to send to iPod. Tap on receive button on iPod now.
Step 3 Now tap on receive button on your iPod and then you will option there click on From Computer.
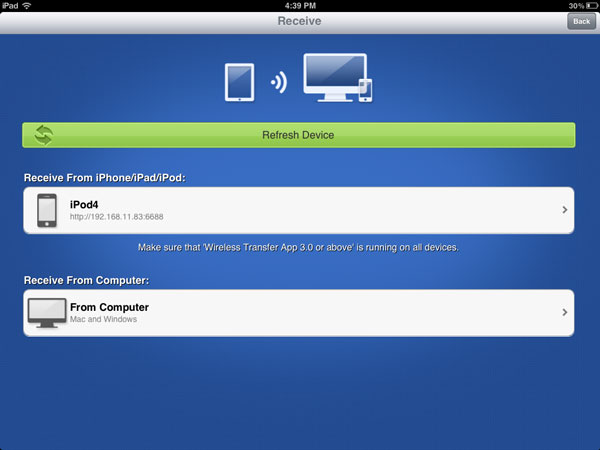
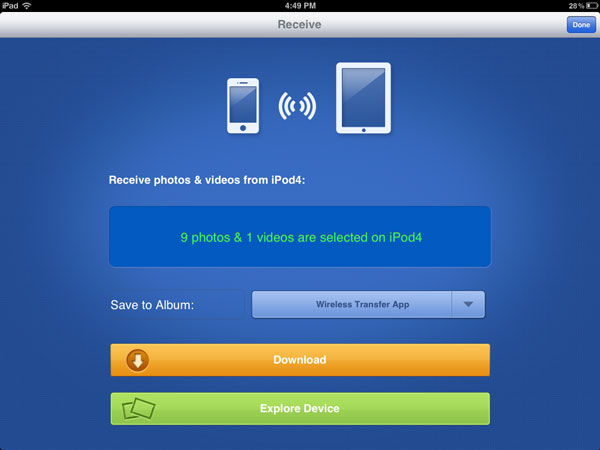
Step 4 After selecting computer, choose the album or create new album where you want to save photos and finally click on Download button. Now your selected photos will be added to your iPod in some time.
We have discussed three different ways above to put pictures on iPod. First way is put pictures on iPod with TunesGo which enables you to add photos easily and quickly from any device. Second way is to put pictures with iTunes - this way is freeway but this is not safe you can lose all previous pictures from your iPod. Third way is about transferring pictures using Wi-Fi - this way is really good but there is device limitation. You need to have Wi-Fi compatible devices. So finally we can say that TunesGo is the only best way because there is no risk of losing files and no limitation of using devices. Even users can use android devices as well.
