How to Sync Photos to iPod
Photos on any device are very precious for every user because they are a proof of user’s memorable moments. Adding or deleting photos from iPod you need to be very careful because your small mistake can be a reason of losing all those memorable moments. When question comes in the mind that how to sync photos to iPod, then iTunes is the only answer which comes first time in your mind. But not only iTunes there are other ways available for users to sync photos to iPod from computer or mac and they are easy to use than iTunes like Wondershare TunesGo which allows you to add unlimited photos to iPod without any device or storage limitation.
- Part 1. Best Way to Sync Photos to iPod
- Part 2. Sync Photos to iPod with iTunes
- Part 3. Sync Photos to iPod Touch with iCloud
Part 1. Best Way to Sync Photos to iPod
iTunes allows users to sync new photos to iPod easily but you will lose all previous memorable photos. To solve out this problem, TunesGo is the best solution for you to sync photos to iPod. TunesGo enables you to sync photos to iPod by keeping old photos. It will not delete a single previous photo from your iPod and you can easily add new photos with a hassle freeway.
Key features
How to sync photos to iPod using TunesGo
Step 1 Users need to download Wondershare TunesGo from official page and install it on your computer. Once installed launch it. You will see an interface asking you to connect android or ios devices.
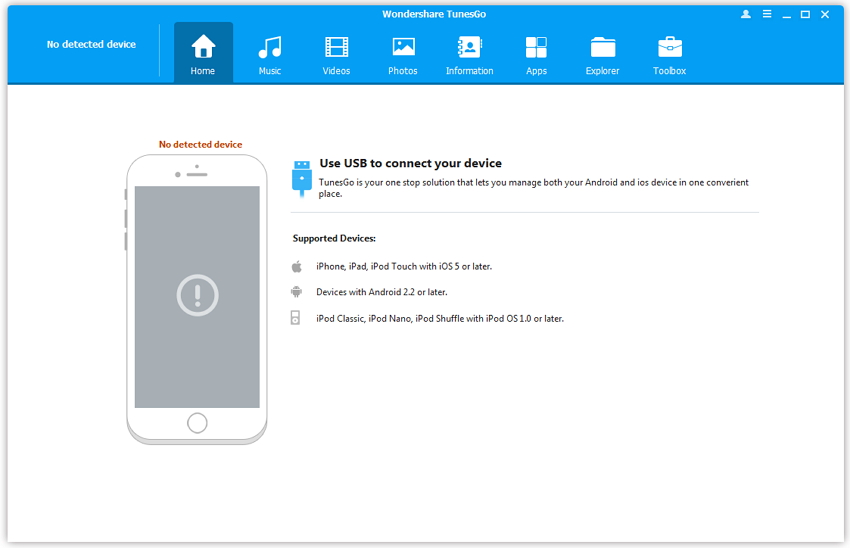
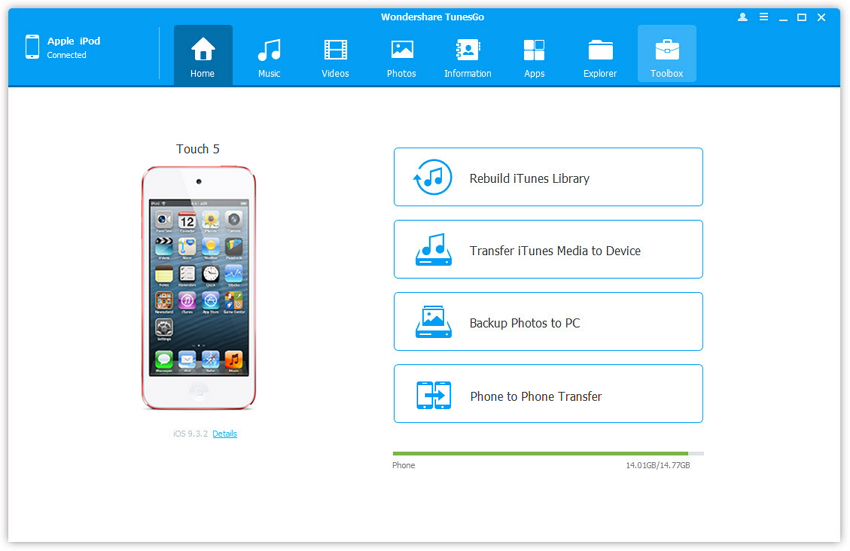
Step 2 Now you need to connect iPod via a USB cable with your computer to sync photos to iPod. Connect iPod now and you will see iPod on the home screen of TunesGo showing free space on your iPod.
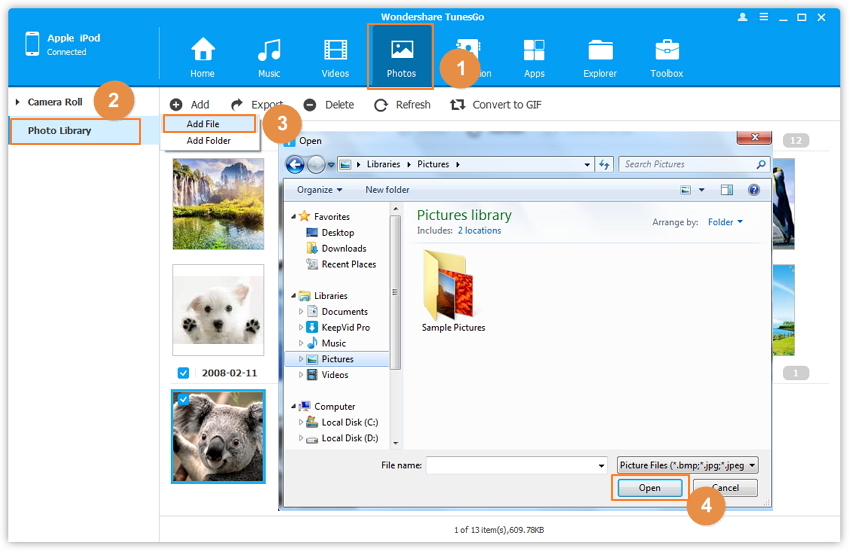
Step 3 Now click on Photos tab on the top of TunesGo interface. You can see previous available photos of your iPod here. Now to sync new photos to iPod, click on Add button and then Add file or Add Folder. Add file is to add selected photos and Add folder will whole photos of a folder. Browse photos path now and click on ok button in the next screen.
Part 2. Sync Photos to iPod with iTunes
We are going to tell you now about how to sync photos to iPod using iTunes. But before following this way, you need to keep in mind that your old picture will be replaced with new pictures. You can’t save your old picture by this way. Follow the below guide if you are find with replacing old photos with new one.
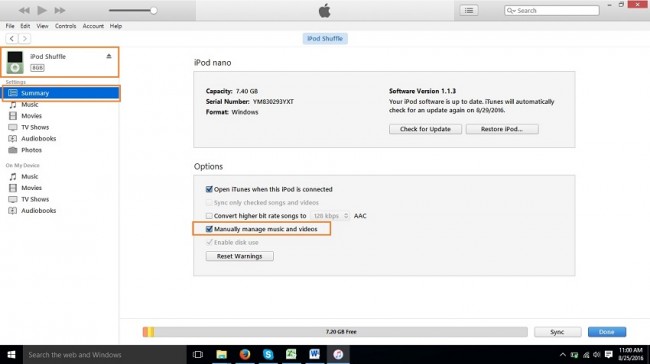
Step 1 Before starting you need the latest version of iTunes installed on your computer. Run it and connect iPod to computer via a USB cable and wait for iTunes to detect iPod. once detected you can see in the top menu like the below iTunes screenshot.

Step 2 Click on device to get redirected to Summary page. On Summary scroll download and find the option “Manually manage music and videos”, then check this option and click on Apply button.
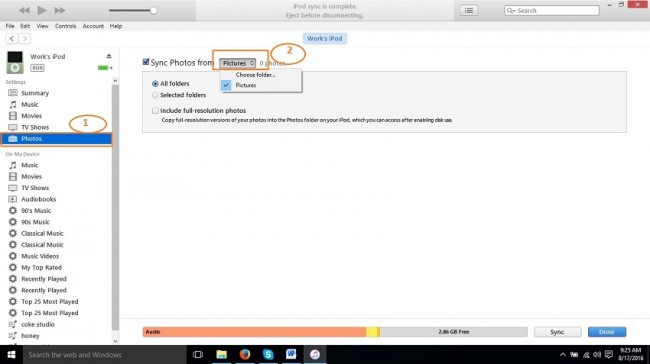
Step 3 Now click on photos in the left side of iTunes interface under the option of iPod. In the photos menu, move cursor to Sync Photos From and check this option. After checking click on the box in front of sync photos from option and select Folder here.
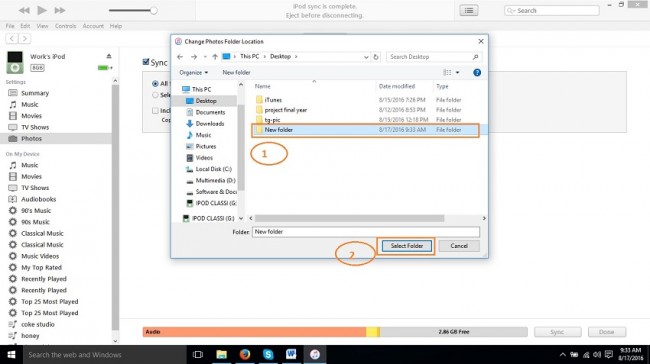
Step 4 Now choose the folder where your picture are available on your computer. Once you found folder, click on Select Folder.
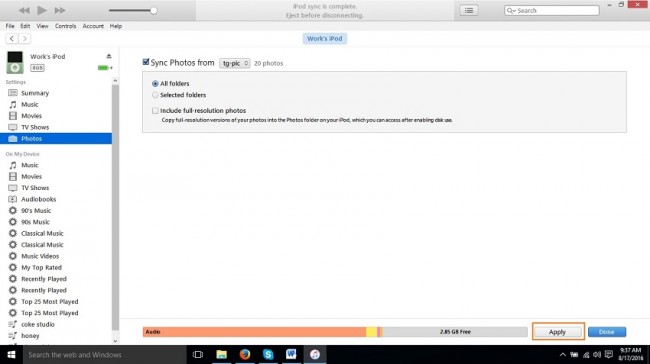
Step 5 Once you have selected folder, now click on Sync button at left downside of iTunes interface. Now iTunes will sync photos from your selected folder and sync new photos to your iPod. iTunes will replace old pictures with new pictures now.
Part 3. Sync Photos to iPod Touch with iCloud
iCloud is an inbuilt application available on all ios devices to backup photos and videos to iCloud library. iCloud enables users to backup photos and videos automatically. But there is problem while using iCloud to sync photos to iPod that you can only sync up to 5 GB photos. If your photos are more than 5 GB, you need to pay for it. Second problem is that you can’t sync photos to iPod using iCloud without any internet connection. You need to have internet Wi-Fi connect on all devices, and you must have devices with Wi-Fi option. Without Wi-Fi devices can’t sync photos to iPod using iCloud.
Step 1 To sync photos to iPod from your computer or mac, you need to install iCloud on your computer and iCloud on mac. You can easily sync photos to iPod using upload button. Before starting make sure that iCloud is enabled on your ios devices and you can only upload .jpg images. Now go to iCloud.com and login to your account.
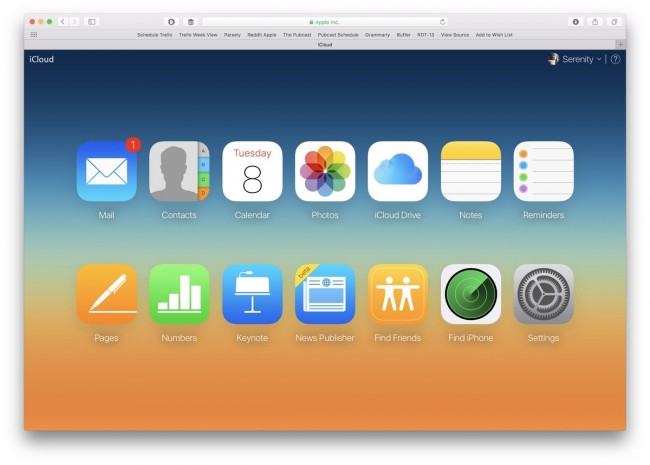
Step 2 After logging in to your iCloud account, click on photos icon and wait to load your previous photos. Once everything is loaded, you need to click on the upload button in the front of Photos option in iCloud interface.

Step 3 Now in this browsing windows, select the .jpg photos which you wish to sync to iPod and click on choose. You will see a processing bar in the left of interface uploading photos. It will take time depending on the size of photos you have selected. Once it is completed you can easily access photos from your iPod touch now.
