How to Transfer Photos from PC to iPad air
Get the dramatically thin and light iPad Air? That's great! This stunning iPad Air will increase your willing to take it at anytime and anywhere. Thus, you may want to transfer lots of files from your computer to your iPad air. Among all kinds of files that you need to transfer, photos, as one of the most precious data, will be the first thing you need to transfer. It is appreciating the photos bring you back to the sweet moments like vacations, parties, reunions and more.
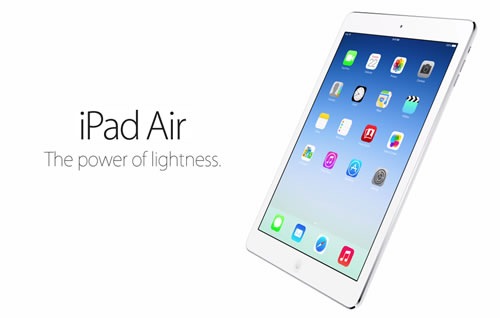
To transfer photos from computer to iPad air, iTunes may fail your expectation because of the sync option of this application. If you try to sync photos to iPad air with iTunes, then it will erase the synced photos and replace the photos with the ones you choose this time. Actually, to do the photo transfer, you'd better turn to a professional third-party iPad transfer tool for help. There are many pieces of software available on the Internet. Among all these programs, there is one tool regarded as a great solution which we will introduce you next. With the help of the iPad manager software, you are able to transfer photos from computer to iPad air without iTunes, and you don't have to suffer from the data loss of any photos.
Both Windows and Mac version of Wondershare TunesGo can help you to transfer photos from computer to iPad air easily. The following guide will set the Windows version as an example, and show you how to transfer photos from computer to iPad air. For the Mac users, you only need to duplicate the process.
Powerful iPad Manager and Transfer Program You Must Have

- Directly transfer media files to iOS devices with a click.
- Transfer audio and video from iDevice to iTunes and PC.
- Import and convert music and video to iDevice friendly formats.
- Delete photos/videos in batch with a single click.
- De-duplicate the repeated contacts
- Fix & optimize ID3 tags,covers,song information
- Transfer music, photos without iTunes restrictions
- Perfectly backup/restore iTunes library.
- Fully compatible with iOS 11
How to Transfer Photos from Computer to iPad Air
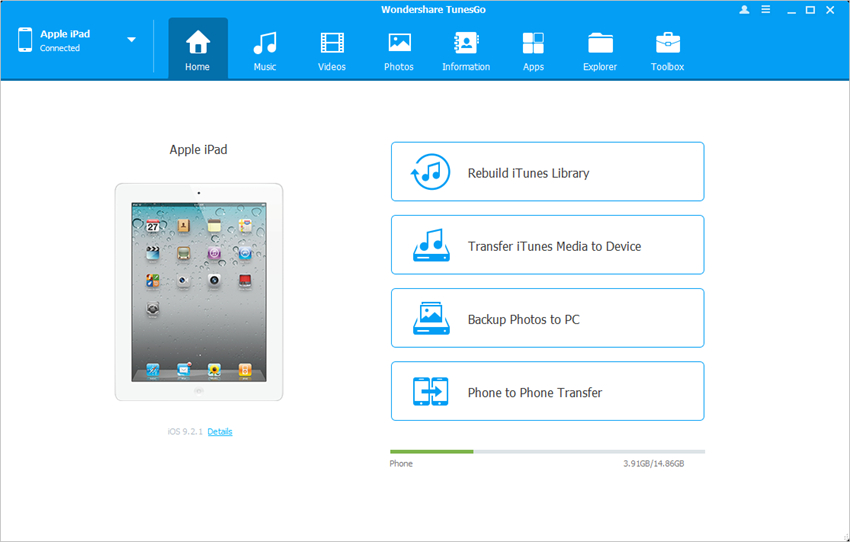
Step 1 Start TunesGo and Connect iPad
Download and install Wondershare TunesGo on your computer, then start it. COnnect iPad air to computer with the USB cable, and the program will show you the file categories at the top of the main interface.
Step 2 Copy Photos from PC to iPad air
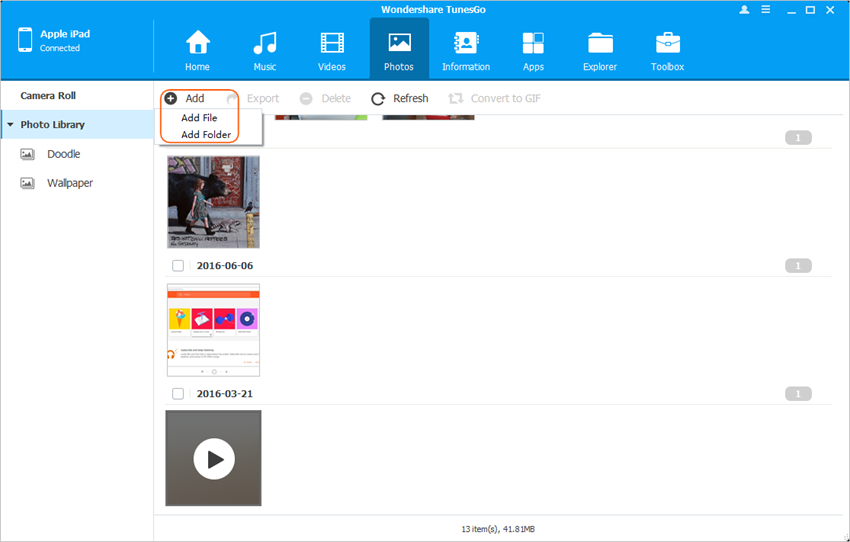
Choose Photos category, and the program will show you the Camera Roll and Photo Library in the left sidebar, along with the contents in the right part. Now click the Add button, and select Add File or Add Folder in the window, and add photos from computer to iPad air.
Transfer Photos from iTunes to iPad air with iTunes
Chances are that you only want to use iTunes to transfer photos from computer to iPad, so this part will introduce the method to import photos from computer to iPad with the help of iTunes. Please note that using iTunes will only sync a folder to your iPad, and replace the photos in your iPad air with the pictures in this folder. The following guide will show you the process. Check it out.
How to Sync Photos to iPad air
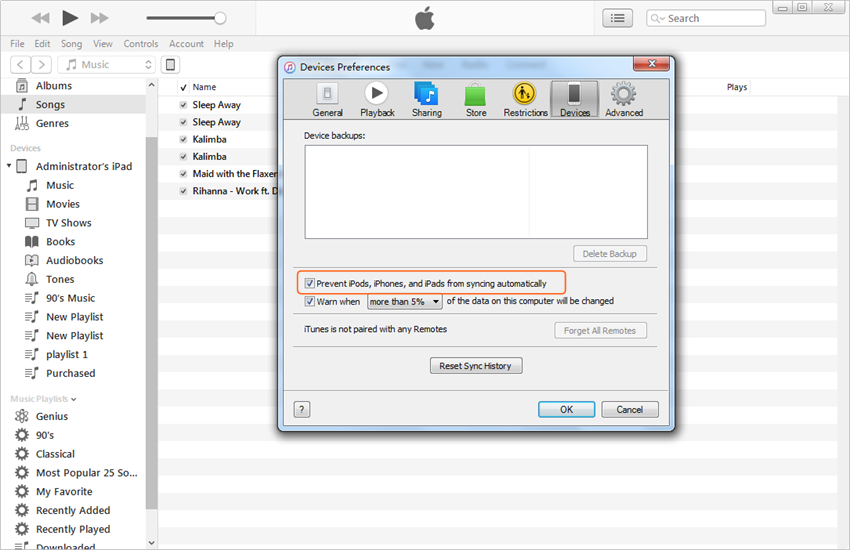
Step 1 Disable Auto Sync of iTunes
Start iTunes, and click Edit > Preferences > Devices, then check Prevent iPods, iPhones and iPads from syncing automatically.
Step 2 Connect iPad and Choose Photos
Connect iPad to computer with the USB cable, and iTunes will recognize it and display the iPad icon at the upper left corner. Click the iPad icon and choose Photos in the left sidebar.
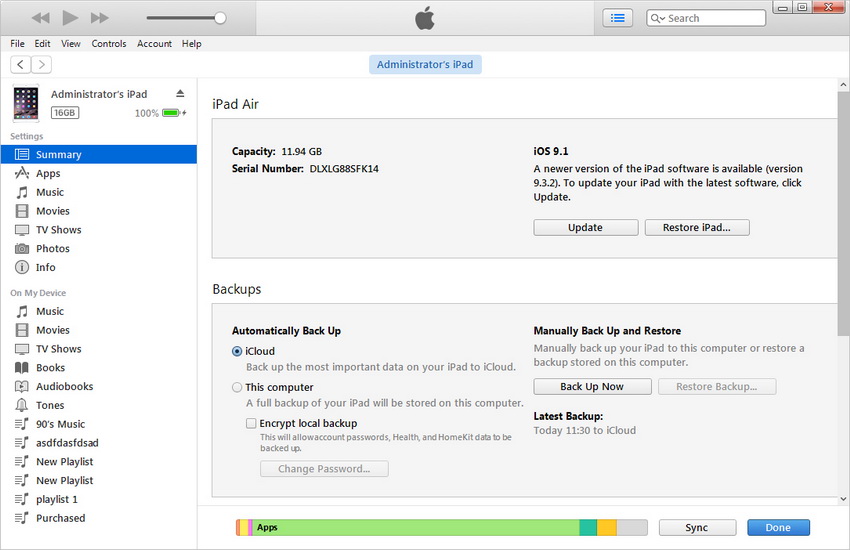
Step 3 Sync Photos to iPad
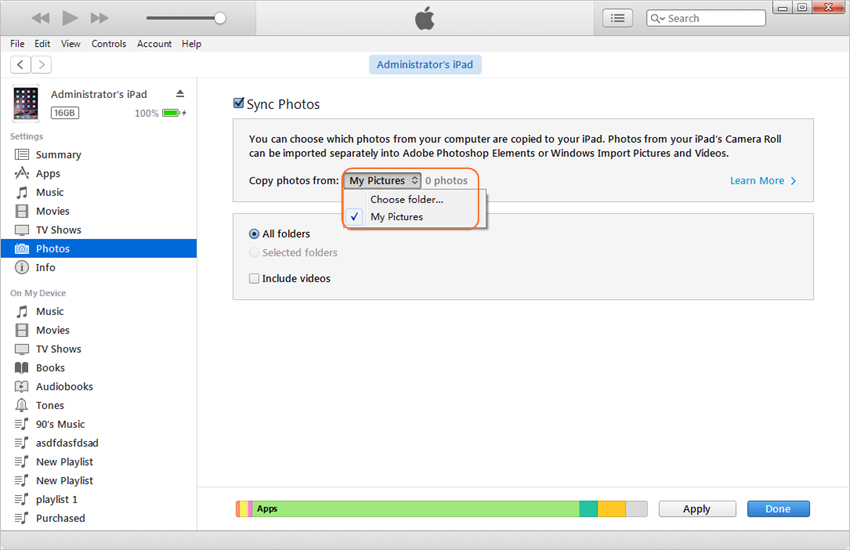
Check Sync Photos and click the folder name, then select Choose Folder. After that, you can select the folder on your computer in which you save the photos. After selecting photos from your computer, click the Apply button at the right bottom to start syncing photos to iPad.
As mentioned above, iTunes doesn't copy photos to iPadaces the i, it only replPad files with the ones you have selected. When comparing TunesGo and iTunes, we can easily find out that Wondershare TunesGo is a better option if you just want to copy files, not replace them. If you are interested in this program, you can free download it to have a try.
Read More About How to Transfer Photos for iPad/iPad Air:
Powerful iPad Manager and Transfer Program

- Directly transfer media files to iOS devices with a click.
- Transfer audio and video from iDevice to iTunes and PC.
- Import and convert music and video to iDevice friendly formats.
- Delete photos/videos in batch with a single click.
- De-duplicate the repeated contacts
- Fix & optimize ID3 tags,covers,song information
- Transfer music, photos without iTunes restrictions
- Perfectly backup/restore iTunes library.
- Fully compatible with iOS 11
